
Icinga Notifications 1.0.0 is out, and if you followed our release announcement, Icinga DB is already connected to Icinga Notifications. After the last step, Icinga DB is connected to Icinga Notifications, but nobody knows yet who should be told about what. In this post, we change that. In about 15 minutes, you will set up a contact, tell Icinga Notifications when to use it, and receive your first notification.
We assume that Icinga Notifications and Icinga Notifications Web are installed, and that you have enabled notifications in Icinga DB Web. If not, the release post walks you through it.
How channels, contacts and event rules fit together
Before we click anything, here is the idea in a few sentences. A channel is the way a message leaves Icinga, for example, email. A contact is a person, and every contact has a default channel that is used to reach them. An event rule is the link between your monitoring and your contacts. It says: when this kind of problem happens, notify these people. We start with the channel, because without it a contact has no way to be reached.
Step 1: Set up an email channel
Open Icinga Web and go to Configuration › Modules › Notifications › Channels. Create a new channel of the type Email and give it a clear name like “Email”. Fill in the details of your mail server and save the channel.
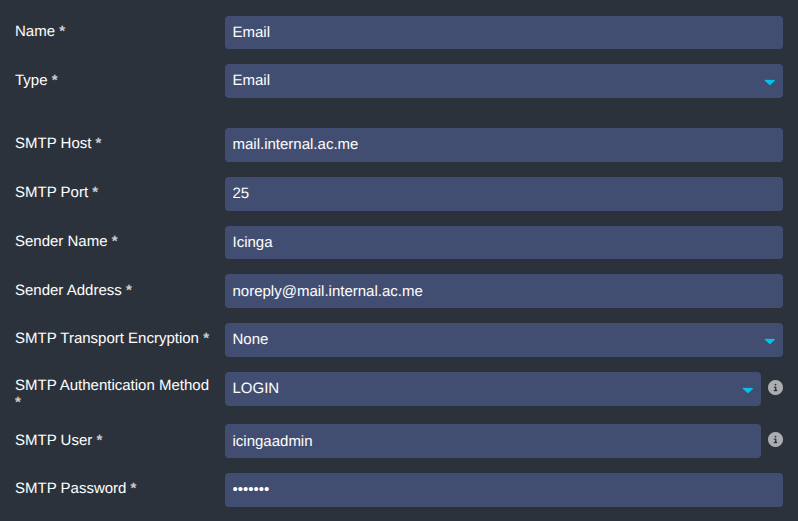
Icinga Notifications now knows how to send emails. If you prefer a chat message, the Telegram channel and webhooks work the same way, so you can add them later.
Step 2: Create a Contact
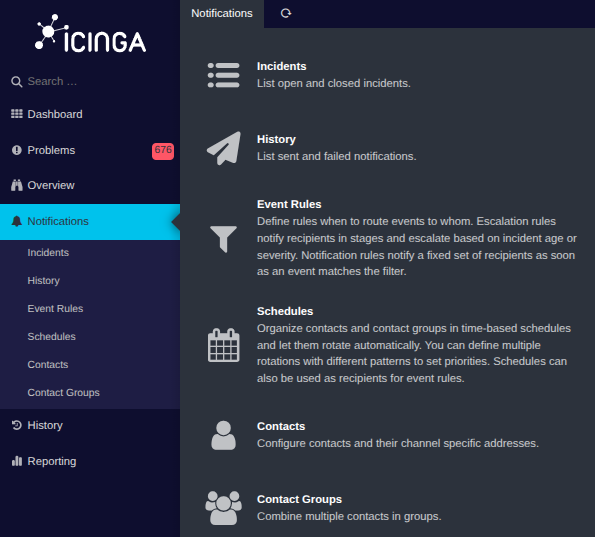
Next, add yourself as a contact. Click Notifications in the main menu, open Contacts and create a new one.
Enter your name and your email address. Every contact needs a default channel, so choose the email channel from the previous step.
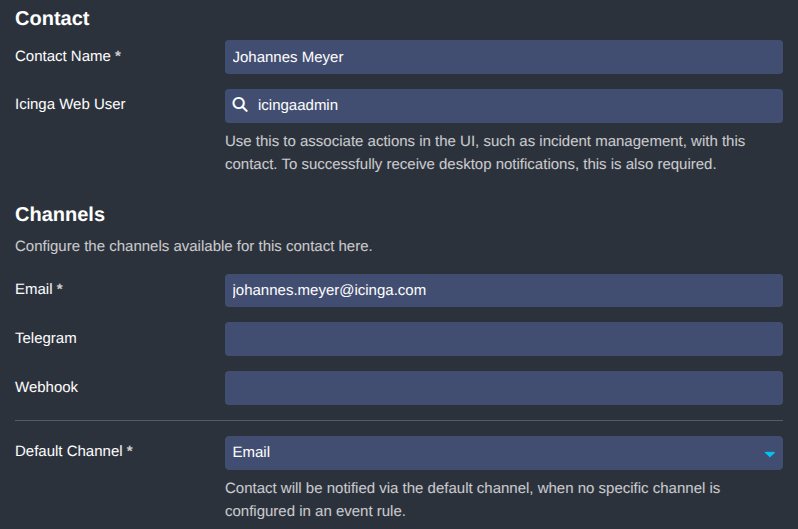
For this first test, a single contact is enough. Later, you can group contacts and create schedules, which we will cover at the end of this post.
Step 3: Create an Event Rule
Open Event Rules and create a new rule. Think of it as a sentence: “When this happens, tell these people.” Give the rule a name such as “Test: ping4 service”.
First, we define when the rule applies. Click Add Filter, which opens a separate modal. To keep the test simple, we limit the rule to a single service. Choose Host Name and Service Name and enter the host and service you want to use, for example the ping4 service of one of your hosts. You can also give the filter a name, which helps you to remember later what it does.
Then we define who is notified. Click Add escalation, which opens another modal, and select the contact you just created as the recipient. The rule asks which channel to use, either the contact’s default channel or a specific one. As you only have a single channel so far, and the default channel is already selected, there is nothing to change here. The first escalation of a rule always fires immediately, which is exactly what we want for this test. In a later post, we will look at adding further escalation stages.
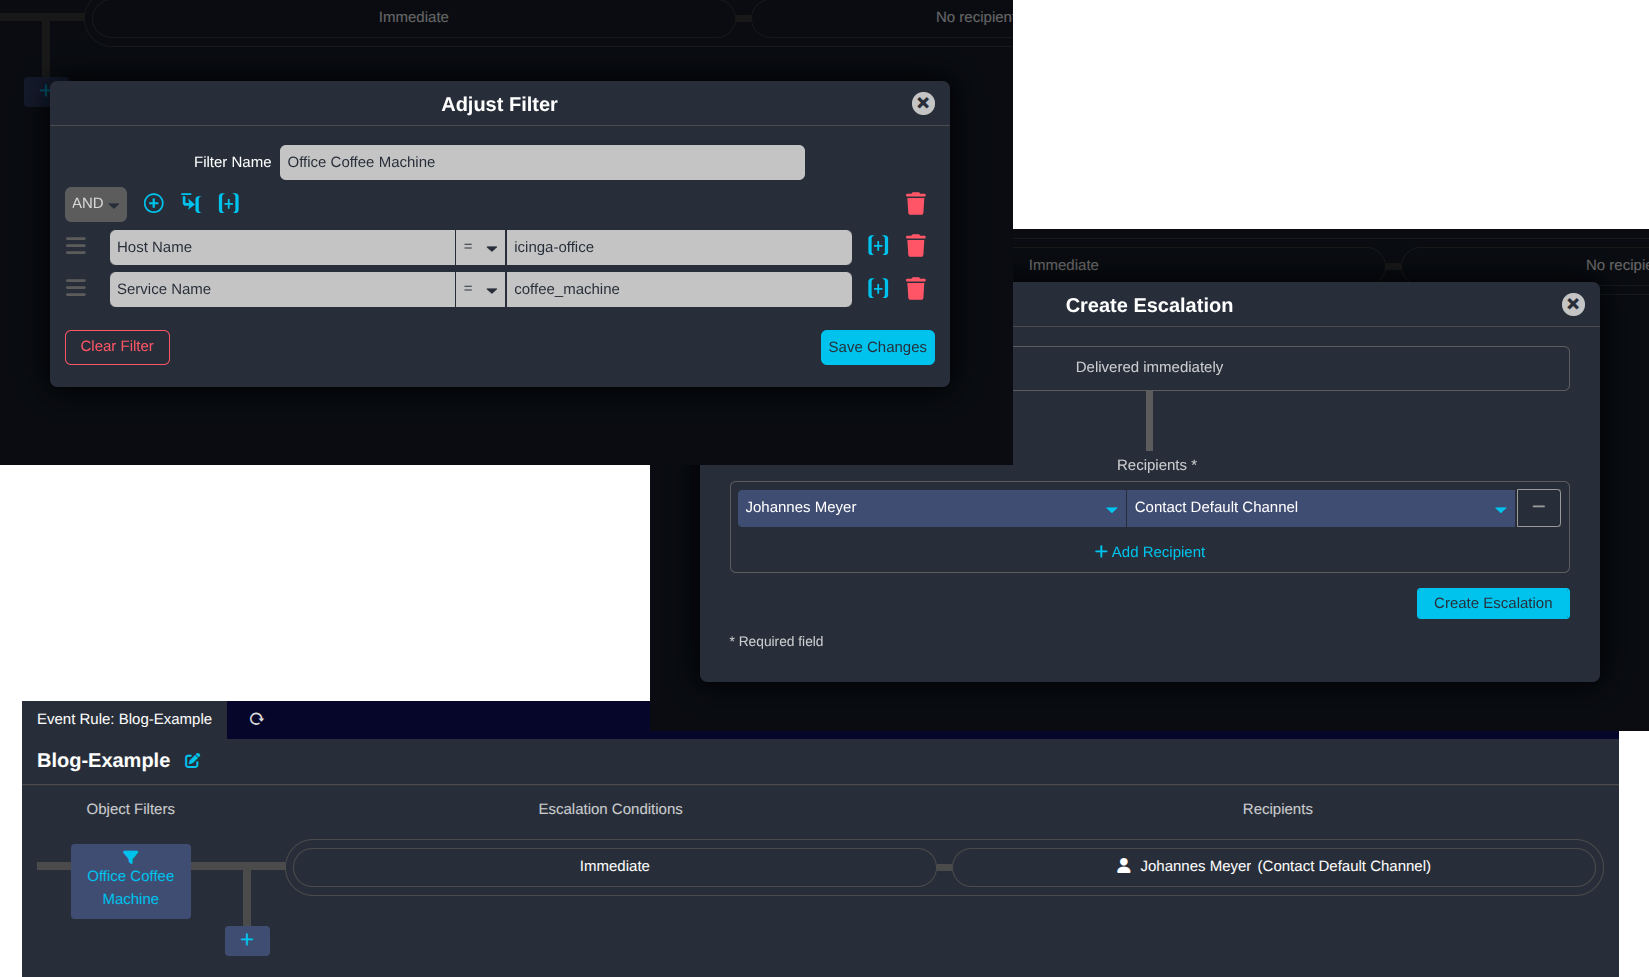
Save the rule. From now on, matching problems are sent to you.
Step 4: Trigger a test incident
Time to test it. Please do this only in a test environment, and never on a service that people rely on, because the notification will be sent for real. If you have no test environment, pick a service that nobody depends on, or create a dummy one.
Open the service from your filter in Icinga DB Web. Use the Process check result action to submit a Critical result for it.
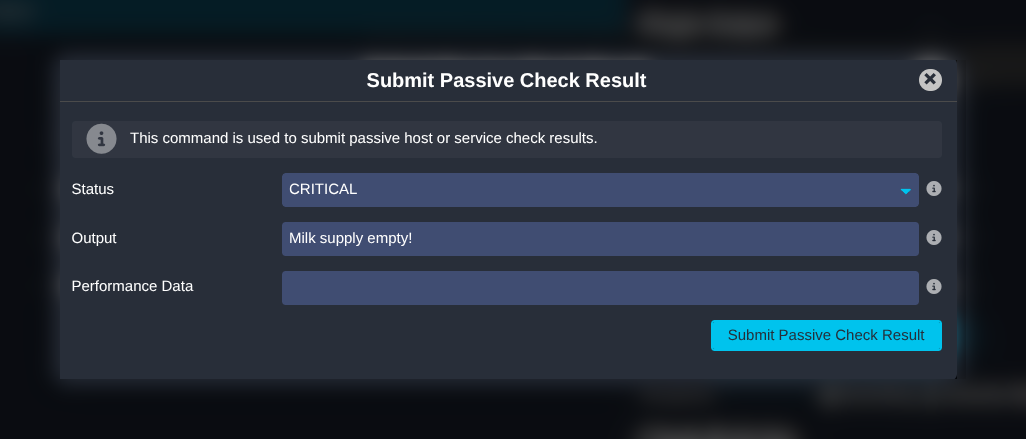
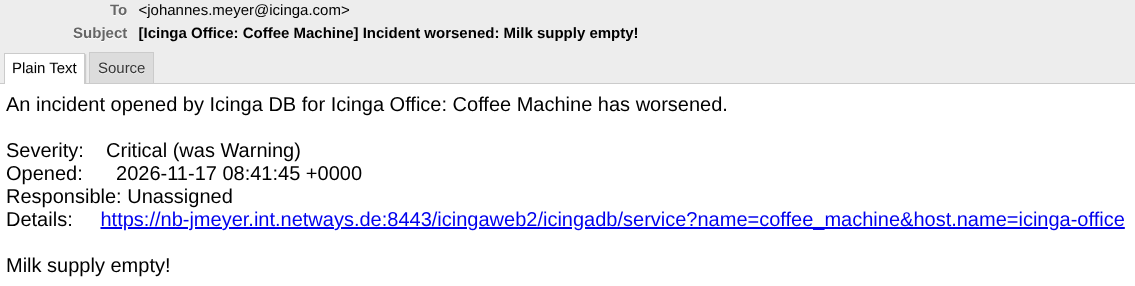
Within a moment, an email should land in your inbox.
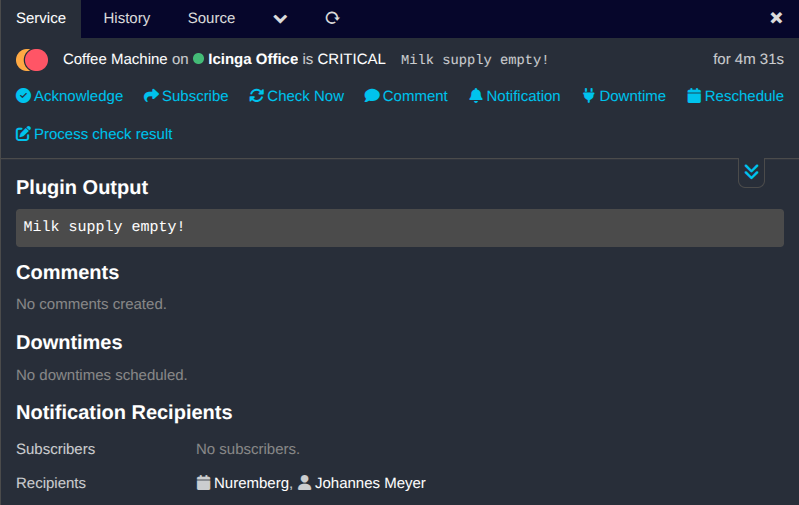
Back in Icinga DB Web, the service now has an incident. Open the details to see who was notified and why, and who has subscribed to updates. You can now react in one of two ways. Click Acknowledge to say that you are taking care of the problem, which makes you the manager of the incident. Or click Subscribe if you only want to follow along. Subscribers receive all events of the incident, just like the manager does, but they don’t own the problem.
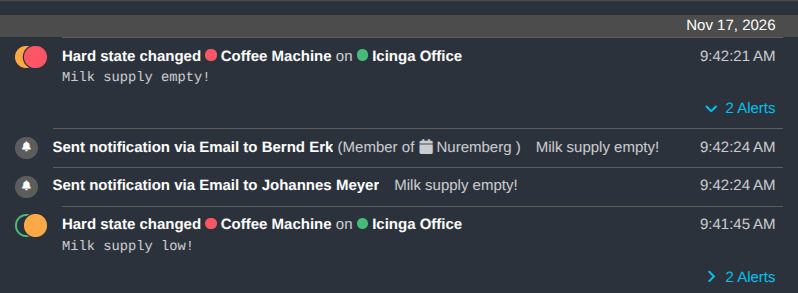
Every notification that was sent also shows up in the history of the host or service, so you can always look back at what happened.
Finally, submit an OK result for the service. The incident closes, and the problem is solved.
Where to go from here
You now have the basic setup: a channel, a contact and a rule. Real life is rarely that simple, so here are a few ideas for your next steps. Add more contacts and put them into a contact group, so a whole team can be notified at once. Create a schedule with rotations for office hours, nights and weekends, and use it as the recipient, so that the person on call gets the message. Or add further escalations to your rule, so that more people are informed if nobody reacts. We will explain each of these in upcoming posts.
If something does not work as expected, let us know on GitHub or in the Icinga Community Forum. We are happy to hear your feedback.