In my ongoing blogpost series about the Icinga PHP library, I am briefly explaining what the individual components of this library do and how easily you can use them in your project. In my previous blog post, i already covered the ipl-html and explained how easy it is to create your own HTML elements and widgets.
Today we are going to talk about the ipl-web. It is a collection of very useful HTML elements/Widgets created with ipl-html. It also offers CSS and Javascript for the widgets.
The icingadb-web module makes the most use of this library. The controls such as the search bar, pagination and lists such as the hosts/services list etc. are all basic elements/widgets of this library. If you are working on Icinga Web modules, now is the time to use this library.
How to start?
This library provides a CompatController for Icinga Web compatibilities. Just extend this in your Contollers.
The Contoller:
namespace Icinga\Module\Test\Controllers;

use Icinga\Module\Test\Widget\MyList;
use ipl\Web\Compat\CompatController;

class TestController extends CompatController
{
    public function indexAction(): void
    {
        $this->addControl($this->createPaginationControl($paginatableQuery));
        $this->addControl($this->createLimitControl());

        $list = new MyList(["first", "second", "third", "etc"]);

        $this->addContent($list); // Accepts Ipl/Html/ValidHtml element/widget
}
The MyList class creates a list from the given elements. Let’s create the class.
<?php

namespace Icinga\Module\Test\Widget;

use ipl\Web\Common\BaseItemList;

class MyList extends BaseItemList
{
    protected $defaultAttributes = ['class' => 'my-list']; // you can change or add extra style using this css class

    protected function getItemClass(): string
    {
        return MyListItem::class;
    }
}
Let’s create the class MyListItem, which describes how the individual list items should look.
<?php

namespace Icinga\Module\Test\Widget;

use Icinga\Module\Notifications\Common\BaseListItem;
use ipl\Html\BaseHtmlElement;
use ipl\Web\Url;
use ipl\Web\Widget\Link;
use ipl\Web\Widget\Icon;

class MyListItem extends BaseListItem
{
    /** @var string */
    protected $item;

    /** @var array */
    protected $list;

    protected function init(): void
    {
        $this->getAttributes()->set('data-action-item', true); // make the list item clickable
    }

    protected function assembleVisual(BaseHtmlElement $visual): void
    {
         $visual->addHtml(new Icon('hamburger')); // font-awesome icon
    }

    protected function assembleTitle(BaseHtmlElement $title): void
    {
        // Add a link to title
        $title->addHtml(new Link(
            $this->item,
            Url::fromPath('test/get', ['id' => $this->item]),
            ['class' => 'subject']
        ));
    }

    protected function assembleHeader(BaseHtmlElement $header): void
    {
        $header->add($this->createTitle());
    }

    protected function assembleMain(BaseHtmlElement $main): void
    {
        $main->add($this->createHeader());
    }
}
With this little code we have created a nice looking list of clickable items as shown below.
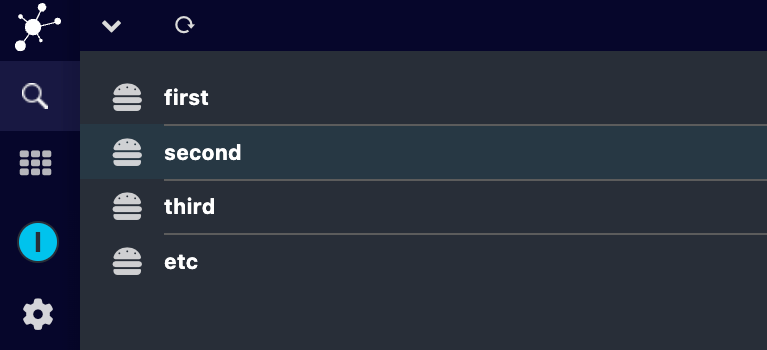
Ipl-web offers many more ready-to-use widgets, give it a try.