Recently I was importing an Icinga configuration for testing purposes. Working with this configuration, I found that there were icon images assigned to the objects. Sadly, those didn’t display, because I didn’t have the icon set installed. So I thought of creating my own.
Creating a set of icon images, that is suitable for large environments, is no short of a time-consuming task. I would have loved to start working on a well-thought-out icon set and already thought of defining a grid for consistency through different object groups, working out different style concepts for different object categories and define a coherent style over all of these. I could have started with some and add more gradually. But I didn’t want to have a project at hand that would probably never become finished.
So what does a modern designer do these days to do get a bunch of repetitive work done quickly? You’re probably already guessing right: I gave AI a try.
Working on an icon style – with prompts
I wasn’t exactly eager to dive deep into a new tool and was integrating ChatGPT more and more into my workflow anyway. And while it wasn’t the most obvious choice for image generation, I wanted to give it a try.
So, after some back and forth and testing with my new prompt based image generation companion, I was able to make it come up with an icon concept, that wasn’t blowing my mind, but after tweaking some of the details, it delivered some solid results. The most fiddly thing probably was to make ChatGPT deliver consistent results.

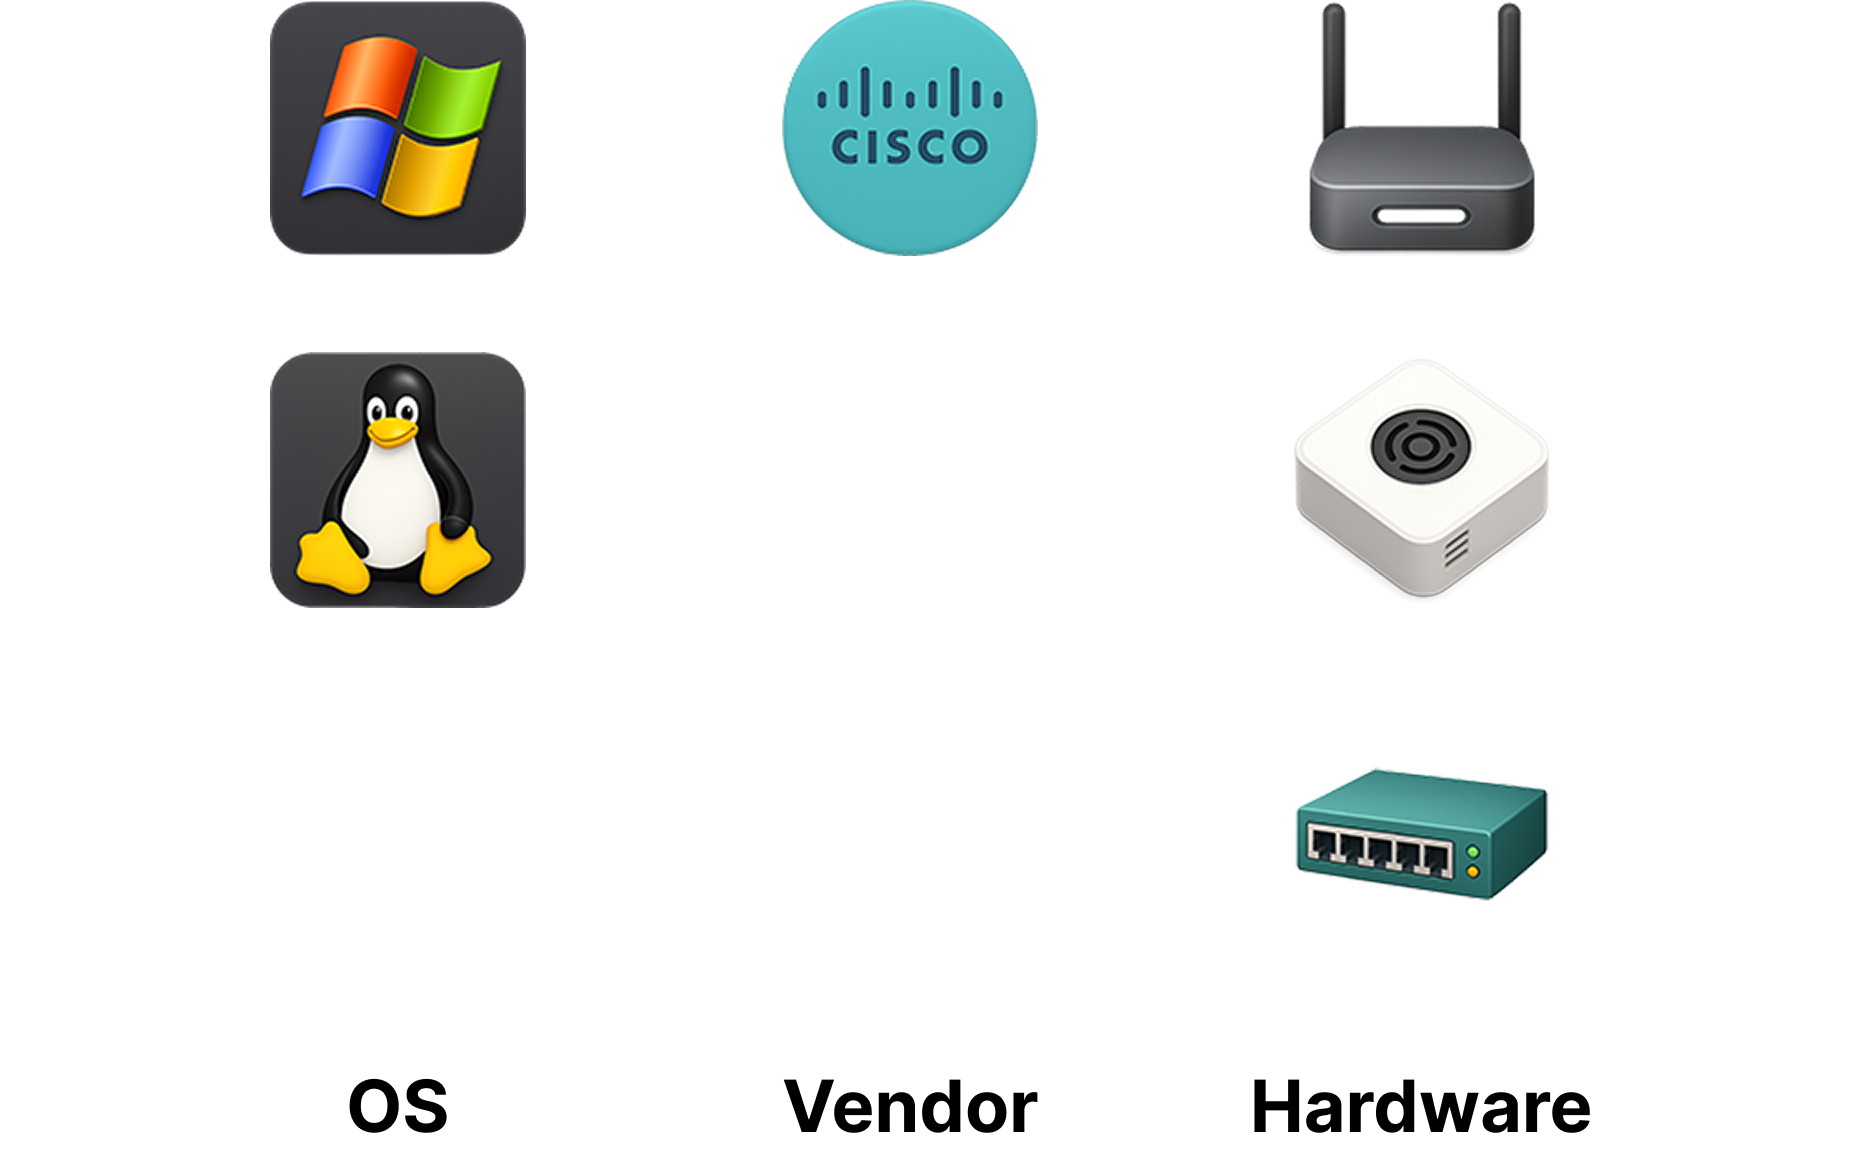
The first drafts already looked promising. It was easy for ChatGPT to use the linux logo, so not much tweaking of the subject was necessary. The hard thing was to make it deliver a consistent layout with consistent elements according to the concept.
The concept regards three categories for the icons: OSes, vendors and hardware.
I quickly realized, that ChatGPT has some limitations for image generation. After some tinkering I learned, that it defaults to a 1024 by 1024 pixel images and I didn’t find a way to stray from that path. It didn’t reliably crop the icons, so it always left them with a white border. I also prompted a list of icon file names and asked to name the generated files properly, which the tool also refused to do from time to time or I constantly had to ask again and again. The icon generation already sped up the process, though, so I did the cropping and renaming myself. The former with my cumbersome old buddy from a different age, named Photoshop (obviously any other image editing tool will work) and the latter with the file explorer tool of my choice: Finder. I cropped the generated to 128 by 128 pixel. But probably most square sizes will work, just be sure to make them at least 32 by 32 pixel.
Using the Icon Images in Icinga Web 2
To provide the icons for Icinga Web 2, practically any publicly available file storage would work. It is only to be made sure, that you have the proper path at hand later. For convenience, I put it into `public/img/icons/` folder in my icingaweb2 repository.
Add the icons to your configuration
The easiest way to use the icons is to assign them with your hosts and services with the Icinga Director. In this example, I’m going to create a new host for that.
To achieve that, navigate to Icinga Director -> Hosts and click “+ Add” in the control bar.
Then enter your host details as usual. After that open the “Additional Attributes” section and enter the path for the icon image you want to assign to this host.
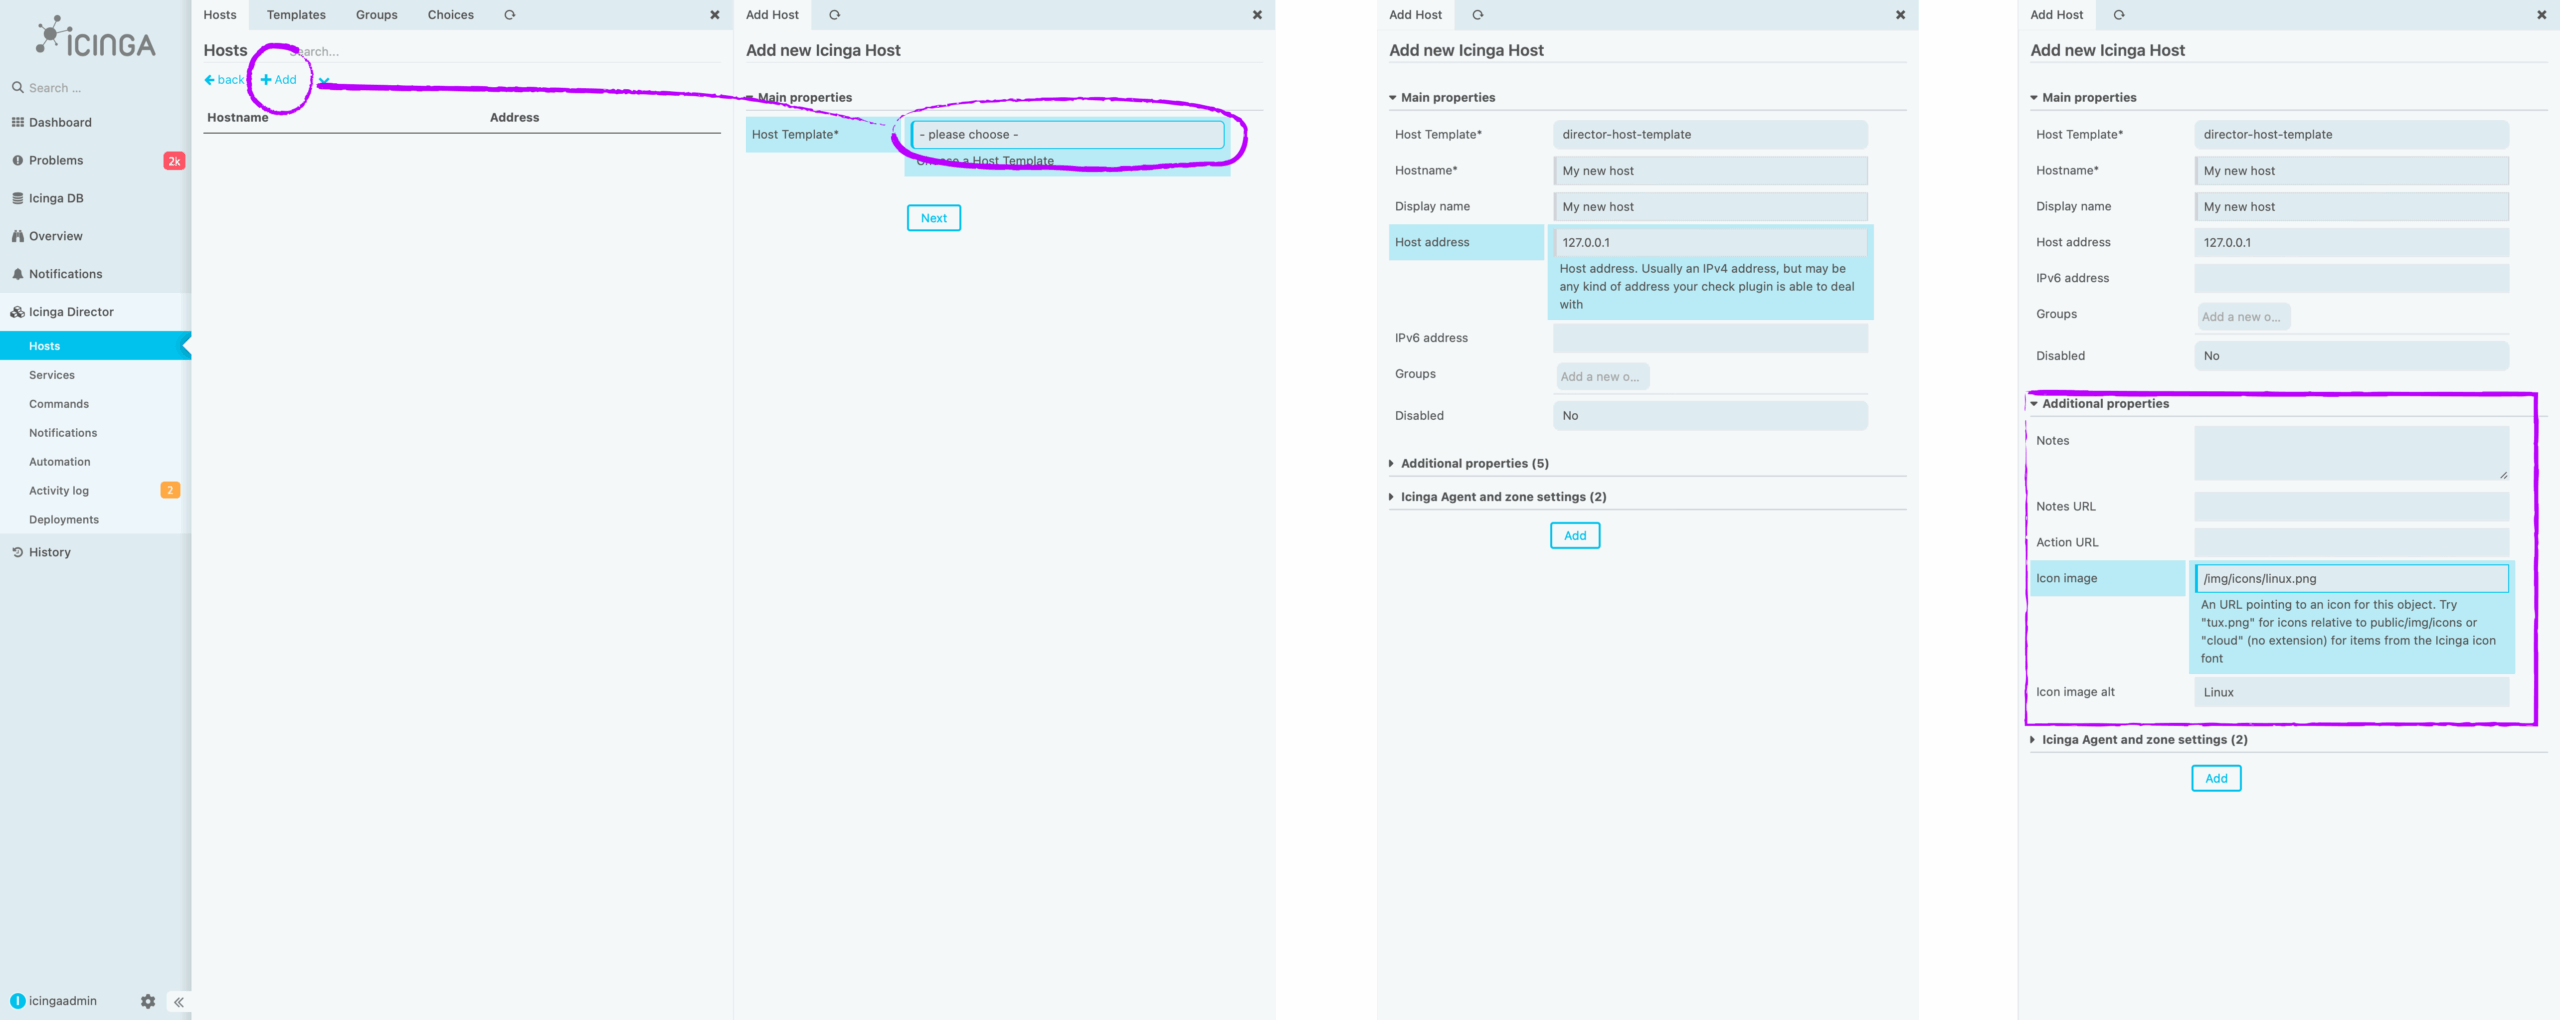
Create a new host in Icinga Director and assign the icon image file.
After clicking “Store”, when you’re ready and deploying the changes from Director, your new object is eventually being monitored and appearing more prominently in your list than ever.
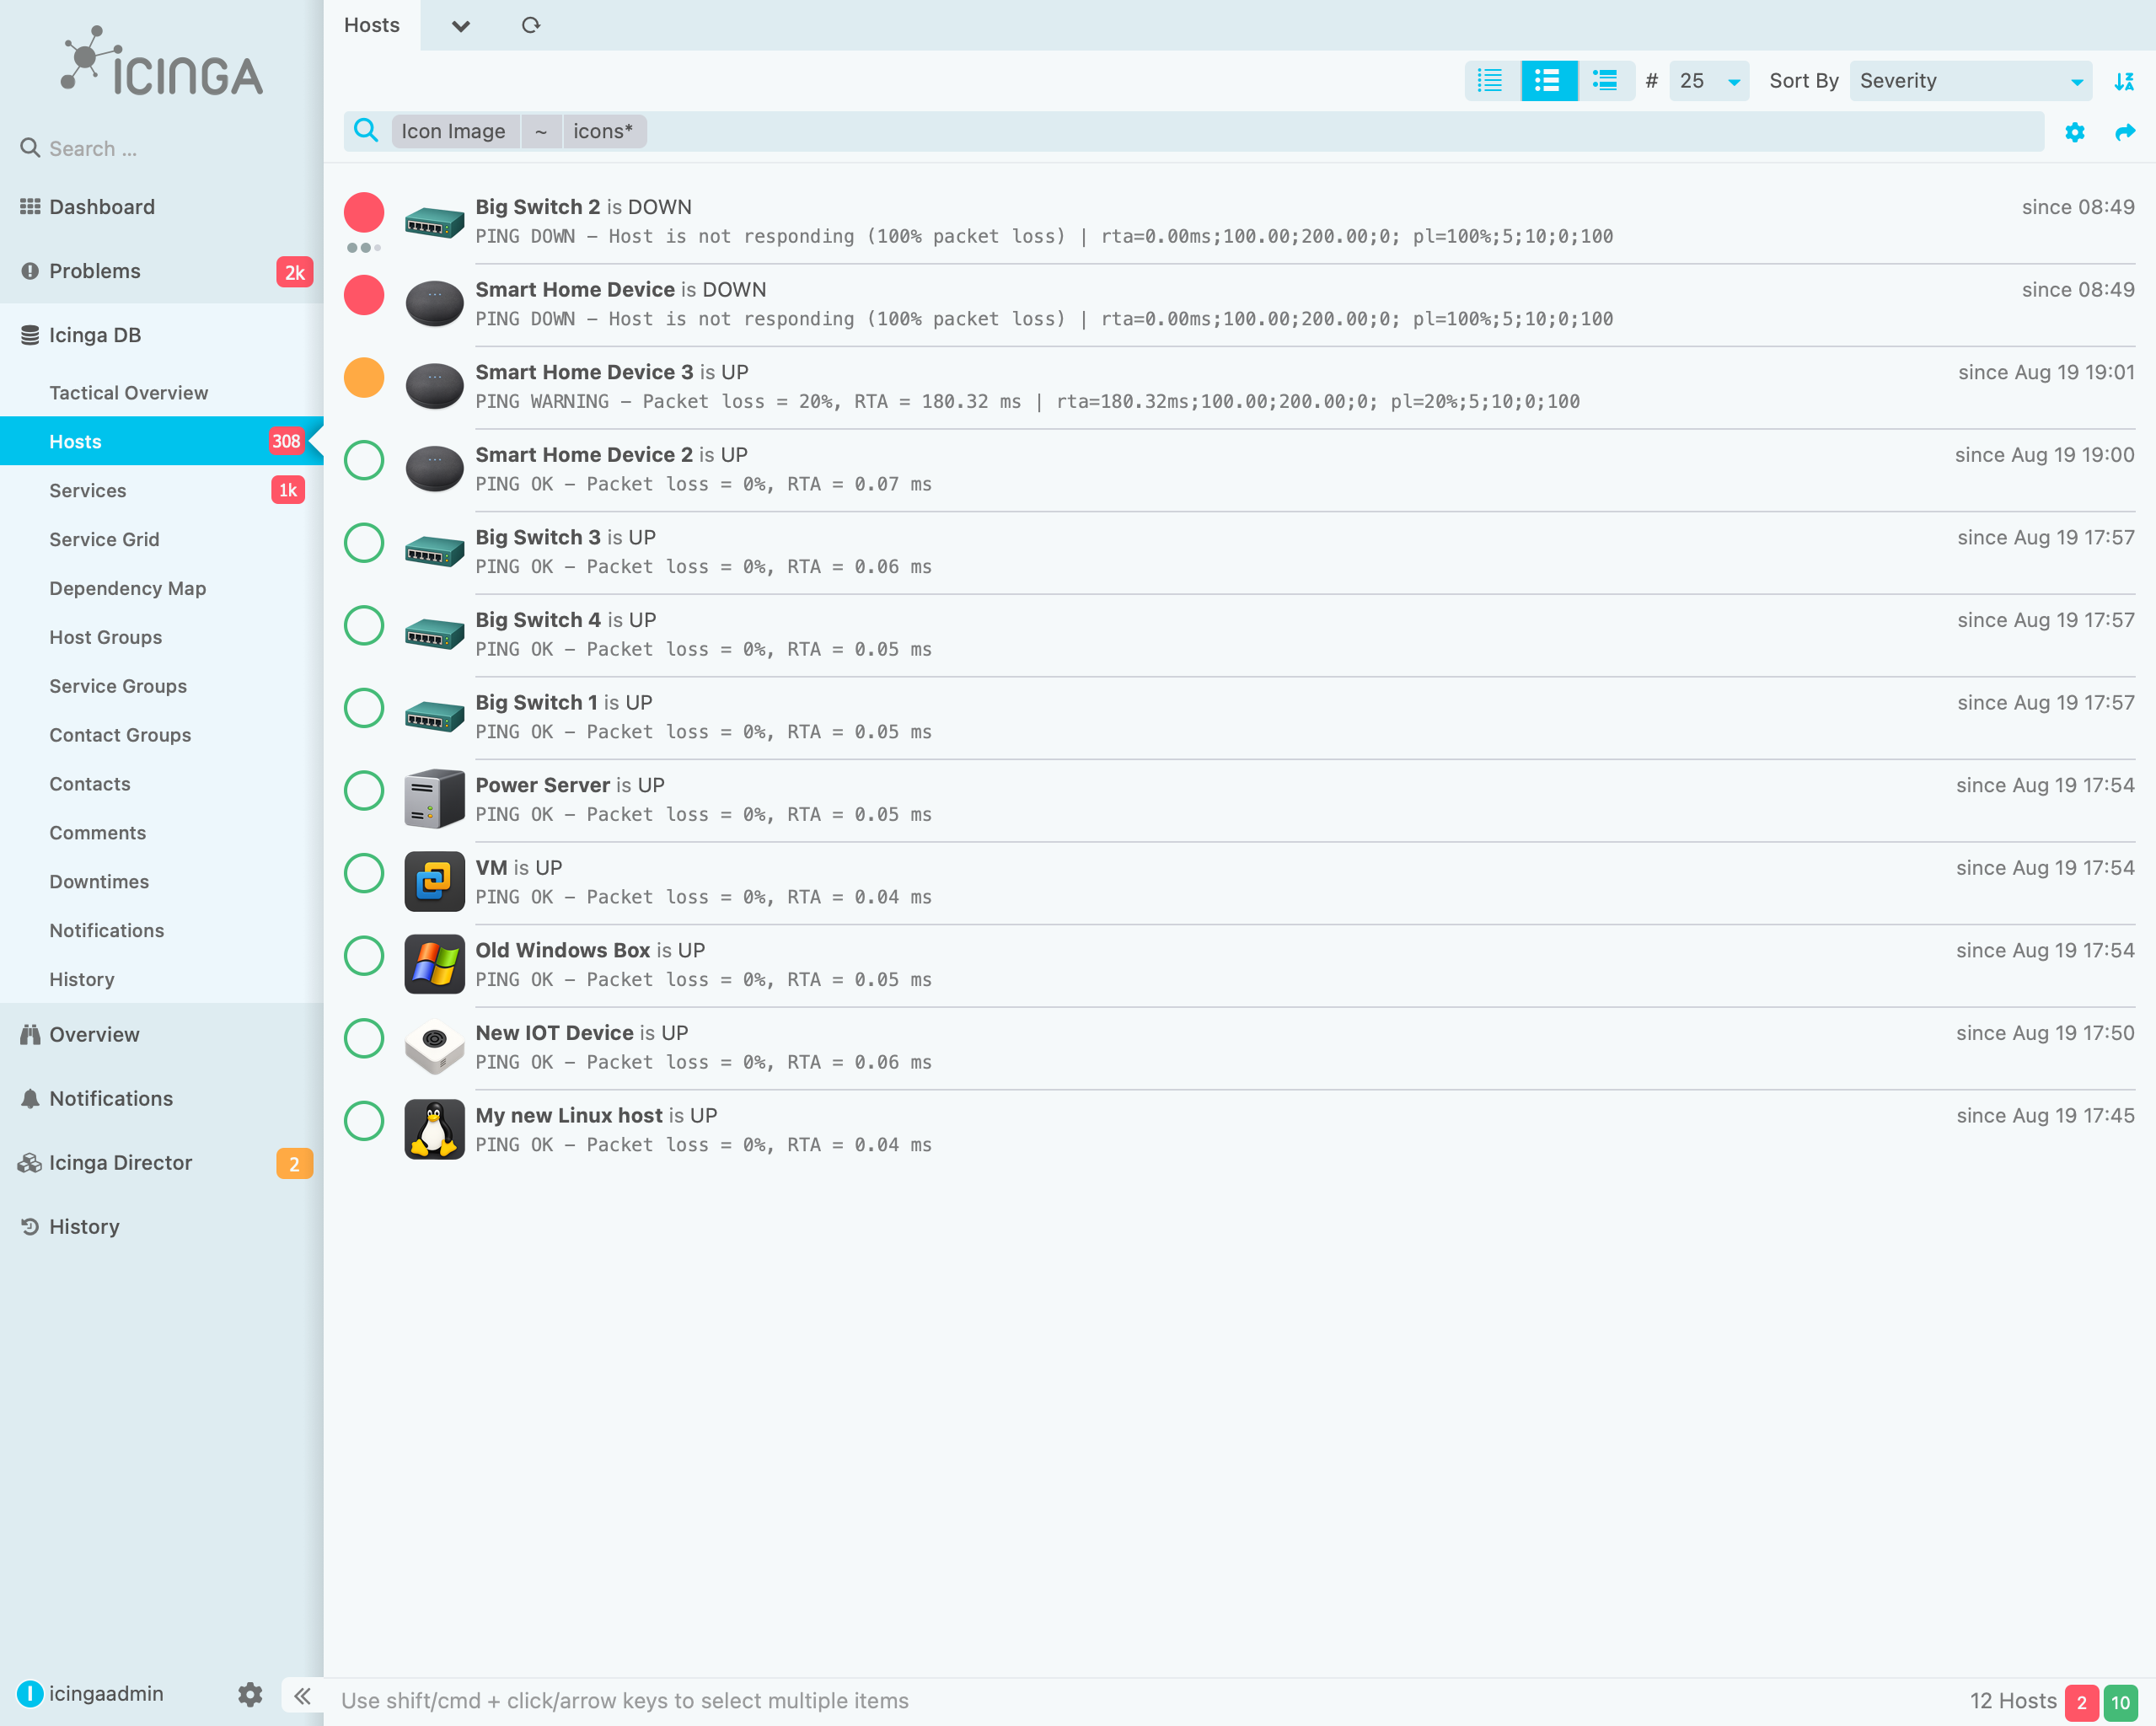
With icon images, your objects are a lot better to differentiate
Download the icon image set
I put the first set of icons I generated into a repository. So feel free to give it a try.
Get the Icon Image Repository here
Generate Your Own Icons Using ChatGPT
As described, the icon generation works pretty reliably. I also generated a prompt, which you can use by yourself. In the repository, you can find a file with the name `chatgpt-prompt.txt`. You can just open the prompt and paste it into ChatGPT. Just be sure to replace the text in the last line and describe the icon you want.