In my previous blog post, I explained how to build lists using ipl-web widgets. That method will soon be deprecated due to its complexity.
With the recent ipl-web release, we have introduced a simpler and more flexible approach to building lists, using a lightweight rendering interface and a single class, as described below:
ItemRenderer (Interface):
This interface defines how individual list items should be rendered. Each method includes a $layout parameter so you can tailor the output to different layouts.
Available Layouts:
![]()
MinimalItemLayout: A compact layout for a clean, minimalist look.

ItemLayout (default): A standard layout with detailed components.
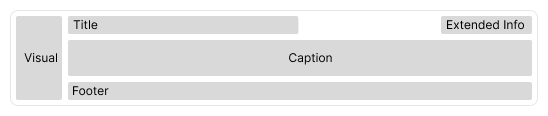
DetailedItemLayout: Like ItemLayout, but includes a footer for extra detail.
ItemList (Class):
This is the base class for creating lists. You can use it directly:
 /** @var $data iterable<object> An iterable of objects as data */
/** @var $itemRenderer ItemRenderer An instance of ItemRenderer (or a compatible callable) */
$list = new ItemList($data, $itemRenderer);
If you require further customisation, you can extend this class.
How to Get Started?
To integrate this into an Icinga Web module, simply extend the provided CompatController — designed for easy compatibility with Icinga Web.
namespace Icinga\Module\Test\Controllers;

use Icinga\Module\Test\Widget\MyItemRenderer;
use ipl\Web\Compat\CompatController;
use ipl\Web\Layout\MinimalItemLayout;
use ipl\Web\Widget\ItemList;

class TestController extends CompatController
{
    public function indexAction(): void
    {
        ...
        $items = [
            (object) ['name' => 'first'],
            (object) ['name' => 'second'],
            (object) ['name' => 'third'],
            (object) ['name' => 'etc']
        ];


        $list = (new ItemList($items, new MyItemRenderer()))
            ->setItemLayoutClass(MinimalItemLayout::class);

        $this->addContent($list);
}
Let’s create the MyItemRenderer class to define how each list item should appear. If you don’t want to add something to a certain part (like the footer), you can leave the method body empty.
<?php

namespace Icinga\Module\Test\Widget;

use ipl\Html\Attributes;
use ipl\Html\HtmlDocument;
use ipl\Html\Text;
use ipl\Web\Common\ItemRenderer;
use ipl\Web\Widget\Icon;

class MyItemRenderer implements ItemRenderer
{
    public function assembleAttributes($item, Attributes $attributes, string $layout): void
    {
        // manage attributes of the item
        $attributes->get('class')->addValue('my-item');
    }

    public function assembleVisual($item, HtmlDocument $visual, string $layout): void
    {
        $visual->addHtml(new Icon('hamburger'));
    }

    public function assembleTitle($item, HtmlDocument $title, string $layout): void
    {
        $title->addHtml(new Text($item->name));
    }

    public function assembleCaption($item, HtmlDocument $caption, string $layout): void
    {
        $caption->addHtml(new Text('some caption for: ' . $item->name));
    }

    public function assembleExtendedInfo($item, HtmlDocument $info, string $layout): void
    {
        $info->addHtml(new Text('Just Now'));
    }

    public function assembleFooter($item, HtmlDocument $footer, string $layout): void
    {// Only called, when layout is set to DetailedItemLayout
    }

    public function assemble($item, string $name, HtmlDocument $element, string $layout): bool
    {
        // Extending the ItemList class allows you to add further elements.

        return false; // false to don't add anything extra
    }
}
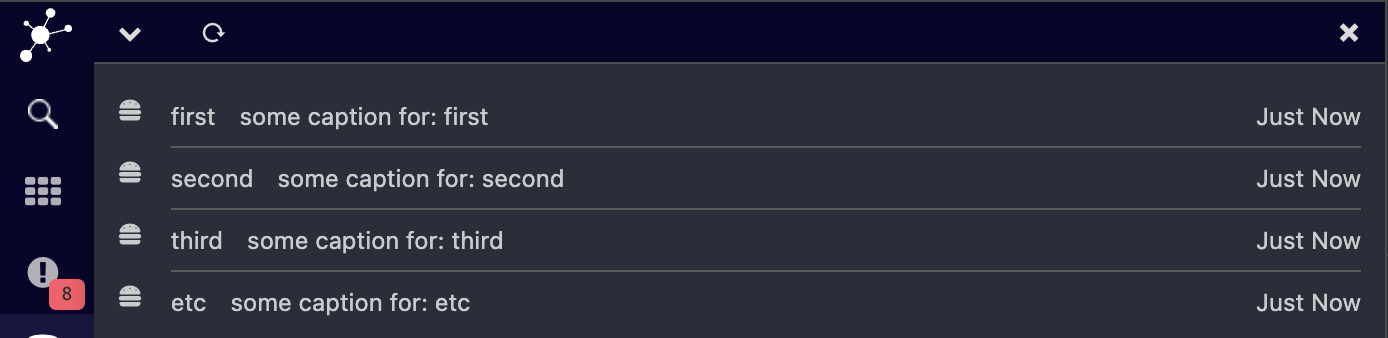
With just a few lines of code, you’ve created a clean list, rendered using modern UI components — like the one below:
What Else Can You Do?
This library comes packed with a growing set of ready-to-use components — not just for lists, but for tables, searchbar, pagination, and more. It’s built to help you create powerful, consistent UI patterns with minimal effort and maximum flexibility.
Give it a try, and see how much time it can save you when building polished interfaces!