Permissions and restrictions are something used to control how much access is provided to a particular user or user group. Therefore one must first understand what is the role of a user or a group.
Requirement: Icinga 2 and Icinga Web 2 installed. Hosts and services configured based on location (for example Berlin, London, Rome etc) using custom variables (refer https://icinga.com/docs/icinga2/latest/doc/03-monitoring-basics/#custom-variables in documentation).
Here, you will understand permissions and restrictions through configuring users, user groups and roles. They can either be created using configuration files or web interface. When the Icinga Web 2 is installed a default user with admin access is configured. This user can now create new users, user groups and roles. A particular administration can have multiple users with admin access or a single admin user.
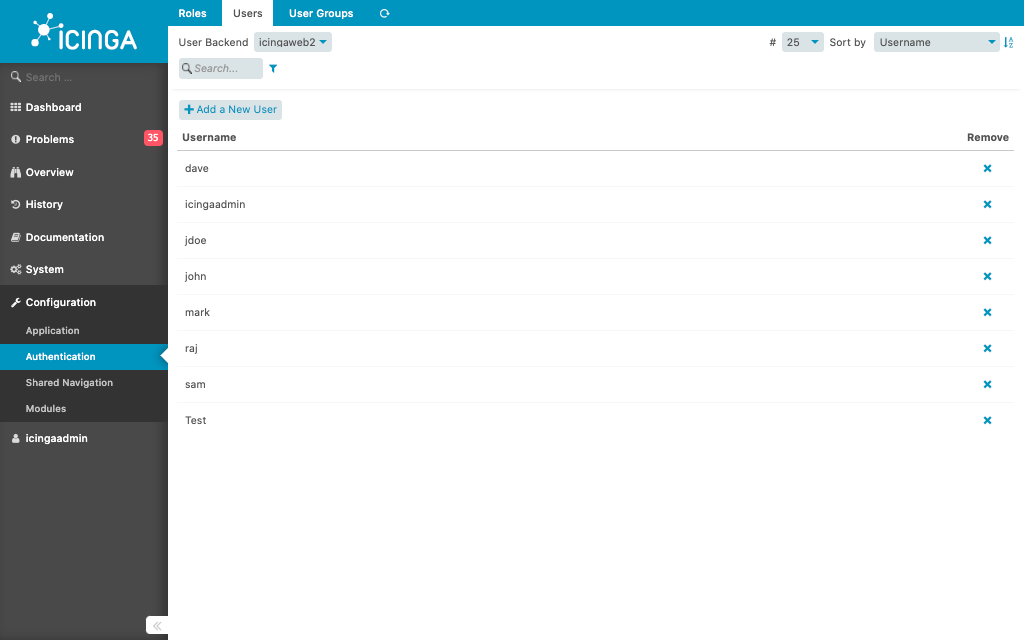
- After logging into Icinga Web 2, navigate to Configuration->Authentication->Users.
- Click Add a New User, to add a user.
Add several users.
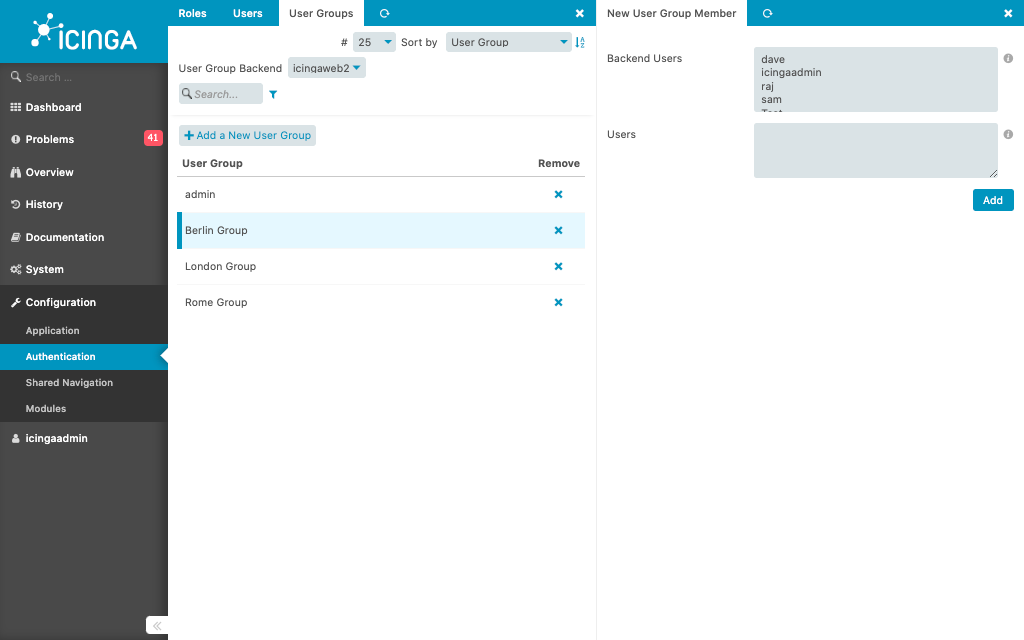
- Navigate to Configuration->Authentication->User Groups.
- Click Add a New User Group, to add a user group.
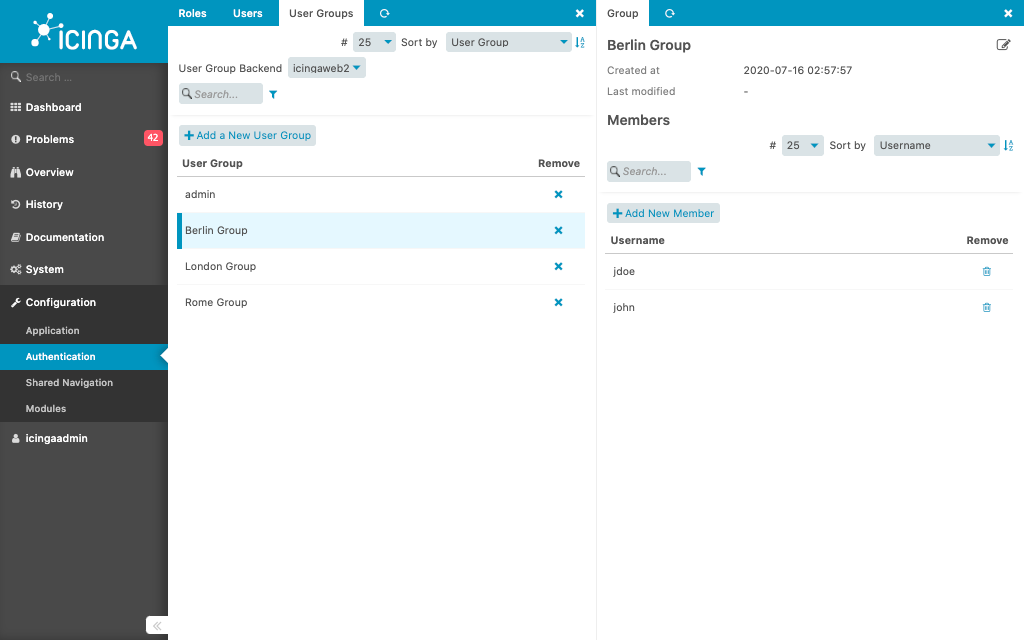
Once, the user group is configured add members to the group by navigating to, Configuration->Authentication->User Groups-><Group> and click on Add New Member. Select users and click Add, to add members to the group. Here, I group john and jdoe to Berlin Group.
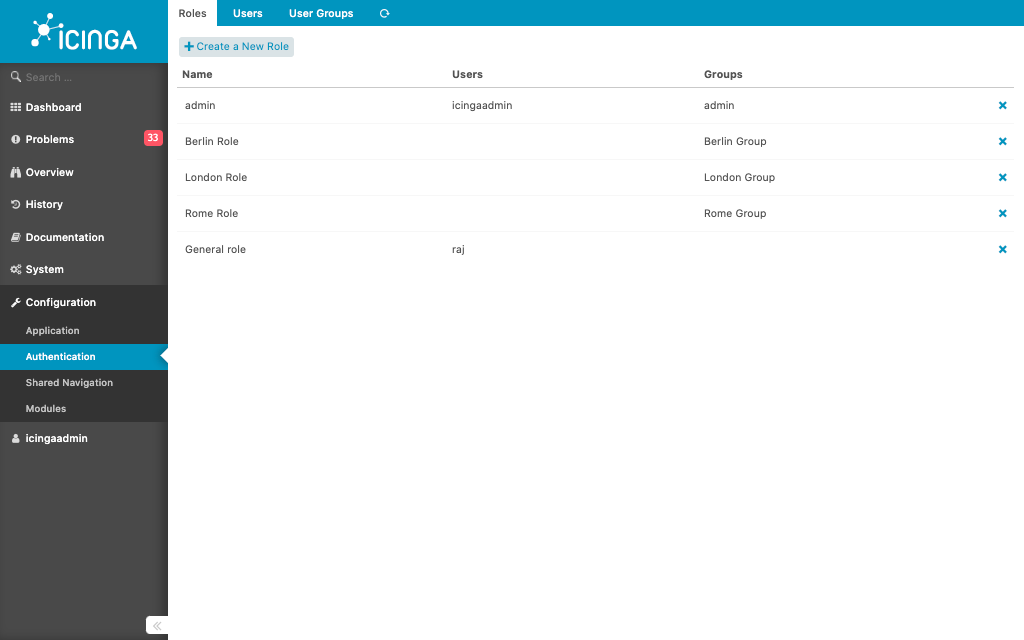
- Here, I have configured several user groups, based on their location and a general monitoring group.
- Navigate to Configuration->Authentication->Roles.
- Click Create a New Role, to add a role.
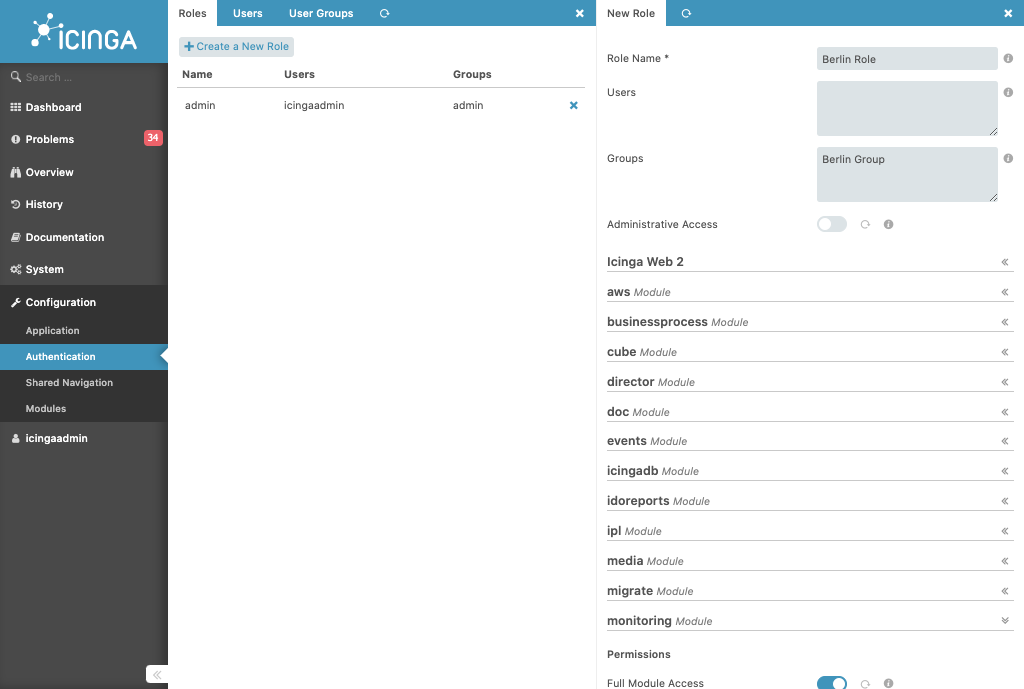
Here, is an example of configuring a role to restrict users from Berlin to monitor the resources only in Berlin.
Use the Berlin user group instead of adding users individually to the role
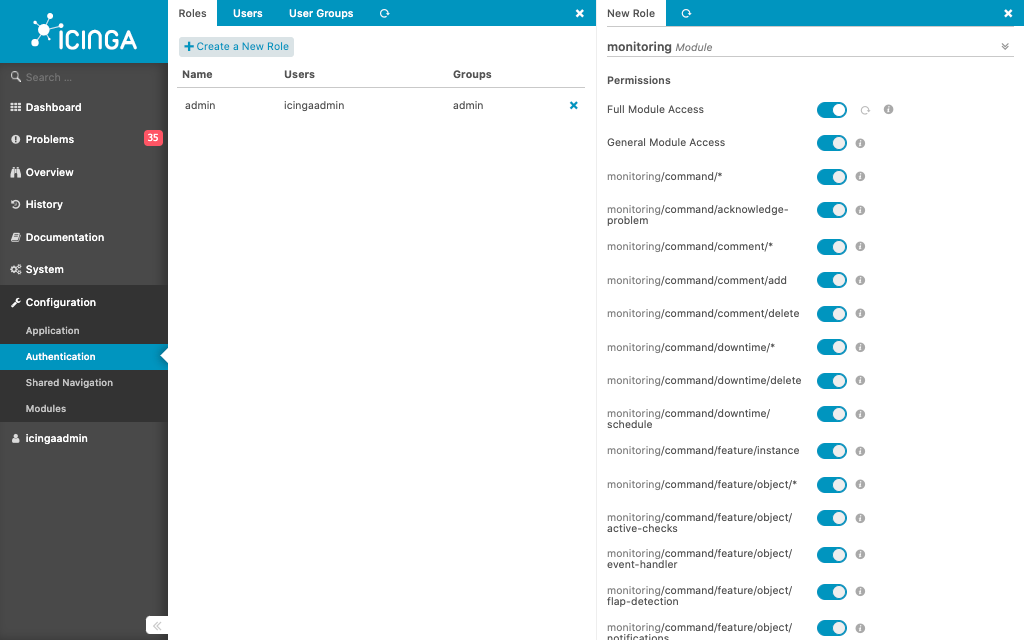
Here, I grant Full Module Access for monitoring in permissions (Note: Enabling Full Module Access, grants all permissions of the monitoring module to the role. Enabling General Module Access, allows the users only to load the monitoring module and allows only the actions to which permissions are not required. By enabling General Module Access, we can customise permissions for the users, by enabling or disabling the corresponding permissions).
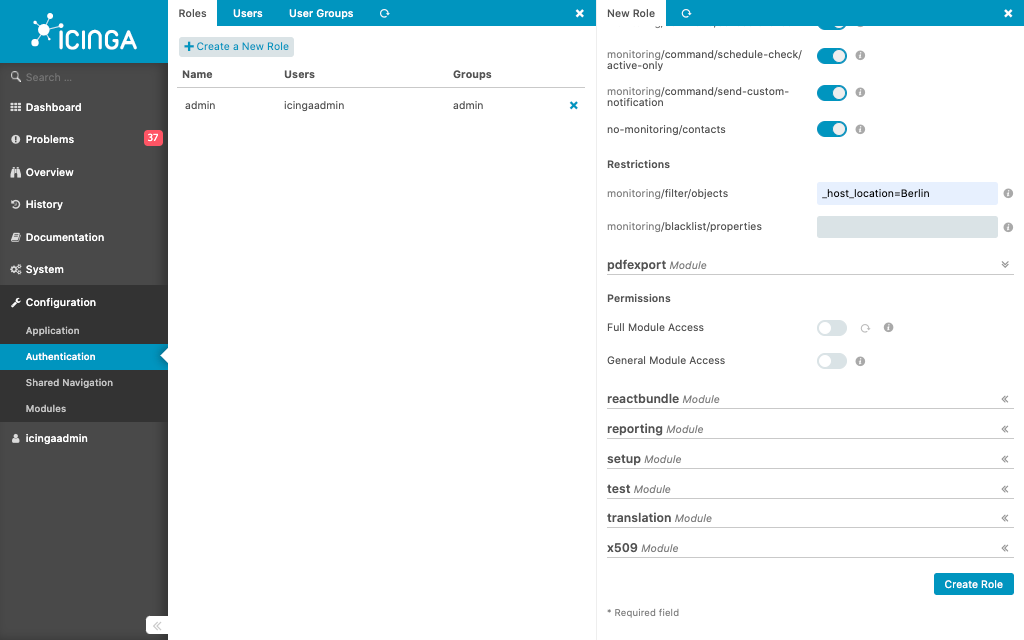
Restrict, the users to the location Berlin, by using the custom variable _host_location.
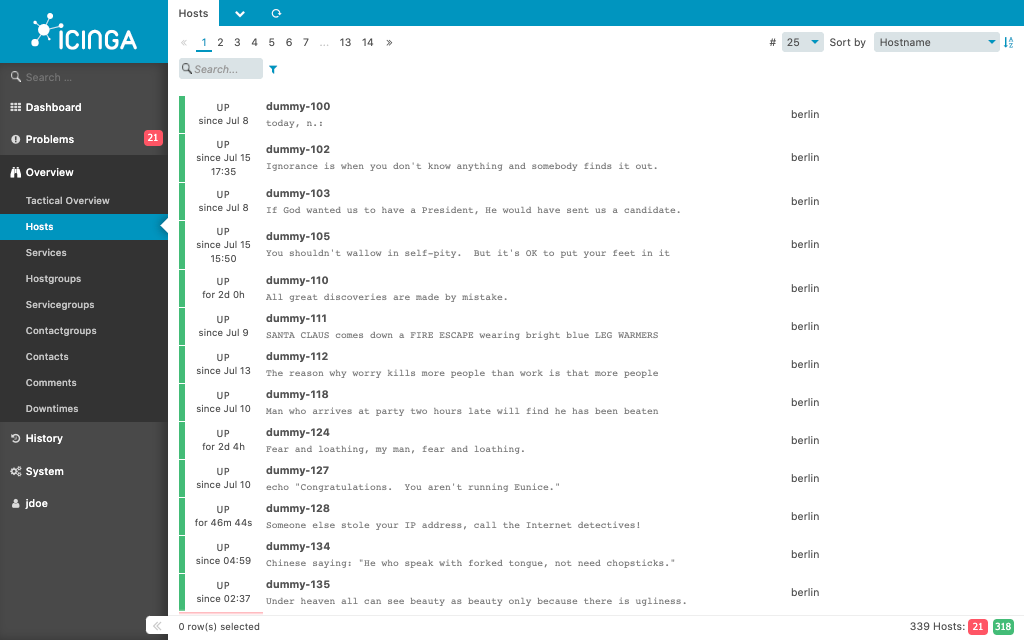
Now the users from Berlin (john and jdoe) can only monitor resources in Berlin.
Similarly, I have created several roles to restrict the users based on location (Rome and London).
Obtaining the expression for restriction filter is simple. All one have to do is, navigate to Overview->Hosts and apply search filter and copy paste the filter expression in the url in restriction filter. Similarly, we can obtain filter expression from host groups, services or service groups.
The above example is for a simple restriction. Restrictions can also be complex based on the requirement, check Restriction section in https://icinga.com/docs/icingaweb2/latest/doc/06-Security/ to understand more about restriction filters.
So, in conclusion assigning permissions is simply to enable or disable a particular permission, based on the role of the user. Thus granting the authorisation to undertake actions based on user’s role. Restrictions further controls the visibility of the monitored objects for the user with the help of restriction filter. Learn more about permissions and restriction in Icinga Web 2 documentation.
Food for thought: Understanding the role of users or user groups makes monitoring life simple.

