Looking to monitor your Windows systems with Icinga, but aren’t allowed to install non-Microsoft certified software on them? Then you are in the right place. After all, you want to monitor your systems somehow. But you don’t want to lose the support from MS afterwards, just because you installed a monitoring system on it. Well, today I will show you how to monitor your Windows without having to install the Icinga agent. By using our much anticipated check_by_powershell plugin, you are actually able of doing precisely just like what check_by_ssh in Linux does. So how does this actually work? I’ll demonstrate to you next.
Configure a CheckCommand for it!
First, you need to install the module on your Unix system. For that you have to either clone it from Github and build it locally yourself or get one of the pre-built release packages. Now, just copy the command.conf file, which is located under the icinga2/ folder, into the /etc/icinga2/conf.d directory. However, in order to run a check on the target system at all, you must have the icinga-powershell-framework and icinga-powershell-plugins module installed on your windows systems. Finally, here is our own CheckCommand for the CheckCPU plugin.
object CheckCommand "check-cpu" {
    import "plugin-check-command"

    command = [ "Invoke-IcingaCheckCPU" ]
    arguments += {
        "-Verbosity" = {
            description = "Changes the behavior of the plugin output which check states are printed"
            value = "$verbosity$"
        }
        "-Core" = {
            description = "Used to specify a single core to check for. For the average load across all cores use `_Total`"
            value = "$core$"
        }
        "-Warning" = {
            description = "Used to specify a Warning threshold. In this case an integer value."
            value = "$warning$"
        }
        "-Critical" = {
            description = "Used to specify a Critical threshold. In this case an integer value."
            value = "$critical$"
        }
        "-NoPerfData" = {
            set_if = "$NoPerfData$"
        }
    }
    vars.NoPerfData = false
}
And what comes next?
After having created our CheckCommands, we are only missing a Host and Service object. We just need to apply those as well and we will be done.
object Host "windowshost" {
  import "generic-host"

  address = "10.27.1.162"
  vars.powershell_port = 5985
  vars.powershell_user = "Administrator"
  vars.powershell_password = "icinga0815!"
  vars.powershell_no_tls = true
  vars.powershell_auth="Basic"

  vars.server_type = "windows"
}

template Service "template-service" {
   import "generic-service"

   vars.original_check_command = check_command
   check_command = "powershell"

   vars.by_powershell_command = {{ get_check_command(service.vars.original_check_command).command }}
   vars.by_powershell_arguments = {{ get_check_command(service.vars.original_check_command).arguments }}
}

apply Service "powershell_check_cpu" {
  check_command = "check-cpu"

  import "template-service"

  vars.warning = "80"
  vars.critical = "90"
  vars.verbosity = "2"

  assign where host.vars.server_type == "windows"
}
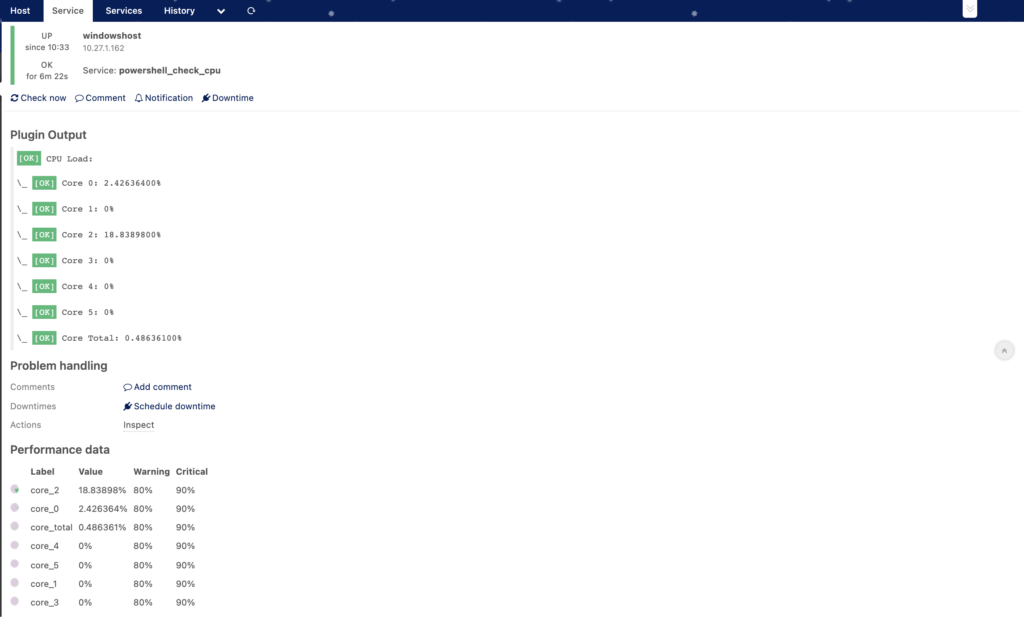
Well, now you only need to adjust the host IP address and credentials, everything else you can leave as it is. And before you restart Icinga2 you should validate the configs with the following command icinga2 daemon -C, just to be sure. When you visit your Icinga Web 2 now, you should also see the newly created host, like in the following screenshot.
As you can see, we managed to run a check without having to install the Icinga agent on the system. As such, you can remotely perform any of our powershell plugins. Examples and configs can be found in the respective github repositories. And if you get stuck somehow, don’t hesitate to ask us or our community. Enjoy ?!


