Introduction
In this post, I will show you how easy you can integrate Graphite with Icinga Web 2. I assume you have a Icinga 2 ready with Icinga Web 2 Server running, and you have an additional Linux Server where you will install Graphite. It’s recommended to have Graphite in a Linux box out of your Icinga Web 2 Server. This scenario was tested on two Linux Servers with Centos 7. Let’s rock:
On the Linux Box for installing Graphite, let’s update / upgrade our CentOS, then install epel-release repository, and ifinally install graphite and tools needed from epel-release repository:
# yum update -y && yum upgrade -y
# yum install -y epel-release
# yum -y install graphite-web python-carbon httpd
Now, we need to modify the following file: /etc/graphite-web/local_settings.py , you need to find the following commented lines:
#SECRET_KEY ='.....'
#TIME_ZONE = '.....'
You will need to uncommnet them, and add the correct values :
#SECRET_KEY ='You need to put here a hash value by your own'
#TIME_ZONE = 'Here you need to use a timezome, same one as the server'
Check sample values:
SECRET_KEY = IcingA234Web2flkdslkrselkrlek32lk3lk'
TIME_ZONE = 'America/Santo_Domingo'
Remember to save the changes. Now, we need to edit the following file: /etc/httpd/conf.d/graphite-web.conf , you will have something like this:
<IfModule mod_authz_core.c>
# Apache 2.4
Require local
</IfModule>
Now, it should be look like this:
<IfModule mod_authz_core.c>
# Apache 2.4
Require all granted
</IfModule>
Now, let’s proceed to generate the database for the graphite, execute the following:
/usr/lib/python2.7/site-packages/graphite/manage.py syncdb
You will get an output like this:
Creating tables ...
Creating table account_profile
Creating table account_variable
Creating table account_view
Creating table account_window
Creating table account_mygraph
Creating table dashboard_dashboard_owners
Creating table dashboard_dashboard
Creating table events_event
Creating table url_shortener_link
Creating table auth_permission
Creating table auth_group_permissions
Creating table auth_group
Creating table auth_user_groups
Creating table auth_user_user_permissions
Creating table auth_user
Creating table django_session
Creating table django_admin_log
Creating table django_content_type
Creating table tagging_tag
Creating table tagging_taggeditem

You just installed Django's auth system, which means you don't have any superusers defined.
Would you like to create one now? (yes/no): yes <- HERE YOU NEED TO ANSWER YES
Username (leave blank to use 'root'): <- IT WILL TAKE USERNAME AUTOMATICALLY, FOLLOW INSTRUCTION
Email address: root@localhost <- YOU NEED TO SPECIFY EMAIL
Password: <- ADD A PASSWORD HERE
Password (again): <- CONFIRM PASSWORD AGAIN
Superuser created successfully.
Installing custom SQL ...
Installing indexes ...
Installed 0 object(s) from 0 fixture(s)
Now, we need start and enable some services, and change permission to graphite-web directory:
chown -R apache. /var/lib/graphite-web
systemctl start carbon-cache
systemctl enable carbon-cache
systemctl restart httpd
systemctl enable httpd
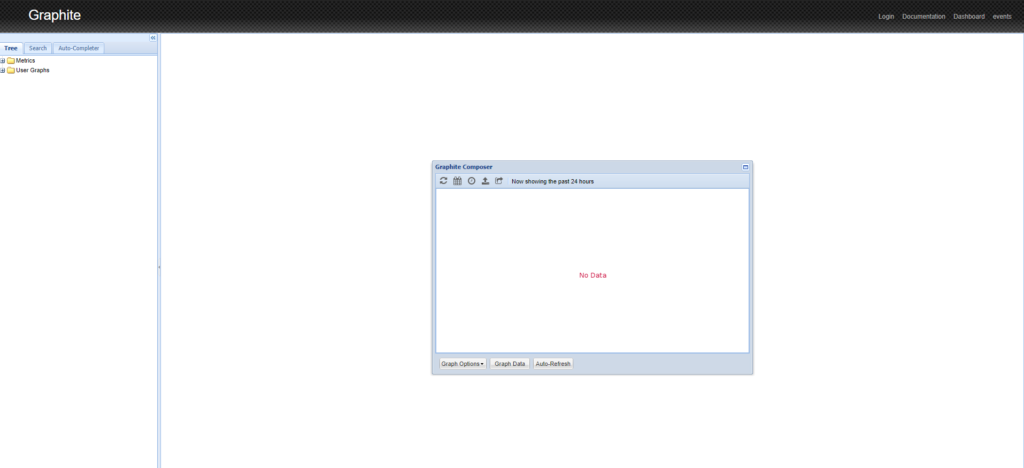
Now, point your browser to http://your-graphite-ip-or-hostname/ and you should get an output like this:
On Icinga Web 2 Server:
Let’s enable graphite feature:
# icinga2 feature enable graphite
We need to define Graphite object, for that we need to create the file /etc/icinga2/features-enabled/graphite.conf
vi /etc/icinga2/features-enabled/graphite.conf
and add the following content:
object GraphiteWriter "graphite" {
  host = "IP OR HOSTNAME OF YOUR GRAPHITE SERVER"
  port = 2003
  enable_send_thresholds = true
}
Now, we need to create a bash script named graphite.sh and add the following content for installing Graphite module from repository:
#!/bin/bash -x

ICINGAWEB_MODULEPATH="/usr/share/icingaweb2/modules"
REPO_URL="https://github.com/icinga/icingaweb2-module-graphite"
TARGET_DIR="${ICINGAWEB_MODULEPATH}/graphite"
MODULE_VERSION="1.1.0"
git clone "${REPO_URL}" "${TARGET_DIR}" --branch v${MODULE_VERSION}
Now give permissions and execute it:
# chmod +x graphite.sh
# ./graphite.sh
You will see an output like this:
+ ICINGAWEB_MODULEPATH=/usr/share/icingaweb2/modules
+ REPO_URL=https://github.com/icinga/icingaweb2-module-graphite
+ TARGET_DIR=/usr/share/icingaweb2/modules/graphite
+ MODULE_VERSION=1.1.0
+ git clone https://github.com/icinga/icingaweb2-module-graphite /usr/share/icingaweb2/modules/graphite --branch v1.1.0
Cloning into '/usr/share/icingaweb2/modules/graphite'...
remote: Enumerating objects: 23, done.
remote: Counting objects: 100% (23/23), done.
remote: Compressing objects: 100% (21/21), done.
remote: Total 2772 (delta 5), reused 7 (delta 2), pack-reused 2749
Receiving objects: 100% (2772/2772), 834.80 KiB | 739.00 KiB/s, done.
Resolving deltas: 100% (1400/1400), done.
Note: checking out 'cb2a94397529f5a4b73d423fe89fabf2b0f064a6'.

You are in 'detached HEAD' state. You can look around, make experimental
changes and commit them, and you can discard any commits you make in this
state without impacting any branches by performing another checkout.

If you want to create a new branch to retain commits you create, you may
do so (now or later) by using -b with the checkout command again. Example:

  git checkout -b new_branch_name
Now, let’s enable graphite module and restart icinga2 service:
# icingacli module enable graphite
# systemctl restart icinga2
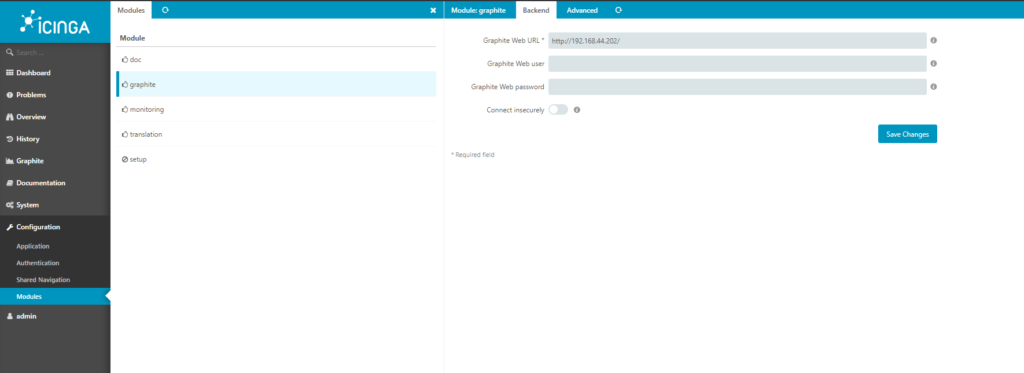
Go to Icinga Web interface, then go to Configuration -> Modules -> graphite -> and then select Backend Tab, at the Graphite Web URL textbox, you need to put Graphite IP or Hostname and then click on Save Changes button.
Now, let’s come back to Graphite Server and let’s edit the file /etc/carbon/storage-schemas.conf, and you will have a content similar to this:
.......
.......


[carbon]
pattern = ^carbon\.
retentions = 60:90d

[default_1min_for_1day]
pattern = .*
retentions = 60s:1d

......
Now, change it to this:
.....
.....

[carbon]
pattern = ^carbon\.
retentions = 60:90d

[icinga2_default]
# intervals like PNP4Nagios uses them per default
pattern = ^icinga2\.
retentions = 1m:2d,5m:10d,30m:90d,360m:4y

[default_1min_for_1day]
pattern = .*
retentions = 60s:1d

......
You see, that now we have a new tag defined named [icinga2_default]. Those are the rules for the retention and the pattern associated to ti.
Let’s remove icinga2 directory and its content:
# rm -rf /var/lib/carbon/whisper/icinga2
Restart carbon-cache service in order to generate new data based on new rule defined:
# systemctl restart carbon-cache
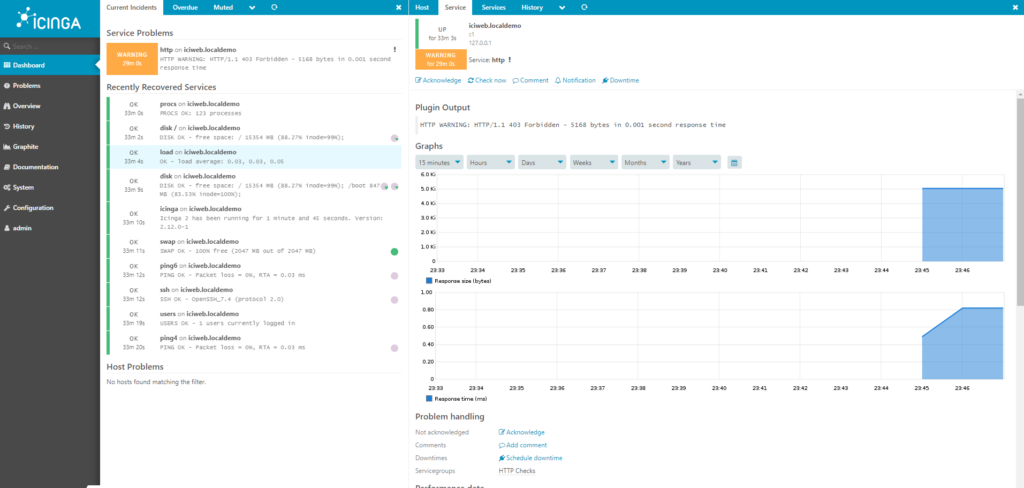
After restarting, just wait for a few minutes, and then you should be able to see some graphs:
Continue enjoying you Icinga Web by adding new features.