INTRODUCTION
The easiest way to get started with Icinga is a single-node installation. If you are new to the Icinga world, here you have a kickstart for installing Icinga 2, Icinga Web 2 and Icinga Director on CentOS 7. With these steps you will have a ready Icinga environment for monitoring your infrastructure.
Step 1: Now update / upgrade your CentOS Linux
yum update -y && yum upgrade -y
Step 2: Install Icinga repository
yum install -y https://packages.icinga.com/epel/icinga-rpm-release-7-latest.noarch.rpm
Step 3: Install EPEL repository
yum install -y epel-release
Step 4: Let’s install some tools we could need later in our system
yum install -y git curl make gcc wget nano vim net-tools tar unzip zip python-devel python-pip python-setuptools
Step 5: Install Icinga 2, enable and start the Icinga 2 service
yum install -y icinga2
systemctl enable icinga2
systemctl start icinga2
systemctl status icinga2
Step 6: Install plugins-all
yum install -y nagios-plugins-all
Step 7: When you make a change into Icinga files and you want to confirm all is correct before restarting, you can run the following command
icinga2 daemon -C
Step 8: If you are going to use SELINUX with Icinga 2, you need to install the following packages, and set rules for port 80 and 443
yum install -y icinga2-selinux
Now proceed to apply firewall rules for port 80, as a best practice you should be using https and open 443 as well.
firewall-cmd --add-service=http && firewall-cmd --permanent --add-service=http
Step 9: Let’s configure vim to use Icinga syntax colors
yum install -y vim-icinga2
Now, create the following file vim ~/.vimrc and add the following: syntax on
Now let’s test that syntax colors are working, open the file templates.conf with vim editor: vim /etc/icinga2/conf.d/templates.conf
Step 10: Installing and configuring MySQL as database for our Icinga:
yum install -y mariadb-server mariadb
systemctl enable mariadb
systemctl start mariadb
mysql_secure_installation [ below details of this step...]
Enter current password for root (enter for none): [  Hit enter ]
Set root password? [Y/n] Y
New password: [ Enter new passowrd ]
Re-enter new password: [ Enter again new password ]
Remove anonymous users? [Y/n] Y
Disallow root login remotely? [Y/n] Y
Remove test database and access to it? [Y/n] Y
Reload privilege tables now? [Y/n] Y
Now let’s install IDO for MySQL
yum install icinga2-ido-mysql
Login to your MySQL
mysql -u root -p
Create the following databases for Icinga and Icinga Web:
CREATE DATABASE icinga;
Now, configure the permissions for the database created in the step before:
GRANT SELECT, INSERT, UPDATE, DELETE, DROP, CREATE VIEW, INDEX, EXECUTE ON icinga.* TO 'icinga'@'localhost' IDENTIFIED BY 'icinga';
Create the database for Icinga Web 2:
CREATE DATABASE icingaweb;
Now, configure permissions:
GRANT ALL PRIVILEGES ON icingaweb.* TO 'icingaweb'@'localhost' IDENTIFIED BY 'icingaweb';
Deploy privileges:
FLUSH PRIVILEGES;
Now, quit from the database:
QUIT
Step 11: Now we need to import the Icinga 2 schema for our MySQL.
mysql -u root -p icinga < /usr/share/icinga2-ido-mysql/schema/mysql.sql
Step 12: Enable the ido-mysql module in Icinga
icinga2 feature enable ido-mysql
Now, restart icinga2 service
systemctl restart icinga2
Step 13: Install Web Server
yum install -y httpd
systemctl enable httpd
systemctl start httpd
Step 14: Configure Icinga 2 REST ApiUser
icinga2 api setup
Now, edit the file vim /etc/icinga2/conf.d/api-users.conf and add the following lines:
object ApiUser "icingaweb2" {
password = "Wijsn8Z9eRs5E25d"
permissions = [ "status/query", "actions/*", "objects/modify/*", "objects/query/*" ]
}
Don’t forget to edit vim /etc/icinga2/features-enabled/ido-mysql.conf according to the configuration needed. Check an example below:
/**
* The IdoMysqlConnection type implements MySQL support
* for DB IDO.
*/
object IdoMysqlConnection "ido-mysql" {
user = "icinga"
password = "icinga"
host = "localhost"
database = "icinga"
}
Now proceed to restart icinga2 service
systemctl restart icinga2
Step 15: Let’s install the SCL repository, we’ll need it for Icinga Web 2
yum install -y centos-release-scl
Step 16: Proceed to install Icinga Web and Icinga CLI
yum install -y icingaweb2 icingacli
Step 17: Install SELINUX for Icinga Web 2 in case you could need it
yum install -y icingaweb2-selinux
Step 18: Install PHP FPM and other PHP modules we could need
yum install -y rh-php73-php-mysqlnd rh-php73-php-fpm sclo-php73-php-pecl-imagick rh-php73-php-ldap rh-php73-php-pgsql rh-php73-php-xmlrpc rh-php73-php-intl rh-php73-php-gd rh-php73-php-pdo rh-php73-php-soap rh-php73-php-posix rh-php73-php-cli
Then start and enable the service:
systemctl start rh-php73-php-fpm.service
systemctl enable rh-php73-php-fpm.service
systemctl restart httpd
systemctl restart rh-php73-php-fpm.service
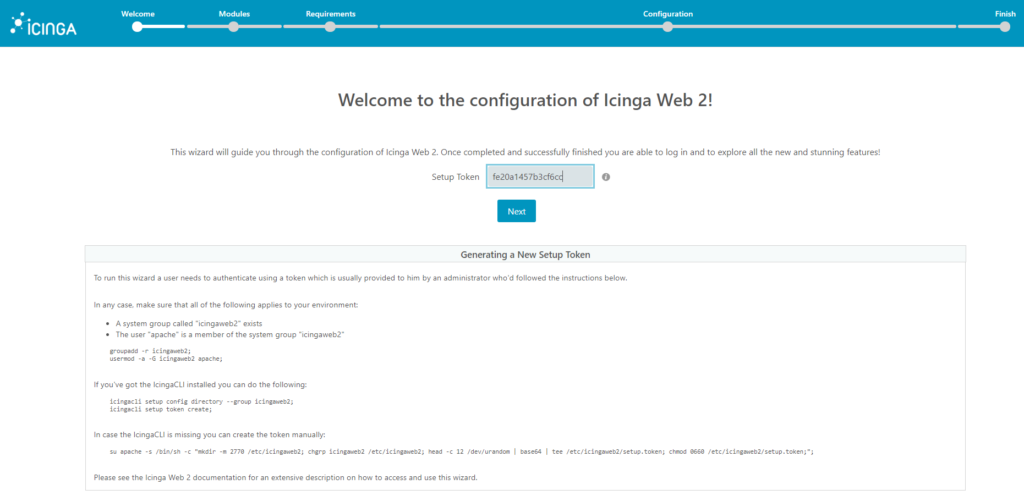
Now, let’s create the token for finishing Icinga Web 2 configuration through web interface:
icingacli setup token create
Step 19: Icinga Web 2 Configuration
Point your browser to :
http://icinga-server/icingaweb2/
1. It will request the generated token, paste it and click on next
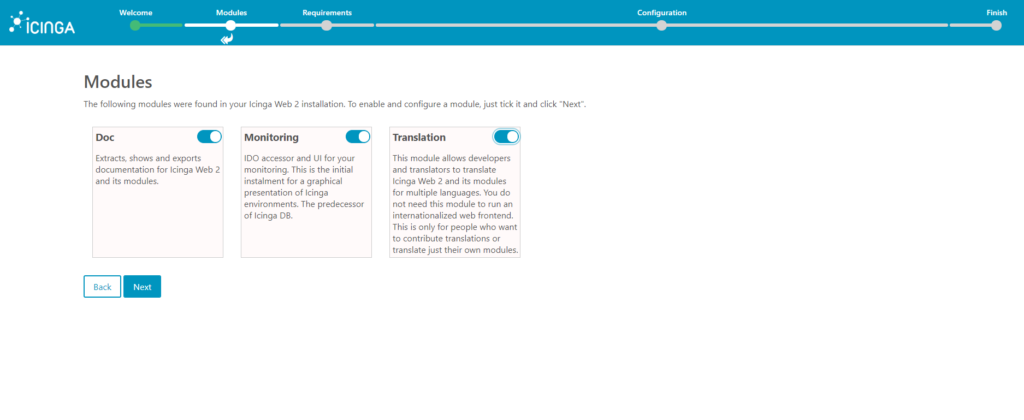
2. Monitoring modules is enable by default, you can enable Doc and Translation optionally and then click next
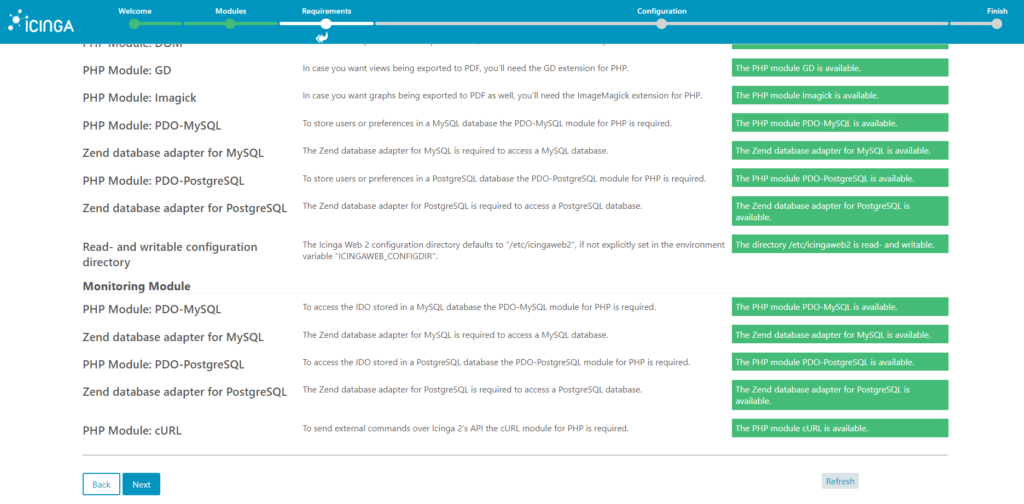
3. Now all PHP Modules should be green, in case you have some in yellow, it is recommended to fix it before moving forward, if all are green, just click next
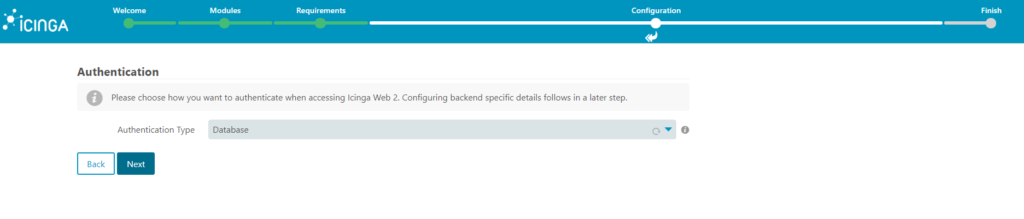
4. By default we are going to use database authentication
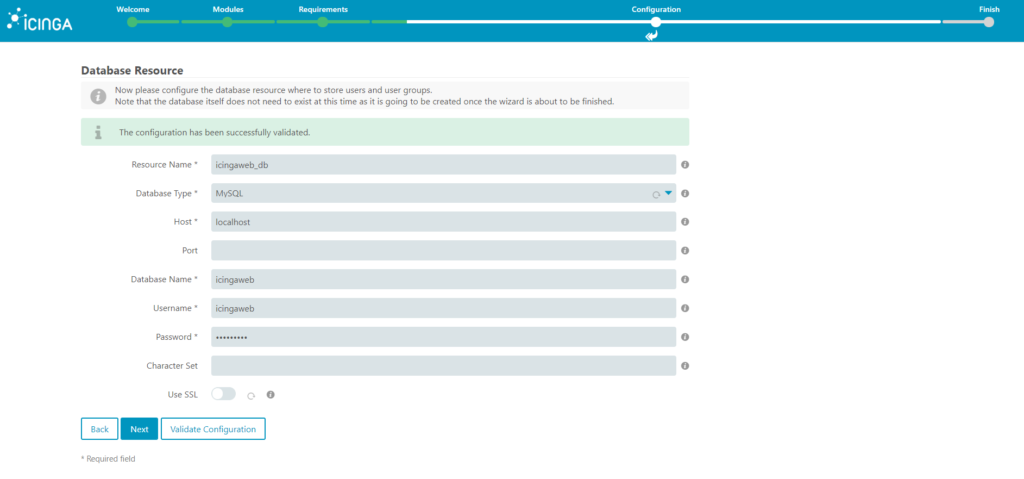
5. Configure the database resource, here we are going to use the credentials we created for icingaweb database. You need to set the parameters localhost, database name, username and password. Before clicking next, you can click on Validate Configuration in order to validate that the credentials are working correctly.
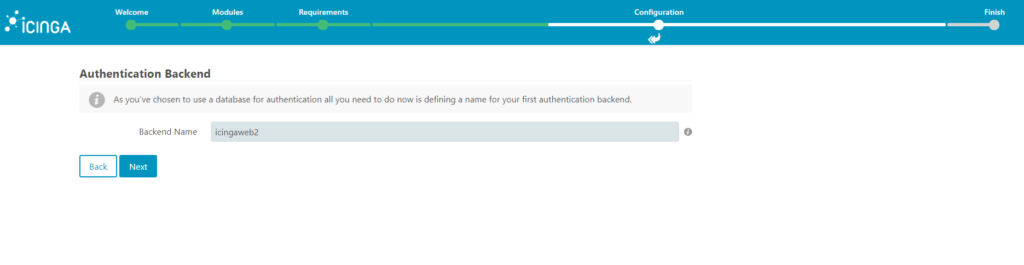
6. Let’s configure the Authentication Backend, this one was defined in the api-users.conf file, just click next.
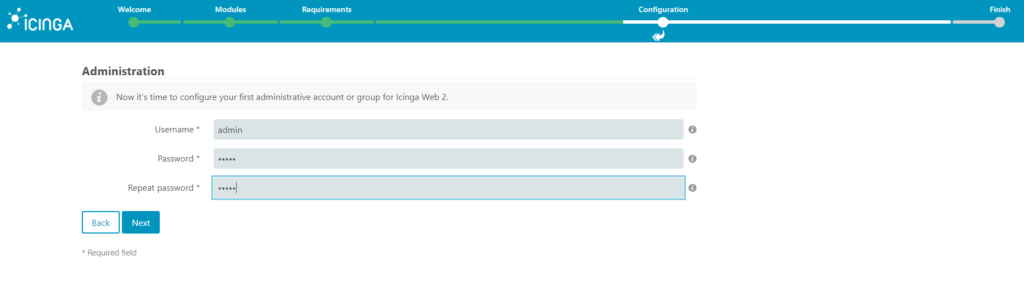
7. In the administration screen you define the username and password for login to the Icinga Web interface.
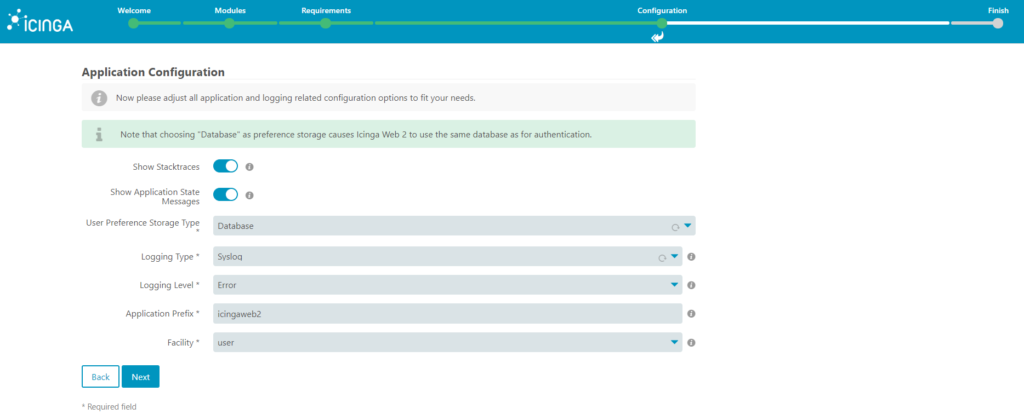
8. In the application configuration screen you just need to click next, you can change adjust it according your needs, but the defaults are fine for now.
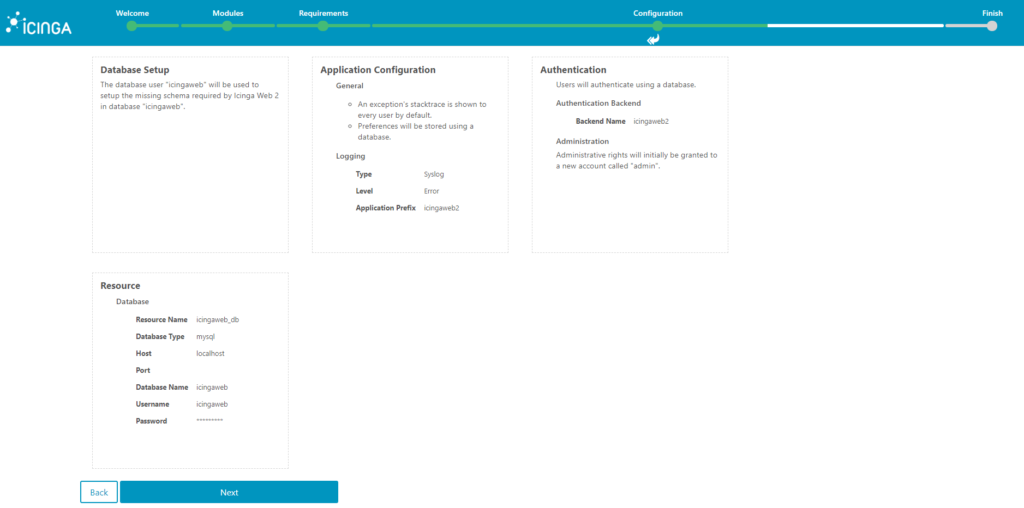
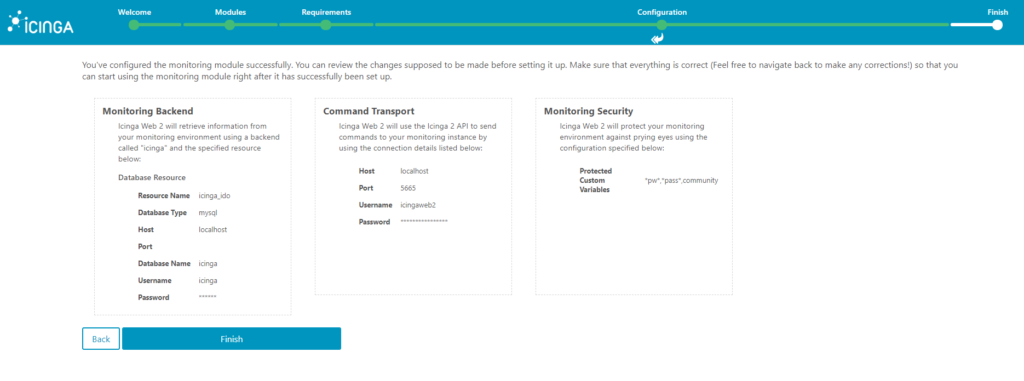
9. Now you have a resume screen, here just need to click next.
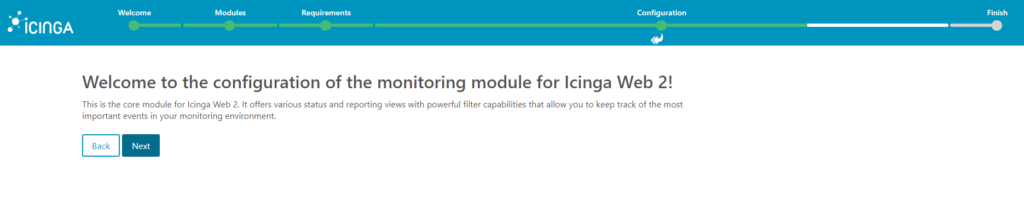
10. Now, you can configure monitoring module for Icinga Web 2, only click next.
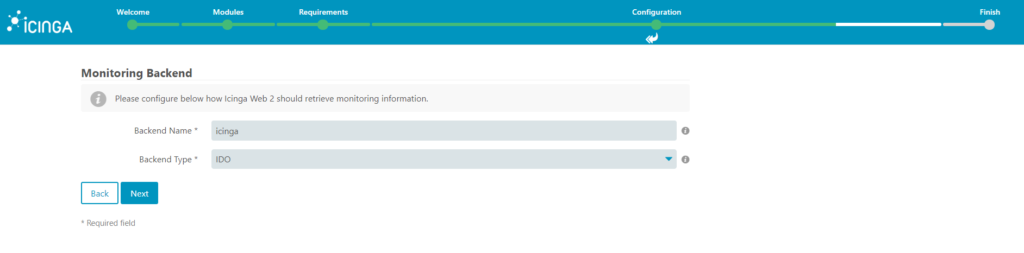
11. Monitoring backend will bring the information by default, here only click next
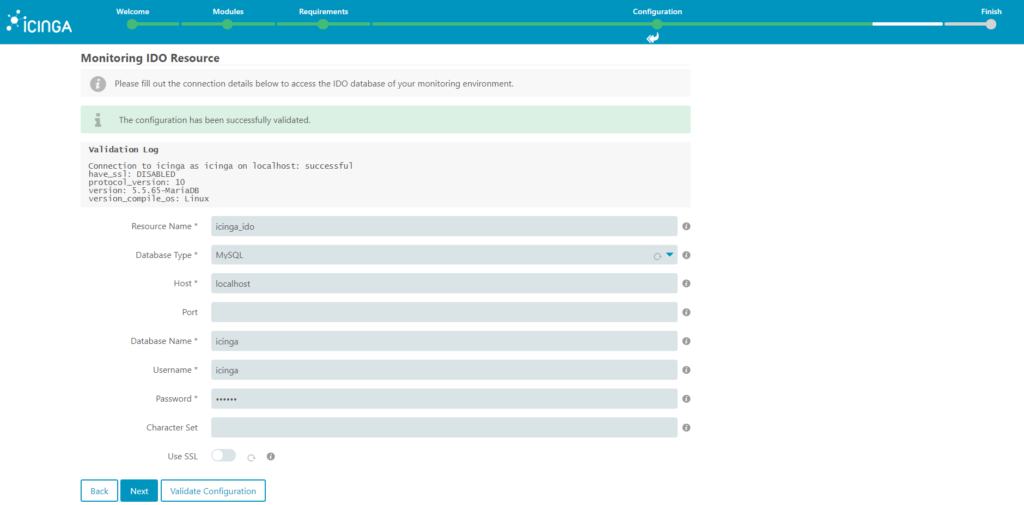
12. Now, let’s configure the monitoring IDO Resource, here we’ll use the credentials we created for the icinga database. Here you need to set the parameters localhost, database name, username and password. Before clicking next, you can click on Validate Configuration in order to validate that the credentials are working correctly.
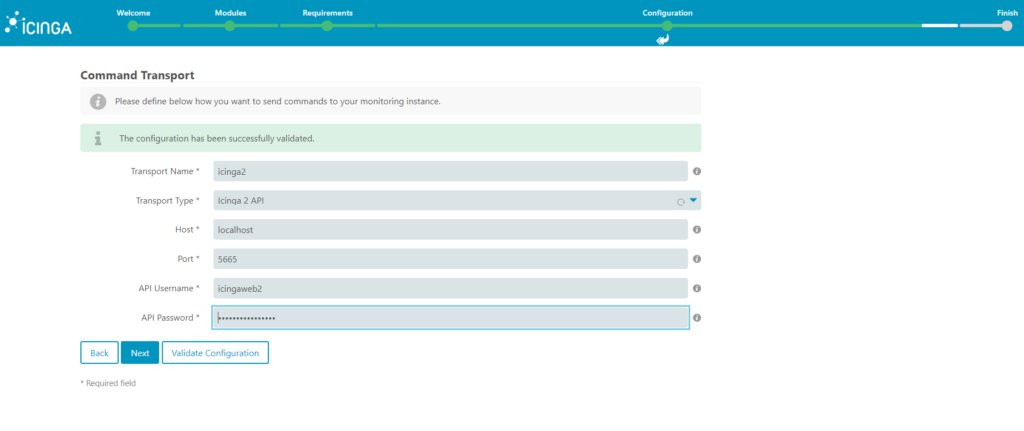
13. In steps before you defined an api user in the api-user.conf file, now you need to define host, api username and api password. Before clicking next, you can click on Validate Configuration in order to validate that the credentials are working correctly.
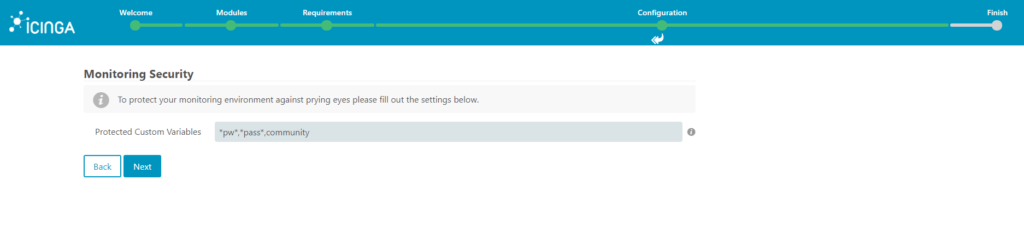
14. In the monitoring security screen you only need to click next.
15. Now you have a sucess screen for Icinga Web 2, you only need to click Finish.
16. You should have now a congratulations screen with a Login to Icinga Web available, only click on that button for logging in into Icinga Web 2.
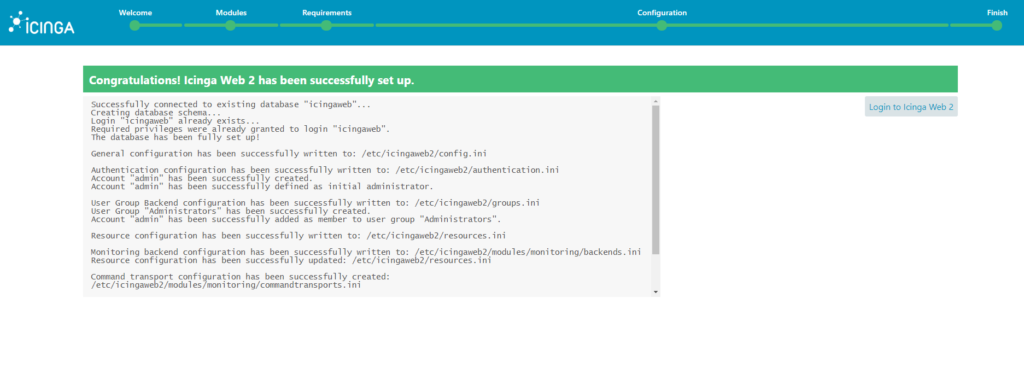
17. Now you have your login, remember to use the credentials defined in step 7
ICINGA DIRECTOR
Step 1: Create database and permission for director
Log in into MariaDB:
mysql -u root -p
Now, let’s create the database and set the user with its permissions:
CREATE DATABASE director CHARACTER SET 'utf8';
GRANT ALL ON director.* TO 'director'@'localhost' IDENTIFIED BY 'director';
FLUSH PRIVILEGES;
QUIT
Step 2: Create a bash file with the following content, give execution permission, this will facilitate to install Icinga Director and its dependencies.
vim director.sh
------- CONTENT OF THE FILE STARTS HERE -----------------------
#!/bin/bash
ICINGAWEB_MODULEPATH="/usr/share/icingaweb2/modules"
REPO_URL="https://github.com/icinga/icingaweb2-module-director"
TARGET_DIR="${ICINGAWEB_MODULEPATH}/director"
MODULE_VERSION="1.7.2"
git clone "${REPO_URL}" "${TARGET_DIR}" --branch v${MODULE_VERSION}
MODULE_NAME=incubator
MODULE_VERSION=v0.5.0
REPO="https://github.com/Icinga/icingaweb2-module-${MODULE_NAME}"
MODULES_PATH="/usr/share/icingaweb2/modules"
git clone ${REPO} "${MODULES_PATH}/${MODULE_NAME}" --branch "${MODULE_VERSION}"
icingacli module enable "${MODULE_NAME}"
MODULE_NAME=ipl
MODULE_VERSION=v0.5.0
REPO="https://github.com/Icinga/icingaweb2-module-${MODULE_NAME}"
MODULES_PATH="/usr/share/icingaweb2/modules"
git clone ${REPO} "${MODULES_PATH}/${MODULE_NAME}" --branch "${MODULE_VERSION}"
icingacli module enable "${MODULE_NAME}"
MODULE_NAME=reactbundle
MODULE_VERSION=v0.7.0
REPO="https://github.com/Icinga/icingaweb2-module-${MODULE_NAME}"
MODULES_PATH="/usr/share/icingaweb2/modules"
git clone ${REPO} "${MODULES_PATH}/${MODULE_NAME}" --branch "${MODULE_VERSION}"
icingacli module enable "${MODULE_NAME}"
------- CONTENT OF THE FILE ENDS HERE -----------------------
Now give permissions: chmod +x director.sh
Run the script: ./director.sh
Let’s load the schema for the director database:
mysql -u root -p director < /usr/share/icingaweb2/modules/director/schema/mysql.sql
After executing the bash script and load the schema, then proceed to enable the module:
icingacli module enable director
You need now to log in into your Icinga Web, and create a new resource. Go to Configuration -> Application -> Resources. Then click Create New Resource, you need to set Resource Name, Database Name, Username, Password and Character Set. After that click on Validate Configuration, and if everything is OK, then click on Save Changes. During the Kickstart process of Icinga Director you will need to provide the credentials for an ApiUser, you can use the root user defined in api-users.conf.
Now create a file named director-service.sh, give execution permission and execute it
------- CONTENT OF THE FILE STARTS HERE -----------------------
#!/bin/bash
useradd -r -g icingaweb2 -d /var/lib/icingadirector -s /bin/false icingadirector
install -d -o icingadirector -g icingaweb2 -m 0750 /var/lib/icingadirector
MODULE_PATH=/usr/share/icingaweb2/modules/director
cp "${MODULE_PATH}/contrib/systemd/icinga-director.service" /etc/systemd/system/
systemctl daemon-reload
systemctl enable icinga-director.service
systemctl start icinga-director.service
------- CONTENT OF THE FILE ENDS HERE -----------------------
Give execution permissions: chmod +x director-services.sh
Execute the script: ./director-service.sh
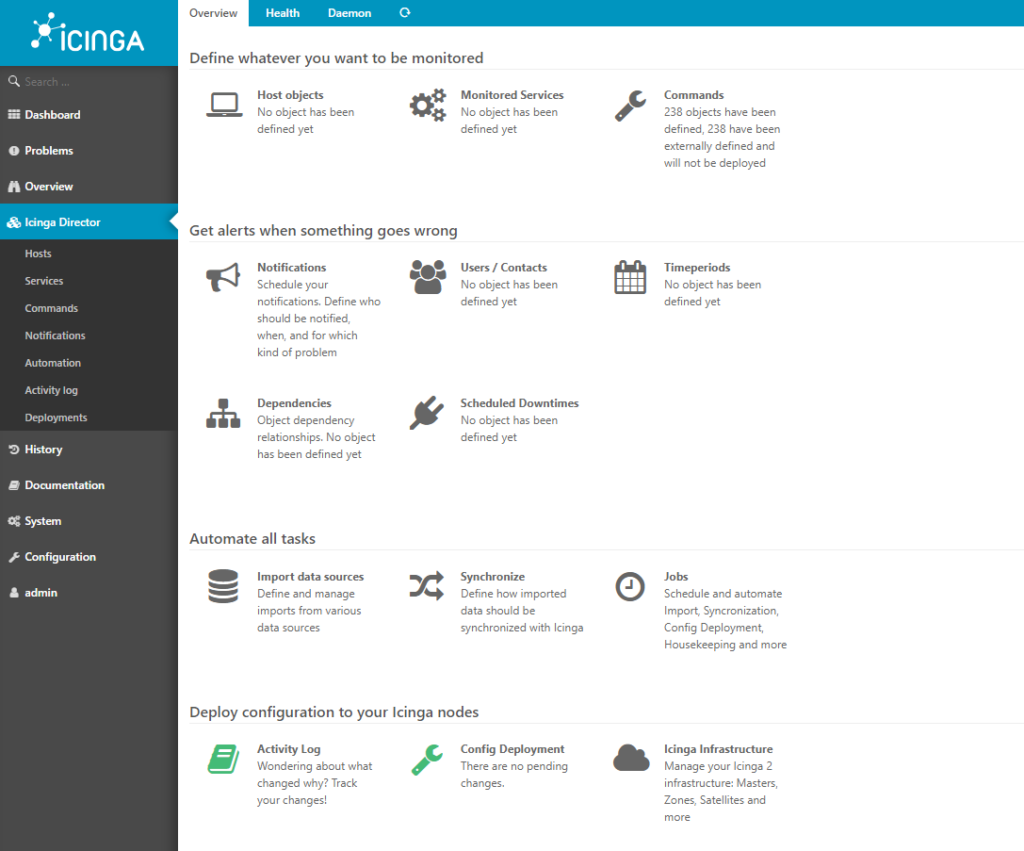
Now you will see in the Activity Log in the Icinga Director menu option that there will be orange alerts. When you click there, you will see in the center of the screen a message Deploy ### pending changes, where ### is a number according to pending changes, just click the link to deploy them.
Now you are ready to take advantage of the benefits of using Director.