Import and Synchronization
Icinga Director offers very powerful mechanisms when it comes to fetching data from external data sources.
The following examples should give you a quick idea of what you might want to use this feature for. Please note that Import Data Sources are implemented as hooks in Director. This means that it is absolutely possible and probably very easy to create custom data sources for whatever kind of data you have. And you do not need to modify the Director source code for this, you can ship your very own importer in your very own Icinga Web 2 module.
Examples
Import Servers from a CMDB
Create a new import source
Importing data from a SQL database is pretty easy. We use a CMDB table listing newly provisioned servers as an example source:
You must formerly have configured a corresponding database resource in your Icinga Web. Then you write the query that selects the columns you care about.
The only tricky part here is the key column. You must choose one property as your key column, and it should correspond to the desired object name for the objects you are going to import. Rows duplicating this property will be considered erroneous, the Import would fail.
Property modifiers
SQL databases provide very powerful modifiers themselves. With a handcrafted query you can already solve lots of data conversion problems. Sometimes this is not possible, or you would rather keep the query simple and let Director do the conversion. Some sources (like plain files or LDAP) do not even offer such features in the first place.
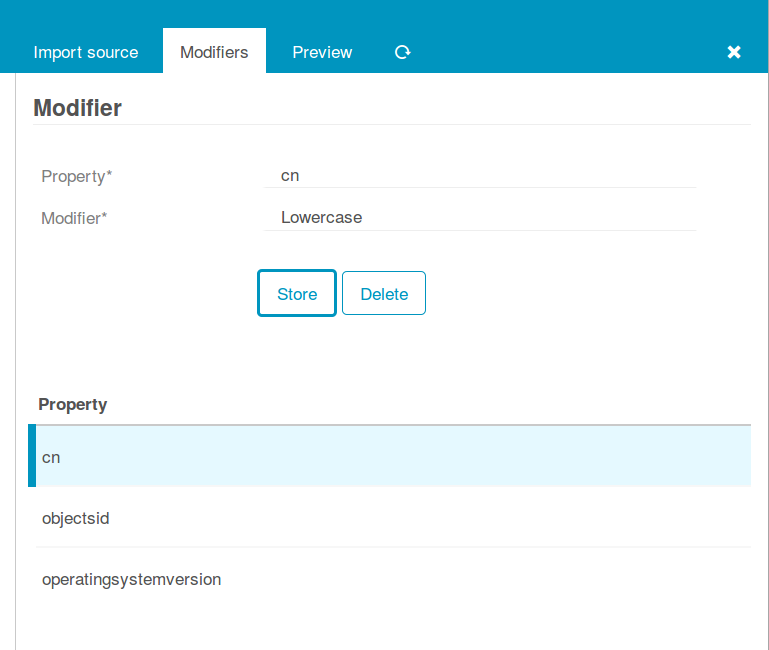
This is where property modifiers jump in to the rescue. Your object names are uppercase and you hate this? Use the lowercase modifier:
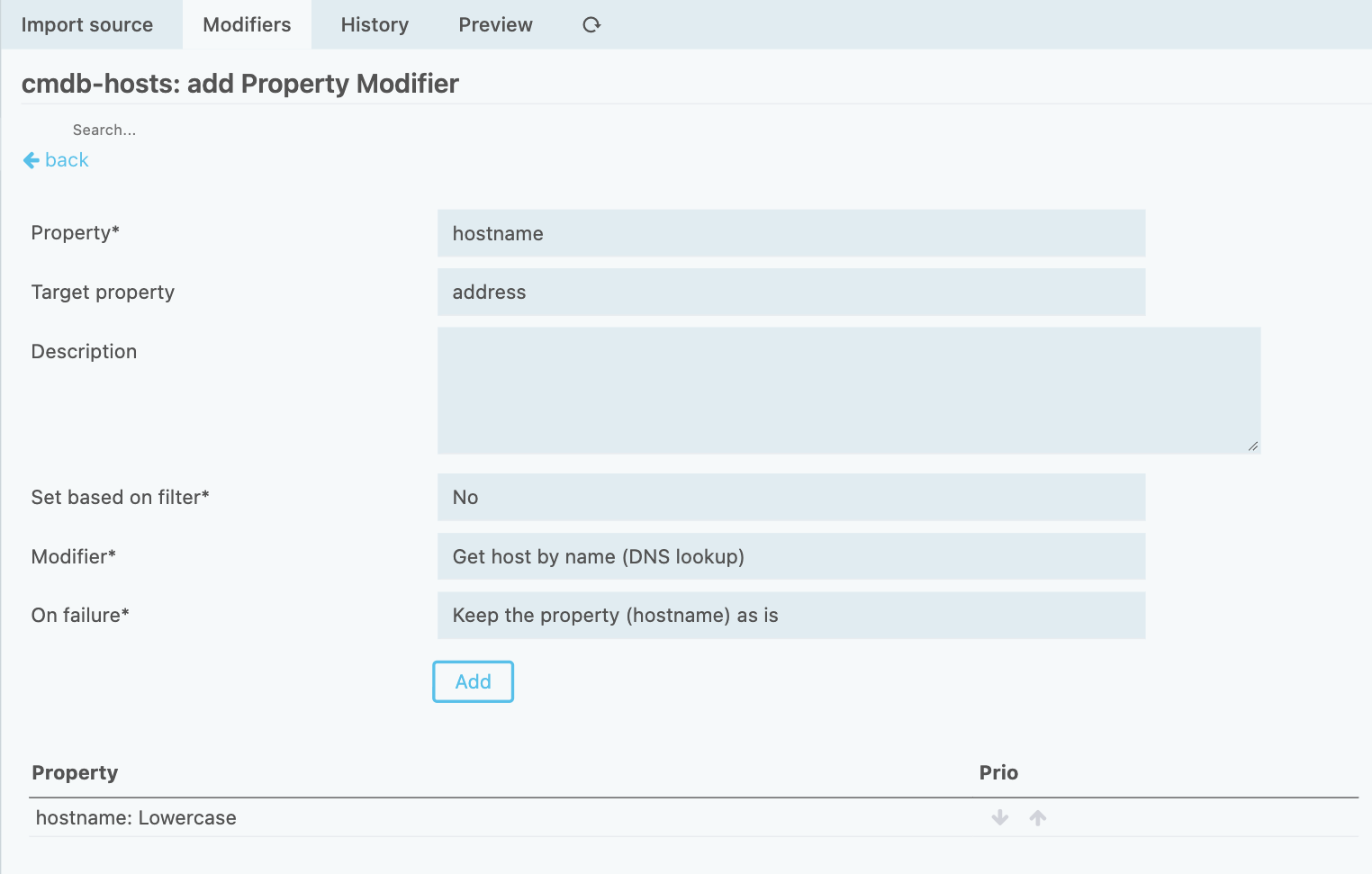
Your source only gives you a hostname and no address? Look it up and store it in a dedicated property:
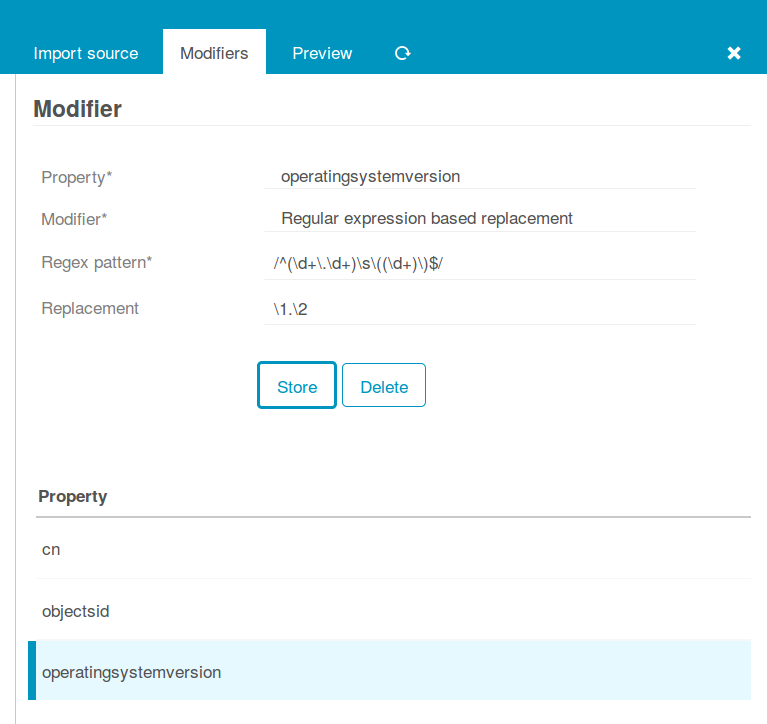
Your source dumps a release codename you don’t care about right into the value? Regular expressions are able to fix everything:
Preview
A quick look at the preview confirms that we reached a good point, that’s the data we want:
Configure synchronization
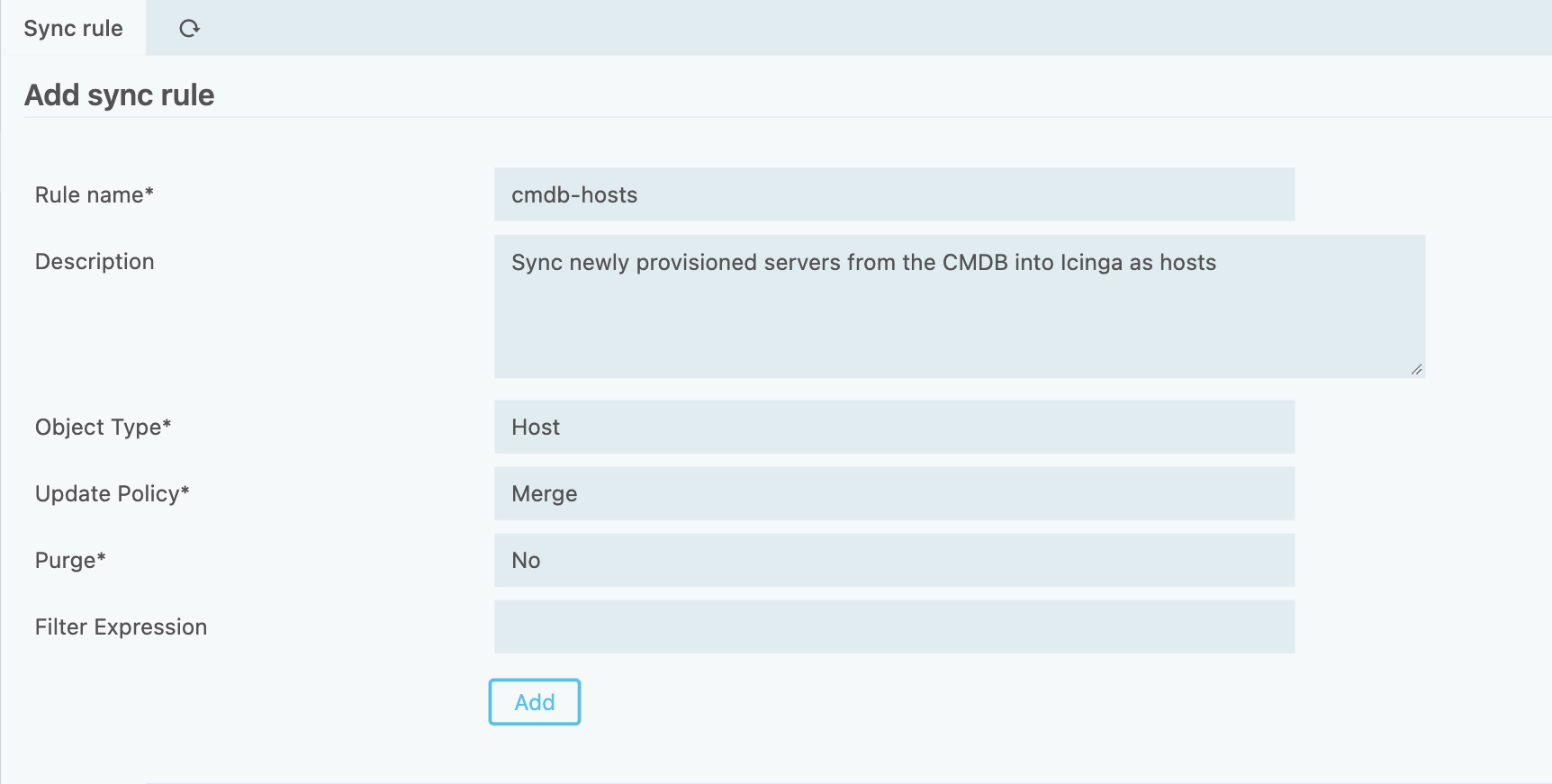
When creating a Synchronization rule, you must decide which Icinga objects you want to work with. You could decide to use the same import source in various rules with different filters and properties.
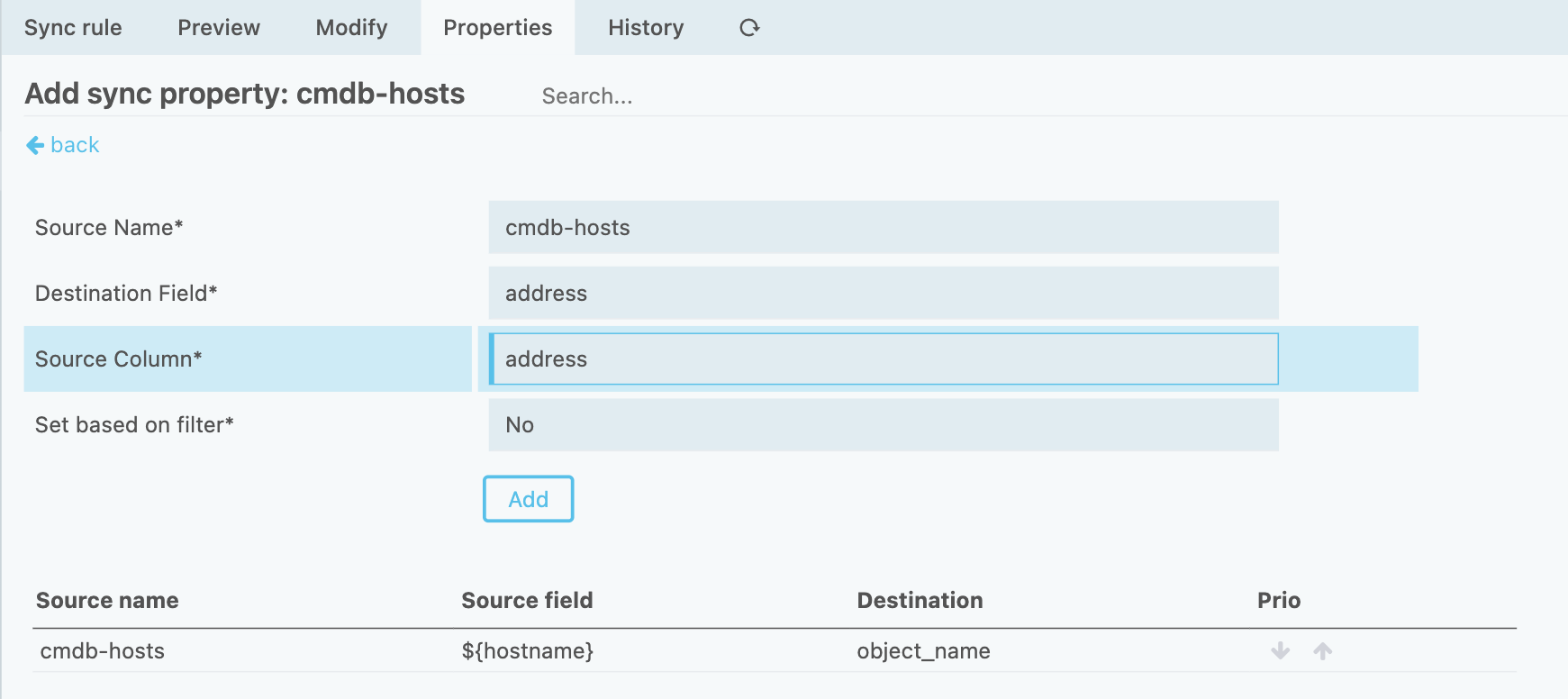
For every property you must decide whether and how it should be synchronized. You can also define custom expressions, combine multiple source fields, set custom properties based on custom conditions and so on.
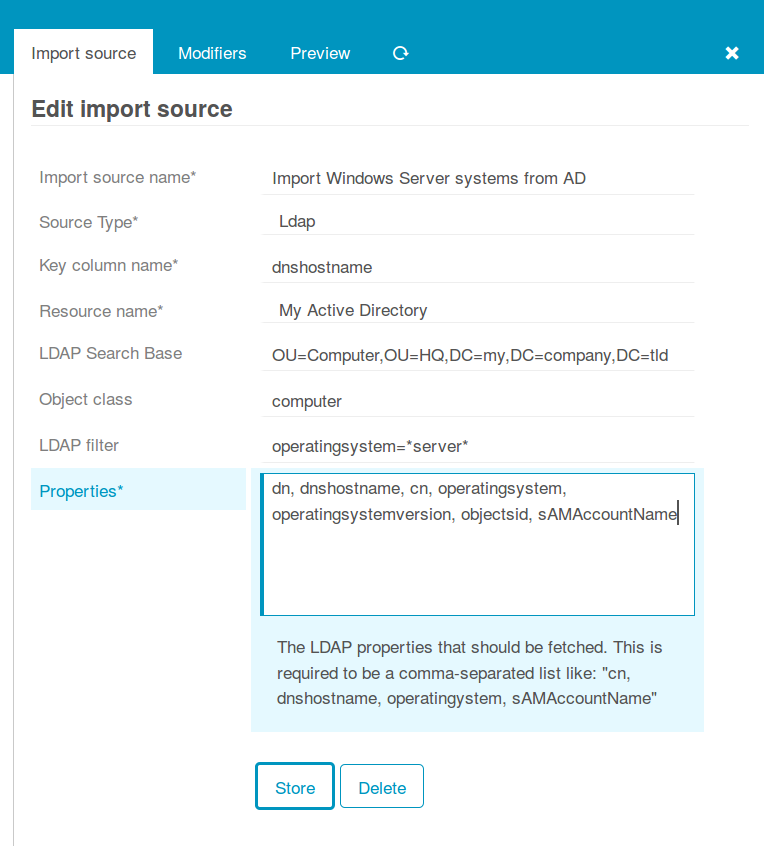
Import Servers from LDAP or Active Directory
Director can import hosts from an LDAP directory, including Microsoft Active Directory. An import source selects the directory entries and attributes to fetch. A sync rule maps those attributes to Icinga hosts.
Create a new import source
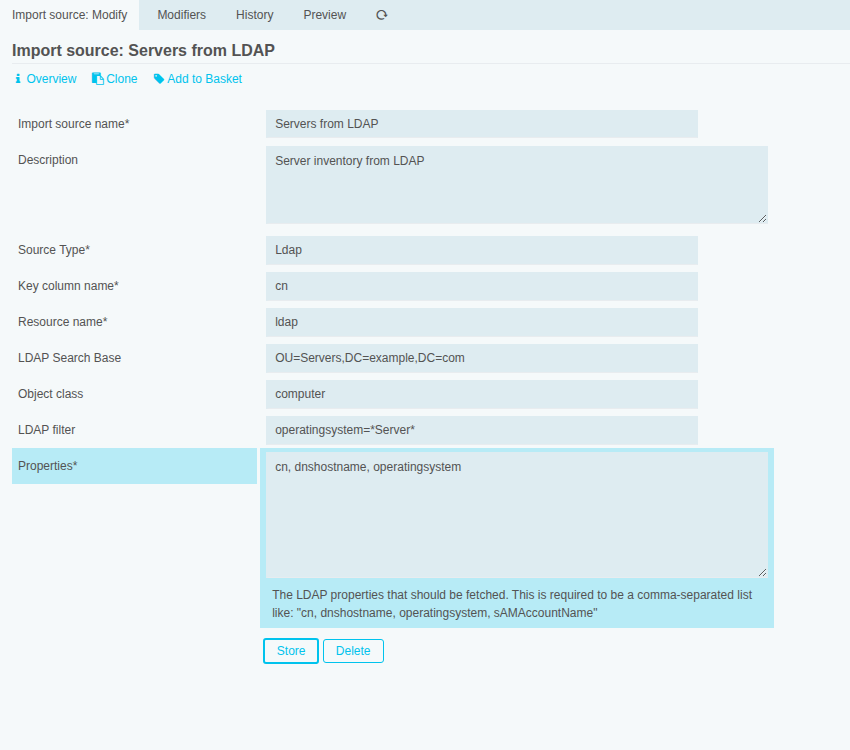
First configure an LDAP resource in Icinga Web with a bind account that can read the required entries and attributes. Add an import source in Director, select Ldap as the source type, and select that resource.
Set the search base to the branch containing your servers. Choose the object class and list the attributes to fetch in Properties, separated by commas. For example, use these settings to import Windows servers from Active Directory:
| Setting | Example value |
|---|---|
| Key column name | cn |
| LDAP Search Base | OU=Servers,DC=example,DC=com |
| Object class | computer |
| LDAP filter | operatingsystem=*Server* |
| Properties | cn, dnshostname, operatingsystem |
Replace the search base with your directory’s distinguished name. The filter
selects computers whose operating system contains Server. Enter this simple
filter without outer parentheses, as Icinga Web adds them. Omit or adjust it
if you also want other computers. For other LDAP directories, use the object
class and attributes defined by their schema.
Choose a key column that is present and unique for every imported row. Here,
cn also supplies the Icinga host name. If common names repeat across your
directory, narrow the search base or use a unique attribute such as
dnshostname. Include the chosen key column in Properties.
Property modifiers and preview
LDAP sources do not provide SQL-style expressions for transforming values.
Use Director’s property modifiers to prepare the imported data. For example,
add a Lowercase modifier for cn and leave Target property empty to
update the name in place. Make sure the resulting names remain unique.
Active Directory stores objectSid as binary data. To use it as a custom
variable, include objectSid in the import source’s Properties, add a
modifier for it, and select Decode a binary object SID (MSAD). Leave
Target property empty to replace the binary value with its readable SID.
If needed, use Regular expression based replacement to normalize operating
system version strings, or Get host by name (DNS lookup) to resolve
dnshostname into a separate address property. DNS lookups require the names
to be resolvable from the system running the import.
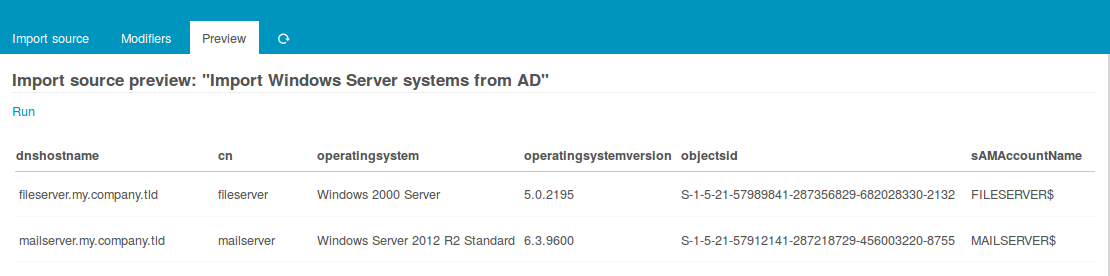
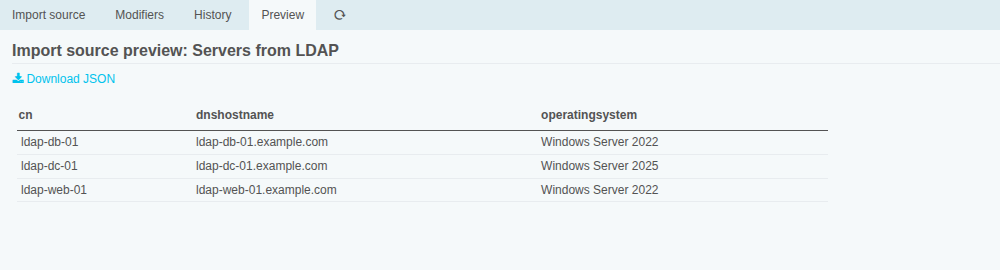
Open Preview to check the selected rows and the results of your modifiers:
Configure synchronization
Create a sync rule with object type Host, update policy Merge, and Purge set to No. Add the following properties, selecting the LDAP import source for each one:
| Destination | Source |
|---|---|
object_name |
${cn} |
address |
${dnshostname} |
vars.operatingsystem |
${operatingsystem} |
import |
An existing host template selected under Inheritance (import) |
Choose a host template that provides the check command and other settings required by your hosts. The address mapping uses the DNS name. Use a resolved address property instead if your checks require an IP address.
For the custom variable, select Custom variable (vars.), enter
operatingsystem, and use the replace merge policy.
For an Active Directory source with the SID modifier, add a mapping from
${objectSid} to vars.objectSid. To synchronize other attributes, such as
operatingsystemversion, include them in the import source’s Properties
and add the corresponding sync mappings.
Run the import and synchronization
After configuring an import source and its sync rules, use the following steps for either example. Import runs fetch and store source data. Synchronization uses the imported data to create or update Director objects.
- Open the import source’s Preview to check the selected rows and property modifiers.
- Select Trigger Import Run to store the data for synchronization.
- Open the sync rule’s Preview to review the proposed object changes, then run the synchronization.
- Deploy the resulting configuration when it is ready for monitoring.
Create Import and Sync jobs to run imports and synchronization on a schedule. See Jobs for details.