Distributed Monitoring with Master, Satellites, and Clients 
This chapter will guide you through the setup of a distributed monitoring environment, including high-availability clustering and setup details for the Icinga 2 client.
Roles: Master, Satellites, and Clients 
Icinga 2 nodes can be given names for easier understanding:
- A
masternode which is on top of the hierarchy. - A
satellitenode which is a child of asatelliteormasternode. - A
clientnode which works as anagentconnected tomasterand/orsatellitenodes.
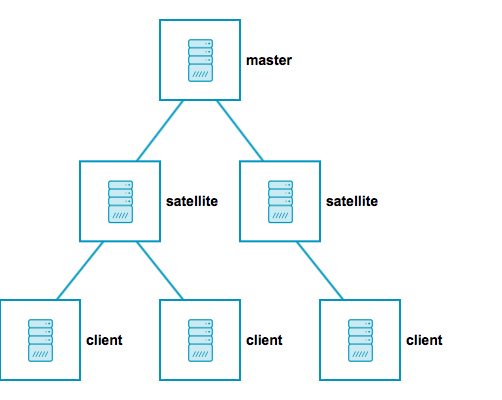
Rephrasing this picture into more details:
- A
masternode has no parent node. - A
masternode is where you usually install Icinga Web 2. - A
masternode can combine executed checks from child nodes into backends and notifications. - A
satellitenode has a parent and a child node. - A
satellitenode may execute checks on its own or delegate check execution to child nodes. - A
satellitenode can receive configuration for hosts/services, etc. from the parent node. - A
satellitenode continues to run even if the master node is temporarily unavailable. - A
clientnode only has a parent node. - A
clientnode will either run its own configured checks or receive command execution events from the parent node.
The following sections will refer to these roles and explain the differences and the possibilities this kind of setup offers.
Tip: If you just want to install a single master node that monitors several hosts (i.e. Icinga 2 clients), continue reading – we’ll start with simple examples. In case you are planning a huge cluster setup with multiple levels and lots of clients, read on – we’ll deal with these cases later on.
The installation on each system is the same: You need to install the Icinga 2 package and the required plugins.
The required configuration steps are mostly happening on the command line. You can also automate the setup.
The first thing you need learn about a distributed setup is the hierarchy of the single components.
Zones 
The Icinga 2 hierarchy consists of so-called zone objects. Zones depend on a parent-child relationship in order to trust each other.
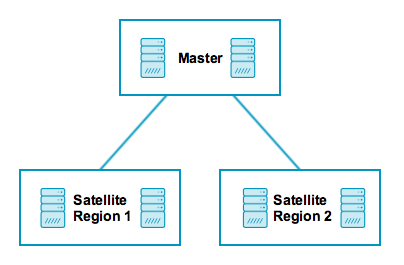
Have a look at this example for the satellite zones which have the master zone as a parent zone:
object Zone "master" {
   //...
}

object Zone "satellite region 1" {
  parent = "master"
  //...
}

object Zone "satellite region 2" {
  parent = "master"
  //...
}
There are certain limitations for child zones, e.g. their members are not allowed
to send configuration commands to the parent zone members. Vice versa, the
trust hierarchy allows for example the master zone to send
configuration files to the satellite zone. Read more about this
in the security section.
client nodes also have their own unique zone. By convention you
can use the FQDN for the zone name.
Endpoints 
Nodes which are a member of a zone are so-called Endpoint objects.
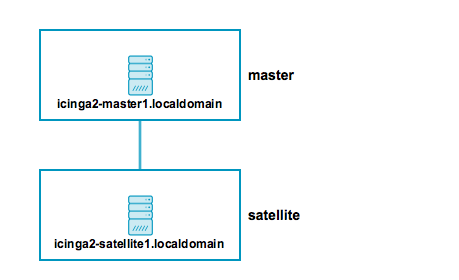
Here is an example configuration for two endpoints in different zones:
object Endpoint "icinga2-master1.localdomain" {
  host = "192.168.56.101"
}

object Endpoint "icinga2-satellite1.localdomain" {
  host = "192.168.56.105"
}

object Zone "master" {
  endpoints = [ "icinga2-master1.localdomain" ]
}

object Zone "satellite" {
  endpoints = [ "icinga2-satellite1.localdomain" ]
  parent = "master"
}
All endpoints in the same zone work as high-availability setup. For
example, if you have two nodes in the master zone, they will load-balance the check execution.
Endpoint objects are important for specifying the connection information, e.g. if the master should actively try to connect to a client.
The zone membership is defined inside the Zone object definition using
the endpoints attribute with an array of Endpoint names.
Note
There is a known problem with >2 endpoints in a zone and a message routing loop. The config validation will log a warning to let you know about this too.
If you want to check the availability (e.g. ping checks) of the node you still need a Host object.
ApiListener 
In case you are using the CLI commands later, you don’t have to write this configuration from scratch in a text editor. The ApiListener object is used to load the TLS certificates and specify restrictions, e.g. for accepting configuration commands.
It is also used for the Icinga 2 REST API which shares the same host and port with the Icinga 2 Cluster protocol.
The object configuration is stored in the /etc/icinga2/features-enabled/api.conf
file. Depending on the configuration mode the attributes accept_commands
and accept_config can be configured here.
In order to use the api feature you need to enable it and restart Icinga 2.
icinga2 feature enable api
Conventions 
By convention all nodes should be configured using their FQDN.
Furthermore, you must ensure that the following names are exactly the same in all configuration files:
- Host certificate common name (CN).
- Endpoint configuration object for the host.
- NodeName constant for the local host.
Setting this up on the command line will help you to minimize the effort. Just keep in mind that you need to use the FQDN for endpoints and for common names when asked.
Security 
While there are certain mechanisms to ensure a secure communication between all nodes (firewalls, policies, software hardening, etc.), Icinga 2 also provides additional security:
- SSL certificates are mandatory for communication between nodes. The CLI commands help you create those certificates.
- Child zones only receive updates (check results, commands, etc.) for their configured objects.
- Child zones are not allowed to push configuration updates to parent zones.
- Zones cannot interfere with other zones and influence each other. Each checkable host or service object is assigned to one zone only.
- All nodes in a zone trust each other.
- Config sync and remote command endpoint execution is disabled by default.
The underlying protocol uses JSON-RPC event notifications exchanged by nodes. The connection is secured by TLS. The message protocol uses an internal API, and as such message types and names may change internally and are not documented.
Zones build the trust relationship in a distributed environment. If you do not specify a zone for a client and specify the parent zone, its zone members e.g. the master instance won’t trust the client.
Building this trust is key in your distributed environment. That way the parent node knows that it is able to send messages to the child zone, e.g. configuration objects, configuration in global zones, commands to be executed in this zone/for this endpoint. It also receives check results from the child zone for checkable objects (host/service).
Vice versa, the client trusts the master and accepts configuration and commands if enabled in the api feature. If the client would send configuration to the parent zone, the parent nodes will deny it. The parent zone is the configuration entity, and does not trust clients in this matter. A client could attempt to modify a different client for example, or inject a check command with malicious code.
While it may sound complicated for client setups, it removes the problem with different roles and configurations for a master and a client. Both of them work the same way, are configured in the same way (Zone, Endpoint, ApiListener), and you can troubleshoot and debug them in just one go.
Versions and Upgrade 
It generally is advised to use the newest releases with the same version on all instances. Prior to upgrading, make sure to plan a maintenance window.
The Icinga project aims to allow the following compatibility:
master (2.9) >= satellite (2.8) >= clients (2.7)
Older client versions may work, but there’s no guarantee. Always keep in mind that older versions are out of support and can contain bugs.
In terms of an upgrade, ensure that the master is upgraded first, then involved satellites, and last the Icinga 2 clients. If you are on v2.8 currently, first upgrade the master instance(s) to 2.9, and then proceed with the satellites. Things are getting easier with any sort of automation tool (Puppet, Ansible, etc.).
Releases and new features may require you to upgrade master/satellite instances at once, this is highlighted in the upgrading docs if needed. One example is the CA Proxy and on-demand signing feature available since v2.8 where all involved instances need this version to function properly.
Master Setup 
This section explains how to install a central single master node using
the node wizard command. If you prefer to do an automated installation, please
refer to the automated setup section.
Install the Icinga 2 package and setup the required plugins if you haven’t done so already.
Note: Windows is not supported for a master node setup.
The next step is to run the node wizard CLI command. Prior to that
ensure to collect the required information:
| Parameter | Description |
|---|---|
| Common name (CN) | Required. By convention this should be the host’s FQDN. Defaults to the FQDN. |
| Master zone name | Optional. Allows to specify the master zone name. Defaults to master. |
| Global zones | Optional. Allows to specify more global zones in addition to global-templates and director-global. Defaults to n. |
| API bind host | Optional. Allows to specify the address the ApiListener is bound to. For advanced usage only. |
| API bind port | Optional. Allows to specify the port the ApiListener is bound to. For advanced usage only (requires changing the default port 5665 everywhere). |
| Disable conf.d | Optional. Allows to disable the include_recursive "conf.d" directive except for the api-users.conf file in the icinga2.conf file. Defaults to y. Configuration on the master is discussed below. |
The setup wizard will ensure that the following steps are taken:
- Enable the
apifeature. - Generate a new certificate authority (CA) in
/var/lib/icinga2/caif it doesn’t exist. - Create a certificate for this node signed by the CA key.
- Update the zones.conf file with the new zone hierarchy.
- Update the ApiListener and constants configuration.
- Update the icinga2.conf to disable the
conf.dinclusion, and add theapi-users.conffile inclusion.
Here is an example of a master setup for the icinga2-master1.localdomain node on CentOS 7:
[root@icinga2-master1.localdomain /]# icinga2 node wizard

Welcome to the Icinga 2 Setup Wizard!

We will guide you through all required configuration details.

Please specify if this is a satellite/client setup ('n' installs a master setup) [Y/n]: n

Starting the Master setup routine...

Please specify the common name (CN) [icinga2-master1.localdomain]: icinga2-master1.localdomain
Reconfiguring Icinga...
Checking for existing certificates for common name 'icinga2-master1.localdomain'...
Certificates not yet generated. Running 'api setup' now.
Generating master configuration for Icinga 2.
Enabling feature api. Make sure to restart Icinga 2 for these changes to take effect.

Master zone name [master]:

Default global zones: global-templates director-global
Do you want to specify additional global zones? [y/N]: N

Please specify the API bind host/port (optional):
Bind Host []:
Bind Port []:

Do you want to disable the inclusion of the conf.d directory [Y/n]:
Disabling the inclusion of the conf.d directory...
Checking if the api-users.conf file exists...

Done.

Now restart your Icinga 2 daemon to finish the installation!
You can verify that the CA public and private keys are stored in the /var/lib/icinga2/ca directory.
Keep this path secure and include it in your backups.
In case you lose the CA private key you have to generate a new CA for signing new client certificate requests. You then have to also re-create new signed certificates for all existing nodes.
Once the master setup is complete, you can also use this node as primary CSR auto-signing master. The following section will explain how to use the CLI commands in order to fetch their signed certificate from this master node.
Signing Certificates on the Master 
All certificates must be signed by the same certificate authority (CA). This ensures that all nodes trust each other in a distributed monitoring environment.
This CA is generated during the master setup and should be the same on all master instances.
You can avoid signing and deploying certificates manually by using built-in methods for auto-signing certificate signing requests (CSR):
- CSR Auto-Signing which uses a client ticket generated on the master as trust identifier.
- On-Demand CSR Signing which allows to sign pending certificate requests on the master.
Both methods are described in detail below.
Note
On-Demand CSR Signing is available in Icinga 2 v2.8+.
CSR Auto-Signing 
A client which sends a certificate signing request (CSR) must authenticate itself in a trusted way. The master generates a client ticket which is included in this request. That way the master can verify that the request matches the previously trusted ticket and sign the request.
Note
Icinga 2 v2.8 adds the possibility to forward signing requests on a satellite to the master node. This is called
CA Proxyin blog posts and design drafts. This functionality helps with the setup of three level clusters and more.
Advantages:
- Nodes can be installed by different users who have received the client ticket.
- No manual interaction necessary on the master node.
- Automation tools like Puppet, Ansible, etc. can retrieve the pre-generated ticket in their client catalog and run the node setup directly.
Disadvantages:
- Tickets need to be generated on the master and copied to client setup wizards.
- No central signing management.
Setup wizards for satellite/client nodes will ask you for this specific client ticket.
There are two possible ways to retrieve the ticket:
- CLI command executed on the master node.
- REST API request against the master node.
Required information:
| Parameter | Description |
|---|---|
| Common name (CN) | Required. The common name for the satellite/client. By convention this should be the FQDN. |
The following example shows how to generate a ticket on the master node icinga2-master1.localdomain for the client icinga2-client1.localdomain:
[root@icinga2-master1.localdomain /]# icinga2 pki ticket --cn icinga2-client1.localdomain
Querying the Icinga 2 API on the master requires an ApiUser
object with at least the actions/generate-ticket permission.
[root@icinga2-master1.localdomain /]# vim /etc/icinga2/conf.d/api-users.conf

object ApiUser "client-pki-ticket" {
  password = "bea11beb7b810ea9ce6ea" //change this
  permissions = [ "actions/generate-ticket" ]
}

[root@icinga2-master1.localdomain /]# systemctl restart icinga2

Retrieve the ticket on the master node `icinga2-master1.localdomain` with `curl`, for example:

 [root@icinga2-master1.localdomain /]# curl -k -s -u client-pki-ticket:bea11beb7b810ea9ce6ea -H 'Accept: application/json' \
 -X POST 'https://localhost:5665/v1/actions/generate-ticket' -d '{ "cn": "icinga2-client1.localdomain" }'
Store that ticket number for the satellite/client setup below.
Note
Never expose the ticket salt and/or ApiUser credentials to your client nodes. Example: Retrieve the ticket on the Puppet master node and send the compiled catalog to the authorized Puppet agent node which will invoke the automated setup steps.
On-Demand CSR Signing 
The client sends a certificate signing request to specified parent node without any ticket. The admin on the master is responsible for reviewing and signing the requests with the private CA key.
This could either be directly the master, or a satellite which forwards the request to the signing master.
Advantages:
- Central certificate request signing management.
- No pre-generated ticket is required for client setups.
Disadvantages:
- Asynchronous step for automated deployments.
- Needs client verification on the master.
You can list certificate requests by using the ca list CLI command. This also shows
which requests already have been signed.
[root@icinga2-master1.localdomain /]# icinga2 ca list
Fingerprint                                                      | Timestamp           | Signed | Subject
-----------------------------------------------------------------|---------------------|--------|--------
403da5b228df384f07f980f45ba50202529cded7c8182abf96740660caa09727 | 2017/09/06 17:02:40 | *      | CN = icinga2-client1.localdomain
71700c28445109416dd7102038962ac3fd421fbb349a6e7303b6033ec1772850 | 2017/09/06 17:20:02 |        | CN = icinga2-client2.localdomain
Tip: Add --json to the CLI command to retrieve the details in JSON format.
If you want to sign a specific request, you need to use the ca sign CLI command
and pass its fingerprint as argument.
[root@icinga2-master1.localdomain /]# icinga2 ca sign 71700c28445109416dd7102038962ac3fd421fbb349a6e7303b6033ec1772850
information/cli: Signed certificate for 'CN = icinga2-client2.localdomain'.
Note
ca listcannot be used as historical inventory. Certificate signing requests older than 1 week are automatically deleted.
Client/Satellite Setup 
This section describes the setup of a satellite and/or client connected to an existing master node setup. If you haven’t done so already, please run the master setup.
Icinga 2 on the master node must be running and accepting connections on port 5665.
Client/Satellite Setup on Linux 
Please ensure that you’ve run all the steps mentioned in the client/satellite section.
Install the Icinga 2 package and setup the required plugins if you haven’t done so already.
The next step is to run the node wizard CLI command.
In this example we’re generating a ticket on the master node icinga2-master1.localdomain for the client icinga2-client1.localdomain:
[root@icinga2-master1.localdomain /]# icinga2 pki ticket --cn icinga2-client1.localdomain
4f75d2ecd253575fe9180938ebff7cbca262f96e
Note: You don’t need this step if you have chosen to use On-Demand CSR Signing.
Start the wizard on the client icinga2-client1.localdomain:
[root@icinga2-client1.localdomain /]# icinga2 node wizard

Welcome to the Icinga 2 Setup Wizard!

We will guide you through all required configuration details.
Press Enter or add y to start a satellite or client setup.
Please specify if this is a satellite/client setup ('n' installs a master setup) [Y/n]:
Press Enter to use the proposed name in brackets, or add a specific common name (CN). By convention
this should be the FQDN.
Starting the Client/Satellite setup routine...

Please specify the common name (CN) [icinga2-client1.localdomain]: icinga2-client1.localdomain
Specify the direct parent for this node. This could be your primary master icinga2-master1.localdomain
or a satellite node in a multi level cluster scenario.
Please specify the parent endpoint(s) (master or satellite) where this node should connect to:
Master/Satellite Common Name (CN from your master/satellite node): icinga2-master1.localdomain
Press Enter or choose y to establish a connection to the parent node.
Do you want to establish a connection to the parent node from this node? [Y/n]:
Note:
If this node cannot connect to the parent node, choose
n. The setup wizard will provide instructions for this scenario – signing questions are disabled then.
Add the connection details for icinga2-master1.localdomain.
Please specify the master/satellite connection information:
Master/Satellite endpoint host (IP address or FQDN): 192.168.56.101
Master/Satellite endpoint port [5665]: 5665
You can add more parent nodes if necessary. Press Enter or choose n
if you don’t want to add any. This comes in handy if you have more than one
parent node, e.g. two masters or two satellites.
Add more master/satellite endpoints? [y/N]:
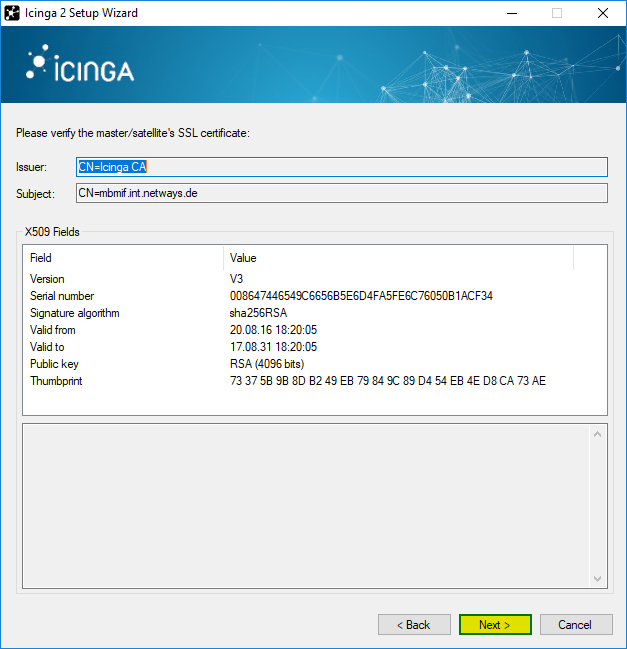
Verify the parent node’s certificate:
Parent certificate information:

 Subject:     CN = icinga2-master1.localdomain
 Issuer:      CN = Icinga CA
 Valid From:  Sep  7 13:41:24 2017 GMT
 Valid Until: Sep  3 13:41:24 2032 GMT
 Fingerprint: AC 99 8B 2B 3D B0 01 00 E5 21 FA 05 2E EC D5 A9 EF 9E AA E3

Is this information correct? [y/N]: y
The setup wizard fetches the parent node’s certificate and ask you to verify this information. This is to prevent MITM attacks or any kind of untrusted parent relationship.
Note: The certificate is not fetched if you have chosen not to connect to the parent node.
Proceed with adding the optional client ticket for CSR auto-signing:
Please specify the request ticket generated on your Icinga 2 master (optional).
 (Hint: # icinga2 pki ticket --cn 'icinga2-client1.localdomain'):
4f75d2ecd253575fe9180938ebff7cbca262f96e
In case you’ve chosen to use On-Demand CSR Signing you can leave the ticket question blank.
Instead, Icinga 2 tells you to approve the request later on the master node.
No ticket was specified. Please approve the certificate signing request manually
on the master (see 'icinga2 ca list' and 'icinga2 ca sign --help' for details).
You can optionally specify a different bind host and/or port.
Please specify the API bind host/port (optional):
Bind Host []:
Bind Port []:
The next step asks you to accept configuration (required for config sync mode) and commands (required for command endpoint mode).
Accept config from parent node? [y/N]: y
Accept commands from parent node? [y/N]: y
Next you can optionally specify the local and parent zone names. This will be reflected in the generated zone configuration file.
Set the local zone name to something else, if you are installing a satellite or secondary master instance.
Local zone name [icinga2-client1.localdomain]:
Set the parent zone name to something else than master if this client connects to a satellite instance instead of the master.
Parent zone name [master]:
You can add more global zones in addition to global-templates and director-global if necessary.
Press Enter or choose n, if you don’t want to add any additional.
Reconfiguring Icinga...

Default global zones: global-templates director-global
Do you want to specify additional global zones? [y/N]: N
Last but not least the wizard asks you whether you want to disable the inclusion of the local configuration
directory in conf.d, or not. Defaults to disabled, as clients either are checked via command endpoint, or
they receive configuration synced from the parent zone.
Do you want to disable the inclusion of the conf.d directory [Y/n]: Y
Disabling the inclusion of the conf.d directory...
The wizard proceeds and you are good to go.
Done.

Now restart your Icinga 2 daemon to finish the installation!
Note
If you have chosen not to connect to the parent node, you cannot start Icinga 2 yet. The wizard asked you to manually copy the master’s public CA certificate file into
/var/lib/icinga2/certs/ca.crt.You need to manually sign the CSR on the master node.
Restart Icinga 2 as requested.
[root@icinga2-client1.localdomain /]# systemctl restart icinga2
Here is an overview of all parameters in detail:
| Parameter | Description |
|---|---|
| Common name (CN) | Required. By convention this should be the host’s FQDN. Defaults to the FQDN. |
| Master common name | Required. Use the common name you’ve specified for your master node before. |
| Establish connection to the parent node | Optional. Whether the node should attempt to connect to the parent node or not. Defaults to y. |
| Master/Satellite endpoint host | Required if the the client needs to connect to the master/satellite. The parent endpoint’s IP address or FQDN. This information is included in the Endpoint object configuration in the zones.conf file. |
| Master/Satellite endpoint port | Optional if the the client needs to connect to the master/satellite. The parent endpoints’s listening port. This information is included in the Endpoint object configuration. |
| Add more master/satellite endpoints | Optional. If you have multiple master/satellite nodes configured, add them here. |
| Parent Certificate information | Required. Verify that the connecting host really is the requested master node. |
| Request ticket | Optional. Add the ticket generated on the master. |
| API bind host | Optional. Allows to specify the address the ApiListener is bound to. For advanced usage only. |
| API bind port | Optional. Allows to specify the port the ApiListener is bound to. For advanced usage only (requires changing the default port 5665 everywhere). |
| Accept config | Optional. Whether this node accepts configuration sync from the master node (required for config sync mode). For security reasons this defaults to n. |
| Accept commands | Optional. Whether this node accepts command execution messages from the master node (required for command endpoint mode). For security reasons this defaults to n. |
| Local zone name | Optional. Allows to specify the name for the local zone. This comes in handy when this instance is a satellite, not a client. Defaults to the FQDN. |
| Parent zone name | Optional. Allows to specify the name for the parent zone. This is important if the client has a satellite instance as parent, not the master. Defaults to master. |
| Global zones | Optional. Allows to specify more global zones in addition to global-templates and director-global. Defaults to n. |
| Disable conf.d | Optional. Allows to disable the inclusion of the conf.d directory which holds local example configuration. Clients should retrieve their configuration from the parent node, or act as command endpoint execution bridge. Defaults to y. |
The setup wizard will ensure that the following steps are taken:
- Enable the
apifeature. - Create a certificate signing request (CSR) for the local node.
- Request a signed certificate i(optional with the provided ticket number) on the master node.
- Allow to verify the parent node’s certificate.
- Store the signed client certificate and ca.crt in
/var/lib/icinga2/certs. - Update the
zones.conffile with the new zone hierarchy. - Update
/etc/icinga2/features-enabled/api.conf(accept_config,accept_commands) andconstants.conf. - Update
/etc/icinga2/icinga2.confand comment outinclude_recursive "conf.d".
You can verify that the certificate files are stored in the /var/lib/icinga2/certs directory.
Note
If the client is not directly connected to the certificate signing master, signing requests and responses might need some minutes to fully update the client certificates.
If you have chosen to use On-Demand CSR Signing certificates need to be signed on the master first. Ticket-less setups require at least Icinga 2 v2.8+ on all involved instances.
Now that you’ve successfully installed a Linux/Unix satellite/client instance, please proceed to the configuration modes.
Client Setup on Windows 
Download the MSI-Installer package from https://packages.icinga.com/windows/.
Requirements:
- Windows Vista/Server 2008 or higher
- Versions older than Windows 10/Server 2016 require the Universal C Runtime for Windows
- Microsoft .NET Framework 2.0 for the setup wizard
The installer package includes the NSClient++ package so that Icinga 2 can use its built-in plugins. You can find more details in this chapter. The Windows package also installs native monitoring plugin binaries to get you started more easily.
Note
Please note that Icinga 2 was designed to run as light-weight client on Windows. There is no support for satellite instances.
Windows Client Setup Start 
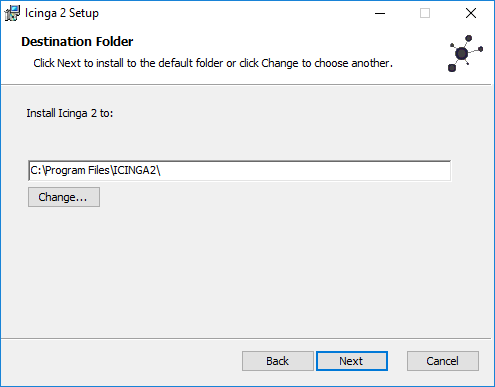
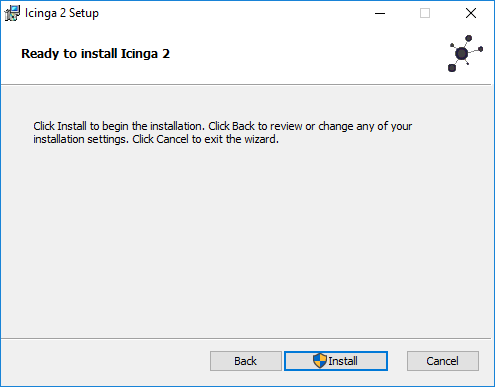
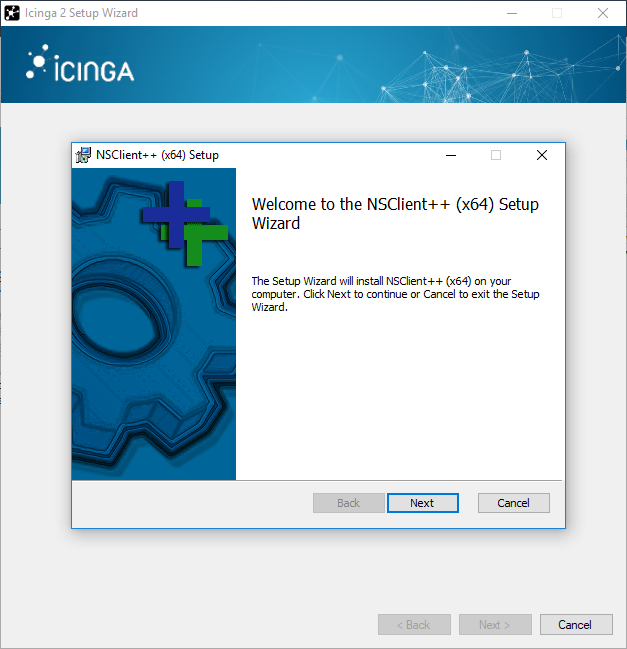
Run the MSI-Installer package and follow the instructions shown in the screenshots.
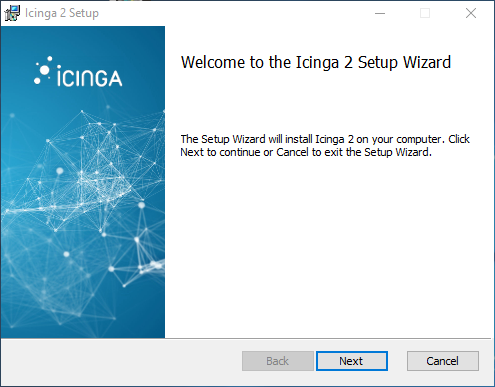
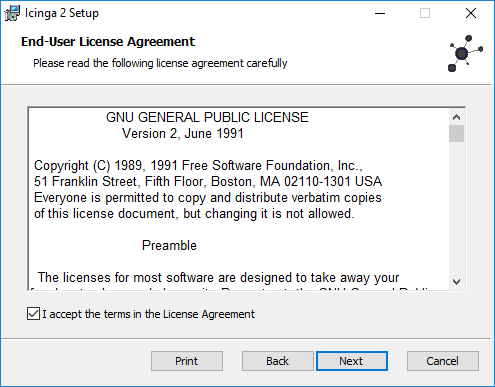
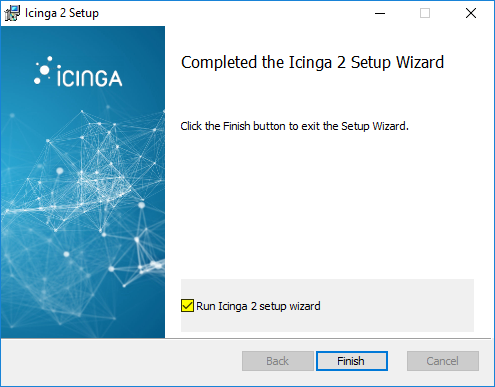
The graphical installer offers to run the Icinga 2 setup wizard after the installation. Select the check box to proceed.
Tip
You can also run the Icinga 2 setup wizard from the Start menu later.
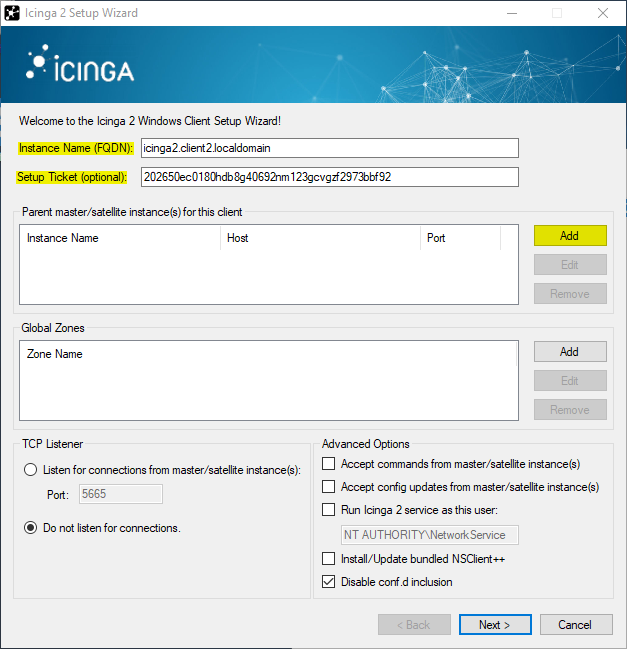
On a fresh installation the setup wizard guides you through the initial configuration. It also provides a mechanism to send a certificate request to the CSR signing master.
The following configuration details are required:
| Parameter | Description |
|---|---|
| Instance name | Required. By convention this should be the host’s FQDN. Defaults to the FQDN. |
| Setup ticket | Optional. Paste the previously generated ticket number. If left blank, the certificate request must be signed on the master node. |
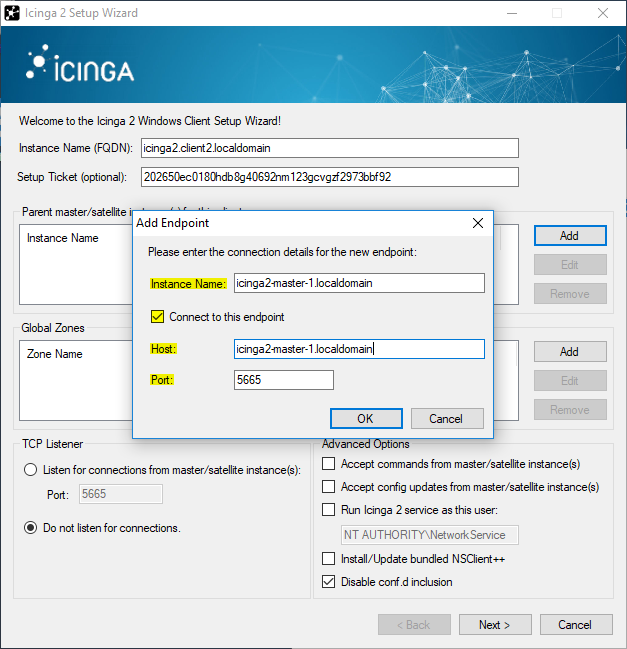
Fill in the required information and click Add to add a new master connection.
Add the following details:
| Parameter | Description |
|---|---|
| Instance name | Required. The master/satellite endpoint name where this client is a direct child of. |
| Master/Satellite endpoint host | Required. The master or satellite’s IP address or FQDN. This information is included in the Endpoint object configuration in the zones.conf file. |
| Master/Satellite endpoint port | Optional. The master or satellite’s listening port. This information is included in the Endpoint object configuration. |
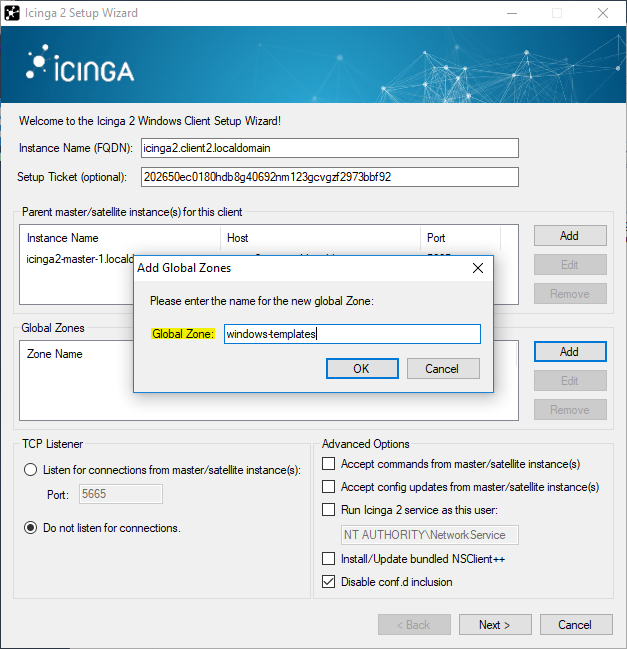
When needed you can add an additional global zone (the zones global-templates and director-global are added by default):
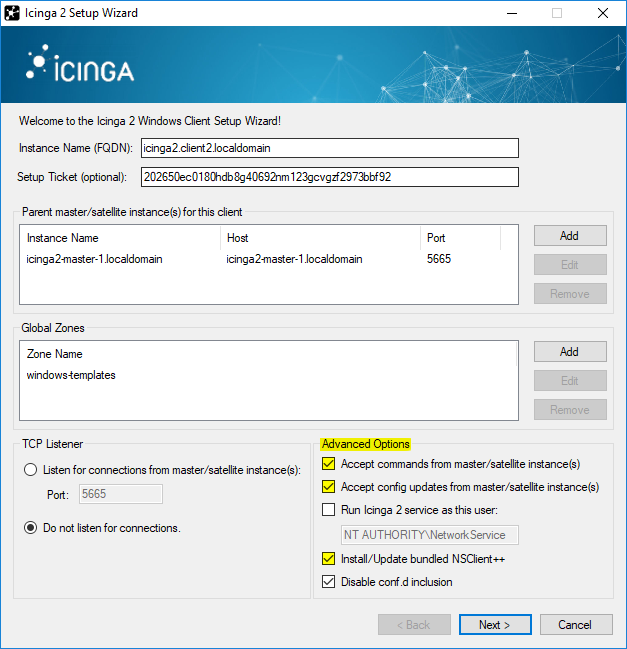
Optionally enable the following settings:
| Parameter | Description |
|---|---|
| Accept config | Optional. Whether this node accepts configuration sync from the master node (required for config sync mode). For security reasons this is disabled by default. |
| Accept commands | Optional. Whether this node accepts command execution messages from the master node (required for command endpoint mode). For security reasons this is disabled by default. |
| Run Icinga 2 service as this user | Optional. Specify a different Windows user. This defaults to NT AUTHORITY\Network Service and is required for more privileged service checks. |
| Install NSClient++ | Optional. The Windows installer bundles the NSClient++ installer for additional plugin checks. |
| Disable conf.d | Optional. Allows to disable the include_recursive "conf.d" directive except for the api-users.conf file in the icinga2.conf file. Defaults to true. |
Verify the certificate from the master/satellite instance where this node should connect to.
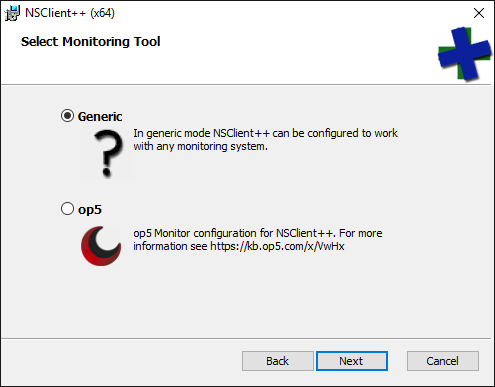
Bundled NSClient++ Setup 
If you have chosen to install/update the NSClient++ package, the Icinga 2 setup wizard asks you to do so.
Choose the Generic setup.
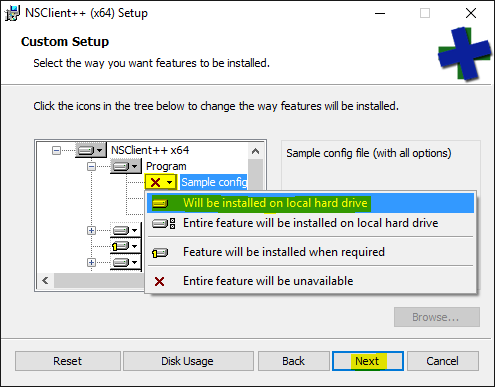
Choose the Custom setup type.
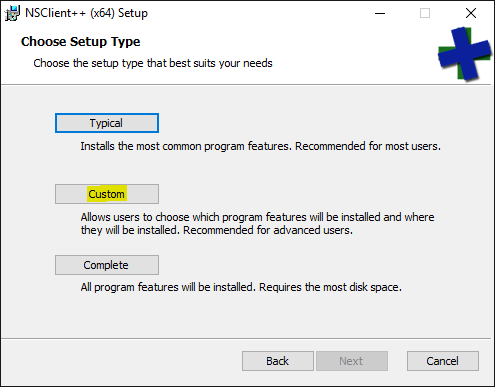
NSClient++ does not install a sample configuration by default. Change this as shown in the screenshot.
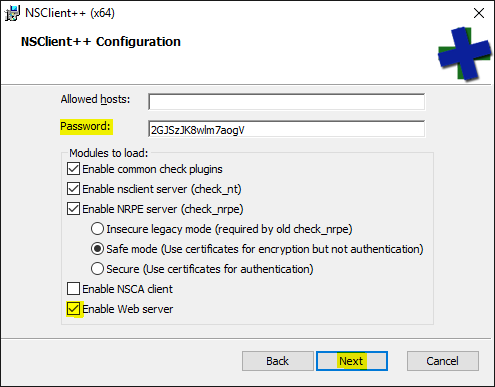
Generate a secure password and enable the web server module. Note: The webserver module is available starting with NSClient++ 0.5.0. Icinga 2 v2.6+ is required which includes this version.
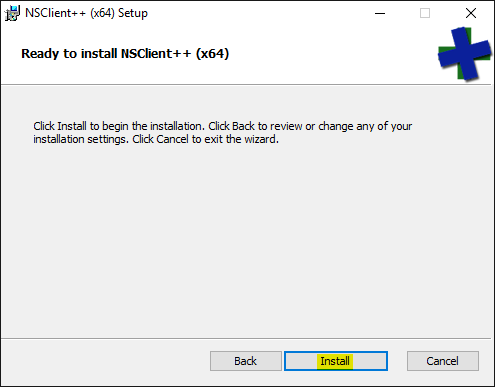
Finish the installation.
Open a web browser and navigate to https://localhost:8443. Enter the password you’ve configured
during the setup. In case you lost it, look into the C:\Program Files\NSClient++\nsclient.ini
configuration file.
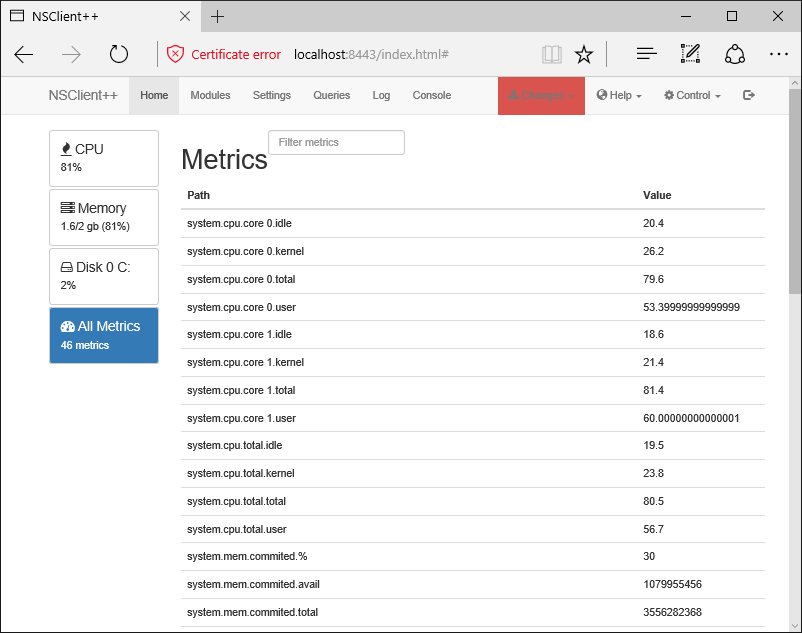
The NSClient++ REST API can be used to query metrics. check_nscp_api uses this transport method.
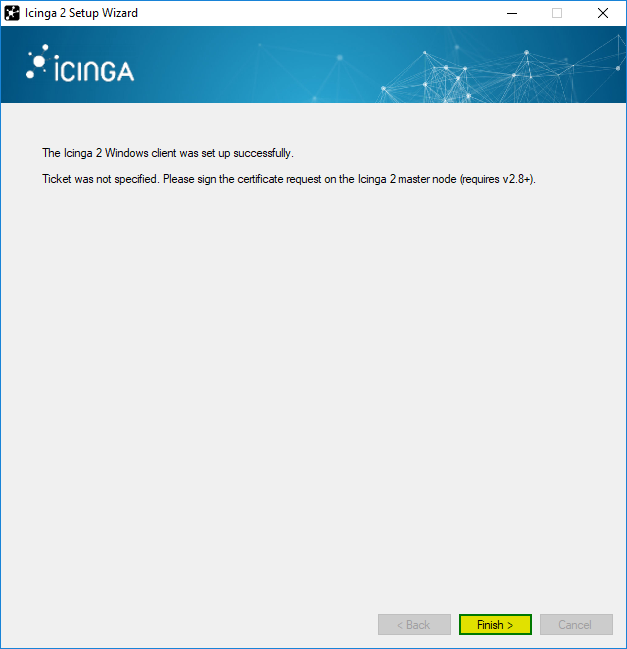
Finish Windows Client Setup 
Finish the Windows setup wizard.
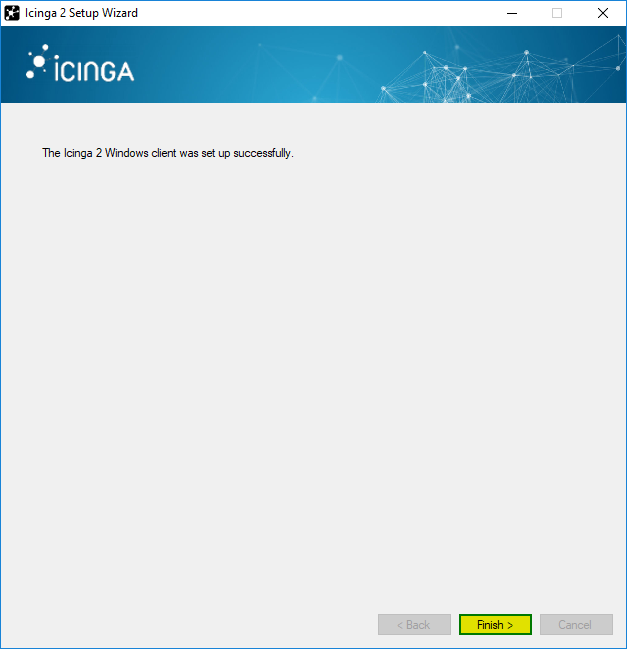
If you did not provide a setup ticket, you need to sign the certificate request on the master. The setup wizards tells you to do so. The Icinga 2 service is running at this point already and will automatically receive and update a signed client certificate.
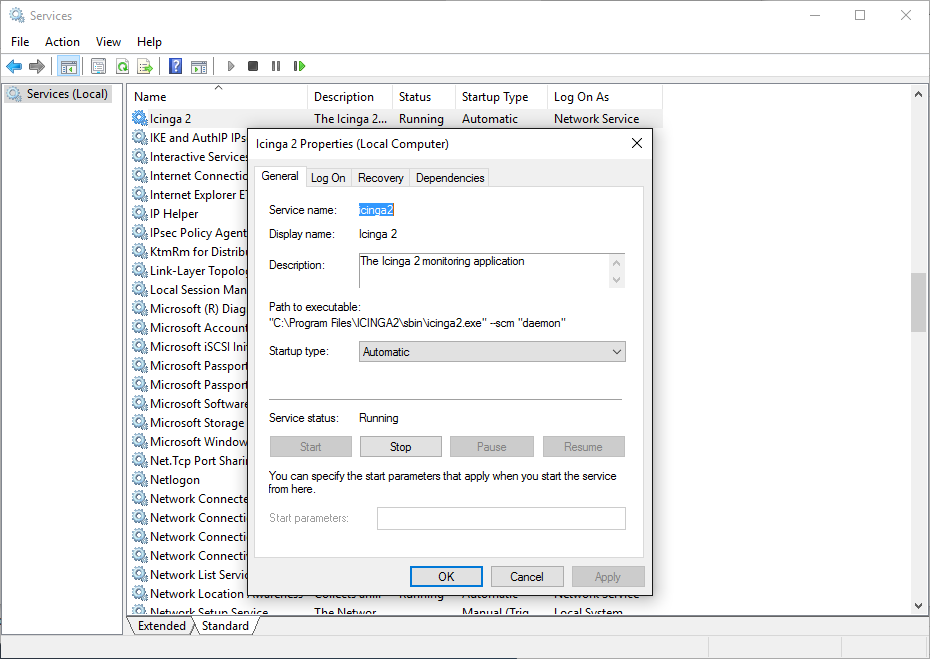
Icinga 2 is automatically started as a Windows service.
The Icinga 2 configuration is stored inside the C:\ProgramData\icinga2 directory.
Click Examine Config in the setup wizard to open a new Explorer window.
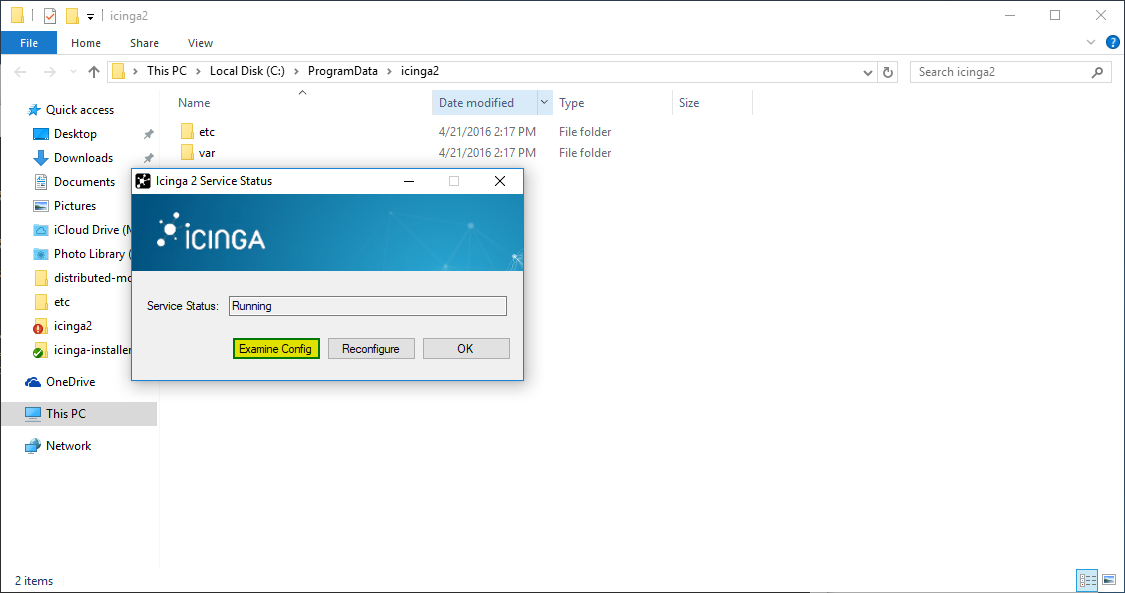
The configuration files can be modified with your favorite editor e.g. Notepad.
In order to use the top down client configuration prepare the following steps.
You don’t need any local configuration on the client except for
CheckCommand definitions which can be synced using the global zone
above. Therefore disable the inclusion of the conf.d directory
in the icinga2.conf file.
Navigate to C:\ProgramData\icinga2\etc\icinga2 and open
the icinga2.conf file in your preferred editor. Remove or comment (//)
the following line:
// Commented out, not required on a client with top down mode
//include_recursive "conf.d"
Note
Packages >= 2.9 provide an option in the setup wizard to disable this. Defaults to disabled.
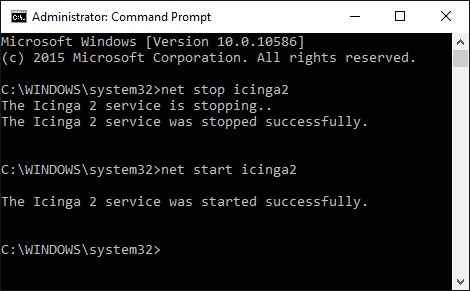
Validate the configuration on Windows open an administrator terminal and run the following command:
C:\WINDOWS\system32>cd "C:\Program Files\ICINGA2\sbin"
C:\Program Files\ICINGA2\sbin>icinga2.exe daemon -C
Note: You have to run this command in a shell with administrator privileges.
Now you need to restart the Icinga 2 service. Run services.msc from the start menu
and restart the icinga2 service. Alternatively, you can use the net {start,stop} CLI commands.
Now that you’ve successfully installed a Windows client, please proceed to the detailed configuration modes.
Configuration Modes 
There are different ways to ensure that the Icinga 2 cluster nodes execute checks, send notifications, etc.
The preferred method is to configure monitoring objects on the master and distribute the configuration to satellites and clients.
The following chapters will explain this in detail with hands-on manual configuration examples. You should test and implement this once to fully understand how it works.
Once you are familiar with Icinga 2 and distributed monitoring, you can start with additional integrations to manage and deploy your configuration:
- Icinga Director provides a web interface to manage configuration and also allows to sync imported resources (CMDB, PuppetDB, etc.)
- Ansible Roles
- Puppet Module
- Chef Cookbook
More details can be found here.
Top Down 
There are two different behaviors with check execution:
- Send a command execution event remotely: The scheduler still runs on the parent node.
- Sync the host/service objects directly to the child node: Checks are executed locally.
Again, technically it does not matter whether this is a client or a satellite
which is receiving configuration or command execution events.
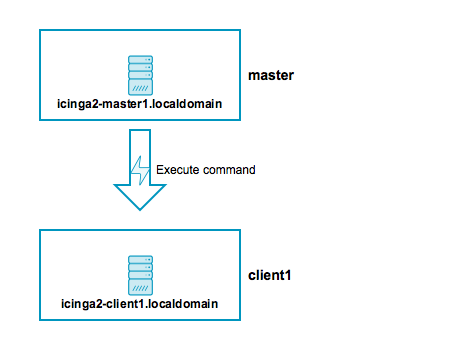
Top Down Command Endpoint 
This mode will force the Icinga 2 node to execute commands remotely on a specified endpoint. The host/service object configuration is located on the master/satellite and the client only needs the CheckCommand object definitions being used there.
Every endpoint has its own remote check queue. The amount of checks executed simultaneously
can be limited on the endpoint with the MaxConcurrentChecks constant defined in constants.conf. Icinga 2 may discard check requests,
if the remote check queue is full.
Advantages:
- No local checks need to be defined on the child node (client).
- Light-weight remote check execution (asynchronous events).
- No replay log is necessary for the child node.
- Pin checks to specific endpoints (if the child zone consists of 2 endpoints).
Disadvantages:
- If the child node is not connected, no more checks are executed.
- Requires additional configuration attribute specified in host/service objects.
- Requires local
CheckCommandobject configuration. Best practice is to use a global config zone.
To make sure that all nodes involved will accept configuration and/or
commands, you need to configure the Zone and Endpoint hierarchy
on all nodes.
icinga2-master1.localdomainis the configuration master in this scenario.icinga2-client1.localdomainacts as client which receives command execution messages via command endpoint from the master. In addition, it receives the global check command configuration from the master.
Include the endpoint and zone configuration on both nodes in the file /etc/icinga2/zones.conf.
The endpoint configuration could look like this, for example:
[root@icinga2-client1.localdomain /]# vim /etc/icinga2/zones.conf

object Endpoint "icinga2-master1.localdomain" {
  host = "192.168.56.101"
}

object Endpoint "icinga2-client1.localdomain" {
  host = "192.168.56.111"
}
Next, you need to define two zones. There is no naming convention, best practice is to either use master, satellite/client-fqdn or to choose region names for example Europe, USA and Asia, though.
Note: Each client requires its own zone and endpoint configuration. Best practice is to use the client’s FQDN for all object names.
The master zone is a parent of the icinga2-client1.localdomain zone:
[root@icinga2-client1.localdomain /]# vim /etc/icinga2/zones.conf

object Zone "master" {
  endpoints = [ "icinga2-master1.localdomain" ] //array with endpoint names
}

object Zone "icinga2-client1.localdomain" {
  endpoints = [ "icinga2-client1.localdomain" ]

  parent = "master" //establish zone hierarchy
}
You don’t need any local configuration on the client except for
CheckCommand definitions which can be synced using the global zone
above. Therefore disable the inclusion of the conf.d directory
in /etc/icinga2/icinga2.conf.
[root@icinga2-client1.localdomain /]# vim /etc/icinga2/icinga2.conf

// Commented out, not required on a client as command endpoint
//include_recursive "conf.d"
Note
Packages >= 2.9 provide an option in the setup wizard to disable this. Defaults to disabled.
Now it is time to validate the configuration and to restart the Icinga 2 daemon on both nodes.
Example on CentOS 7:
[root@icinga2-client1.localdomain /]# icinga2 daemon -C
[root@icinga2-client1.localdomain /]# systemctl restart icinga2

[root@icinga2-master1.localdomain /]# icinga2 daemon -C
[root@icinga2-master1.localdomain /]# systemctl restart icinga2
Once the clients have successfully connected, you are ready for the next step: execute a remote check on the client using the command endpoint.
Include the host and service object configuration in the master zone
– this will help adding a secondary master for high-availability later.
[root@icinga2-master1.localdomain /]# mkdir -p /etc/icinga2/zones.d/master
Add the host and service objects you want to monitor. There is no limitation for files and directories – best practice is to sort things by type.
By convention a master/satellite/client host object should use the same name as the endpoint object. You can also add multiple hosts which execute checks against remote services/clients.
[root@icinga2-master1.localdomain /]# cd /etc/icinga2/zones.d/master
[root@icinga2-master1.localdomain /etc/icinga2/zones.d/master]# vim hosts.conf

object Host "icinga2-client1.localdomain" {
  check_command = "hostalive" //check is executed on the master
  address = "192.168.56.111"

  vars.client_endpoint = name //follows the convention that host name == endpoint name
}
Given that you are monitoring a Linux client, we’ll add a remote disk check.
[root@icinga2-master1.localdomain /etc/icinga2/zones.d/master]# vim services.conf

apply Service "disk" {
  check_command = "disk"

  //specify where the check is executed
  command_endpoint = host.vars.client_endpoint

  assign where host.vars.client_endpoint
}
If you have your own custom CheckCommand definition, add it to the global zone:
[root@icinga2-master1.localdomain /]# mkdir -p /etc/icinga2/zones.d/global-templates
[root@icinga2-master1.localdomain /]# vim /etc/icinga2/zones.d/global-templates/commands.conf

object CheckCommand "my-cmd" {
  //...
}
Save the changes and validate the configuration on the master node:
[root@icinga2-master1.localdomain /]# icinga2 daemon -C
[root@icinga2-master1.localdomain /]# systemctl restart icinga2
The following steps will happen:
- Icinga 2 validates the configuration on
icinga2-master1.localdomainand restarts. - The
icinga2-master1.localdomainnode schedules and executes the checks. - The
icinga2-client1.localdomainnode receives the execute command event with additional command parameters. - The
icinga2-client1.localdomainnode maps the command parameters to the local check command, executes the check locally, and sends back the check result message.
As you can see, no interaction from your side is required on the client itself, and it’s not necessary to reload the Icinga 2 service on the client.
You have learned the basics about command endpoint checks. Proceed with the scenarios section where you can find detailed information on extending the setup.
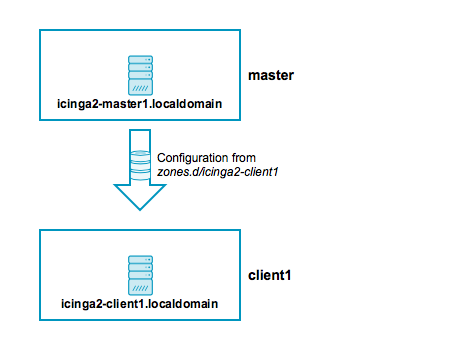
Top Down Config Sync 
This mode syncs the object configuration files within specified zones. It comes in handy if you want to configure everything on the master node and sync the satellite checks (disk, memory, etc.). The satellites run their own local scheduler and will send the check result messages back to the master.
Advantages:
- Sync the configuration files from the parent zone to the child zones.
- No manual restart is required on the child nodes, as syncing, validation, and restarts happen automatically.
- Execute checks directly on the child node’s scheduler.
- Replay log if the connection drops (important for keeping the check history in sync, e.g. for SLA reports).
- Use a global zone for syncing templates, groups, etc.
Disadvantages:
- Requires a config directory on the master node with the zone name underneath
/etc/icinga2/zones.d. - Additional zone and endpoint configuration needed.
- Replay log is replicated on reconnect after connection loss. This might increase the data transfer and create an overload on the connection.
To make sure that all involved nodes accept configuration and/or
commands, you need to configure the Zone and Endpoint hierarchy
on all nodes.
icinga2-master1.localdomainis the configuration master in this scenario.icinga2-client2.localdomainacts as client which receives configuration from the master. Checks are scheduled locally.
Include the endpoint and zone configuration on both nodes in the file /etc/icinga2/zones.conf.
The endpoint configuration could look like this:
[root@icinga2-client2.localdomain /]# vim /etc/icinga2/zones.conf

object Endpoint "icinga2-master1.localdomain" {
  host = "192.168.56.101"
}

object Endpoint "icinga2-client2.localdomain" {
  host = "192.168.56.112"
}
Next, you need to define two zones. There is no naming convention, best practice is to either use master, satellite/client-fqdn or to choose region names for example Europe, USA and Asia, though.
Note: Each client requires its own zone and endpoint configuration. Best practice is to use the client’s FQDN for all object names.
The master zone is a parent of the icinga2-client2.localdomain zone:
[root@icinga2-client2.localdomain /]# vim /etc/icinga2/zones.conf

object Zone "master" {
  endpoints = [ "icinga2-master1.localdomain" ] //array with endpoint names
}

object Zone "icinga2-client2.localdomain" {
  endpoints = [ "icinga2-client2.localdomain" ]

  parent = "master" //establish zone hierarchy
}
Edit the api feature on the client icinga2-client2.localdomain in
the /etc/icinga2/features-enabled/api.conf file and set
accept_config to true.
[root@icinga2-client2.localdomain /]# vim /etc/icinga2/features-enabled/api.conf

object ApiListener "api" {
   //...
   accept_config = true
}
Now it is time to validate the configuration and to restart the Icinga 2 daemon on both nodes.
Example on CentOS 7:
[root@icinga2-client2.localdomain /]# icinga2 daemon -C
[root@icinga2-client2.localdomain /]# systemctl restart icinga2

[root@icinga2-master1.localdomain /]# icinga2 daemon -C
[root@icinga2-master1.localdomain /]# systemctl restart icinga2
Tip: Best practice is to use a global zone for common configuration items (check commands, templates, groups, etc.).
Once the clients have connected successfully, it’s time for the next step: execute a local check on the client using the configuration sync.
Navigate to /etc/icinga2/zones.d on your master node
icinga2-master1.localdomain and create a new directory with the same
name as your satellite/client zone name:
[root@icinga2-master1.localdomain /]# mkdir -p /etc/icinga2/zones.d/icinga2-client2.localdomain
Add the host and service objects you want to monitor. There is no limitation for files and directories – best practice is to sort things by type.
By convention a master/satellite/client host object should use the same name as the endpoint object. You can also add multiple hosts which execute checks against remote services/clients.
[root@icinga2-master1.localdomain /]# cd /etc/icinga2/zones.d/icinga2-client2.localdomain
[root@icinga2-master1.localdomain /etc/icinga2/zones.d/icinga2-client2.localdomain]# vim hosts.conf

object Host "icinga2-client2.localdomain" {
  check_command = "hostalive"
  address = "192.168.56.112"
  zone = "master" //optional trick: sync the required host object to the client, but enforce the "master" zone to execute the check
}
Given that you are monitoring a Linux client we’ll just add a local disk check.
[root@icinga2-master1.localdomain /etc/icinga2/zones.d/icinga2-client2.localdomain]# vim services.conf

object Service "disk" {
  host_name = "icinga2-client2.localdomain"

  check_command = "disk"
}
Save the changes and validate the configuration on the master node:
[root@icinga2-master1.localdomain /]# icinga2 daemon -C
Restart the Icinga 2 daemon (example for CentOS 7):
[root@icinga2-master1.localdomain /]# systemctl restart icinga2
The following steps will happen:
- Icinga 2 validates the configuration on
icinga2-master1.localdomain. - Icinga 2 copies the configuration into its zone config store in
/var/lib/icinga2/api/zones. - The
icinga2-master1.localdomainnode sends a config update event to all endpoints in the same or direct child zones. - The
icinga2-client2.localdomainnode accepts config and populates the local zone config store with the received config files. - The
icinga2-client2.localdomainnode validates the configuration and automatically restarts.
Again, there is no interaction required on the client itself.
You can also use the config sync inside a high-availability zone to ensure that all config objects are synced among zone members.
Note: You can only have one so-called “config master” in a zone which stores
the configuration in the zones.d directory.
Multiple nodes with configuration files in the zones.d directory are
not supported.
Now that you’ve learned the basics about the configuration sync, proceed with the scenarios section where you can find detailed information on extending the setup.
If you are eager to start fresh instead you might take a look into the Icinga Director.
Scenarios 
The following examples should give you an idea on how to build your own distributed monitoring environment. We’ve seen them all in production environments and received feedback from our community and partner support channels:
- Single master with client.
- HA master with clients as command endpoint
- Three level cluster with config HA masters, satellites receiving config sync, and clients checked using command endpoint.
You can also extend the cluster tree depth to four levels e.g. with 2 satellite levels. Just keep in mind that multiple levels become harder to debug in case of errors.
You can also start with a single master setup, and later add a secondary master endpoint. This requires an extra step with the initial sync for cloning the runtime state. This is described in detail here.
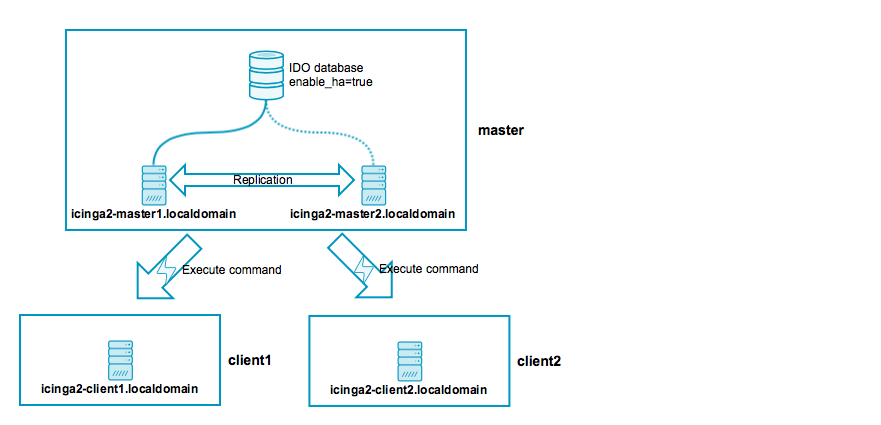
Master with Clients 
In this scenario, a single master node runs the check scheduler, notifications and IDO database backend and uses the command endpoint mode to execute checks on the remote clients.
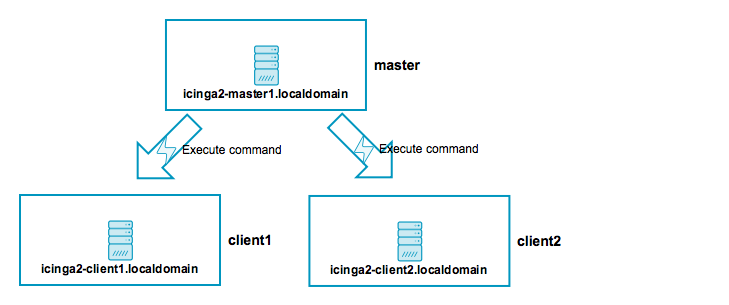
icinga2-master1.localdomainis the primary master node.icinga2-client1.localdomainandicinga2-client2.localdomainare two child nodes as clients.
Setup requirements:
- Set up
icinga2-master1.localdomainas master. - Set up
icinga2-client1.localdomainandicinga2-client2.localdomainas client.
Edit the zones.conf configuration file on the master:
[root@icinga2-master1.localdomain /]# vim /etc/icinga2/zones.conf

object Endpoint "icinga2-master1.localdomain" {
}

object Endpoint "icinga2-client1.localdomain" {
  host = "192.168.56.111" //the master actively tries to connect to the client
}

object Endpoint "icinga2-client2.localdomain" {
  host = "192.168.56.112" //the master actively tries to connect to the client
}

object Zone "master" {
  endpoints = [ "icinga2-master1.localdomain" ]
}

object Zone "icinga2-client1.localdomain" {
  endpoints = [ "icinga2-client1.localdomain" ]

  parent = "master"
}

object Zone "icinga2-client2.localdomain" {
  endpoints = [ "icinga2-client2.localdomain" ]

  parent = "master"
}

/* sync global commands */
object Zone "global-templates" {
  global = true
}
The two client nodes do not necessarily need to know about each other. The only important thing is that they know about the parent zone and their endpoint members (and optionally the global zone).
If you specify the host attribute in the icinga2-master1.localdomain endpoint object,
the client will actively try to connect to the master node. Since we’ve specified the client
endpoint’s attribute on the master node already, we don’t want the clients to connect to the
master. Choose one connection direction.
[root@icinga2-client1.localdomain /]# vim /etc/icinga2/zones.conf

object Endpoint "icinga2-master1.localdomain" {
  //do not actively connect to the master by leaving out the 'host' attribute
}

object Endpoint "icinga2-client1.localdomain" {
}

object Zone "master" {
  endpoints = [ "icinga2-master1.localdomain" ]
}

object Zone "icinga2-client1.localdomain" {
  endpoints = [ "icinga2-client1.localdomain" ]

  parent = "master"
}

/* sync global commands */
object Zone "global-templates" {
  global = true
}

[root@icinga2-client2.localdomain /]# vim /etc/icinga2/zones.conf

object Endpoint "icinga2-master1.localdomain" {
  //do not actively connect to the master by leaving out the 'host' attribute
}

object Endpoint "icinga2-client2.localdomain" {
}

object Zone "master" {
  endpoints = [ "icinga2-master1.localdomain" ]
}

object Zone "icinga2-client2.localdomain" {
  endpoints = [ "icinga2-client2.localdomain" ]

  parent = "master"
}

/* sync global commands */
object Zone "global-templates" {
  global = true
}
Now it is time to define the two client hosts and apply service checks using the command endpoint execution method on them. Note: You can also use the config sync mode here.
Create a new configuration directory on the master node:
[root@icinga2-master1.localdomain /]# mkdir -p /etc/icinga2/zones.d/master
Add the two client nodes as host objects:
[root@icinga2-master1.localdomain /]# cd /etc/icinga2/zones.d/master
[root@icinga2-master1.localdomain /etc/icinga2/zones.d/master]# vim hosts.conf

object Host "icinga2-client1.localdomain" {
  check_command = "hostalive"
  address = "192.168.56.111"
  vars.client_endpoint = name //follows the convention that host name == endpoint name
}

object Host "icinga2-client2.localdomain" {
  check_command = "hostalive"
  address = "192.168.56.112"
  vars.client_endpoint = name //follows the convention that host name == endpoint name
}
Add services using command endpoint checks:
[root@icinga2-master1.localdomain /etc/icinga2/zones.d/master]# vim services.conf

apply Service "ping4" {
  check_command = "ping4"
  //check is executed on the master node
  assign where host.address
}

apply Service "disk" {
  check_command = "disk"

  //specify where the check is executed
  command_endpoint = host.vars.client_endpoint

  assign where host.vars.client_endpoint
}
Validate the configuration and restart Icinga 2 on the master node icinga2-master1.localdomain.
[root@icinga2-master1.localdomain /]# icinga2 daemon -C
[root@icinga2-master1.localdomain /]# systemctl restart icinga2
Open Icinga Web 2 and check the two newly created client hosts with two new services
– one executed locally (ping4) and one using command endpoint (disk).
High-Availability Master with Clients 
This scenario is similar to the one in the previous section. The only difference is that we will now set up two master nodes in a high-availability setup. These nodes must be configured as zone and endpoints objects.
The setup uses the capabilities of the Icinga 2 cluster. All zone members replicate cluster events amongst each other. In addition to that, several Icinga 2 features can enable HA functionality.
Best practice is to run the database backend on a dedicated server/cluster and only expose a virtual IP address to Icinga and the IDO feature. By default, only one endpoint will actively write to the backend then. Typical setups for MySQL clusters involve Master-Master-Replication (Master-Slave-Replication in both directions) or Galera, more tips can be found on our community forums.
Note: All nodes in the same zone require that you enable the same features for high-availability (HA).
Overview:
icinga2-master1.localdomainis the config master master node.icinga2-master2.localdomainis the secondary master master node without config inzones.d.icinga2-client1.localdomainandicinga2-client2.localdomainare two child nodes as clients.
Setup requirements:
- Set up
icinga2-master1.localdomainas master. - Set up
icinga2-master2.localdomainas client (we will modify the generated configuration). - Set up
icinga2-client1.localdomainandicinga2-client2.localdomainas clients (when asked for adding multiple masters, set toyand add the secondary mastericinga2-master2.localdomain).
In case you don’t want to use the CLI commands, you can also manually create and sync the required SSL certificates. We will modify and discuss all the details of the automatically generated configuration here.
Since there are now two nodes in the same zone, we must consider the high-availability features.
- Checks and notifications are balanced between the two master nodes. That’s fine, but it requires check plugins and notification scripts to exist on both nodes.
- The IDO feature will only be active on one node by default. Since all events are replicated between both nodes, it is easier to just have one central database.
One possibility is to use a dedicated MySQL cluster VIP (external application cluster) and leave the IDO feature with enabled HA capabilities. Alternatively, you can disable the HA feature and write to a local database on each node. Both methods require that you configure Icinga Web 2 accordingly (monitoring backend, IDO database, used transports, etc.).
Note
You can also start with a single master shown here and later add the second master. This requires an extra step with the initial sync for cloning the runtime state after done. Once done, proceed here.
The zone hierarchy could look like this. It involves putting the two master nodes
icinga2-master1.localdomain and icinga2-master2.localdomain into the master zone.
[root@icinga2-master1.localdomain /]# vim /etc/icinga2/zones.conf

object Endpoint "icinga2-master1.localdomain" {
  host = "192.168.56.101"
}

object Endpoint "icinga2-master2.localdomain" {
  host = "192.168.56.102"
}

object Endpoint "icinga2-client1.localdomain" {
  host = "192.168.56.111" //the master actively tries to connect to the client
}

object Endpoint "icinga2-client2.localdomain" {
  host = "192.168.56.112" //the master actively tries to connect to the client
}

object Zone "master" {
  endpoints = [ "icinga2-master1.localdomain", "icinga2-master2.localdomain" ]
}

object Zone "icinga2-client1.localdomain" {
  endpoints = [ "icinga2-client1.localdomain" ]

  parent = "master"
}

object Zone "icinga2-client2.localdomain" {
  endpoints = [ "icinga2-client2.localdomain" ]

  parent = "master"
}

/* sync global commands */
object Zone "global-templates" {
  global = true
}
The two client nodes do not necessarily need to know about each other. The only important thing is that they know about the parent zone and their endpoint members (and optionally about the global zone).
If you specify the host attribute in the icinga2-master1.localdomain and icinga2-master2.localdomain
endpoint objects, the client will actively try to connect to the master node. Since we’ve specified the client
endpoint’s attribute on the master node already, we don’t want the clients to connect to the
master nodes. Choose one connection direction.
[root@icinga2-client1.localdomain /]# vim /etc/icinga2/zones.conf

object Endpoint "icinga2-master1.localdomain" {
  //do not actively connect to the master by leaving out the 'host' attribute
}

object Endpoint "icinga2-master2.localdomain" {
  //do not actively connect to the master by leaving out the 'host' attribute
}

object Endpoint "icinga2-client1.localdomain" {
}

object Zone "master" {
  endpoints = [ "icinga2-master1.localdomain", "icinga2-master2.localdomain" ]
}

object Zone "icinga2-client1.localdomain" {
  endpoints = [ "icinga2-client1.localdomain" ]

  parent = "master"
}

/* sync global commands */
object Zone "global-templates" {
  global = true
}

[root@icinga2-client2.localdomain /]# vim /etc/icinga2/zones.conf

object Endpoint "icinga2-master1.localdomain" {
  //do not actively connect to the master by leaving out the 'host' attribute
}

object Endpoint "icinga2-master2.localdomain" {
  //do not actively connect to the master by leaving out the 'host' attribute
}

object Endpoint "icinga2-client2.localdomain" {
}

object Zone "master" {
  endpoints = [ "icinga2-master1.localdomain", "icinga2-master2.localdomain" ]
}

object Zone "icinga2-client2.localdomain" {
  endpoints = [ "icinga2-client2.localdomain" ]

  parent = "master"
}

/* sync global commands */
object Zone "global-templates" {
  global = true
}
Now it is time to define the two client hosts and apply service checks using the command endpoint execution method. Note: You can also use the config sync mode here.
Create a new configuration directory on the master node icinga2-master1.localdomain.
Note: The secondary master node icinga2-master2.localdomain receives the
configuration using the config sync mode.
[root@icinga2-master1.localdomain /]# mkdir -p /etc/icinga2/zones.d/master
Add the two client nodes as host objects:
[root@icinga2-master1.localdomain /]# cd /etc/icinga2/zones.d/master
[root@icinga2-master1.localdomain /etc/icinga2/zones.d/master]# vim hosts.conf

object Host "icinga2-client1.localdomain" {
  check_command = "hostalive"
  address = "192.168.56.111"
  vars.client_endpoint = name //follows the convention that host name == endpoint name
}

object Host "icinga2-client2.localdomain" {
  check_command = "hostalive"
  address = "192.168.56.112"
  vars.client_endpoint = name //follows the convention that host name == endpoint name
}
Add services using command endpoint checks:
[root@icinga2-master1.localdomain /etc/icinga2/zones.d/master]# vim services.conf

apply Service "ping4" {
  check_command = "ping4"
  //check is executed on the master node
  assign where host.address
}

apply Service "disk" {
  check_command = "disk"

  //specify where the check is executed
  command_endpoint = host.vars.client_endpoint

  assign where host.vars.client_endpoint
}
Validate the configuration and restart Icinga 2 on the master node icinga2-master1.localdomain.
[root@icinga2-master1.localdomain /]# icinga2 daemon -C
[root@icinga2-master1.localdomain /]# systemctl restart icinga2
Open Icinga Web 2 and check the two newly created client hosts with two new services
– one executed locally (ping4) and one using command endpoint (disk).
Tip: It’s a good idea to add health checks to make sure that your cluster notifies you in case of failure.
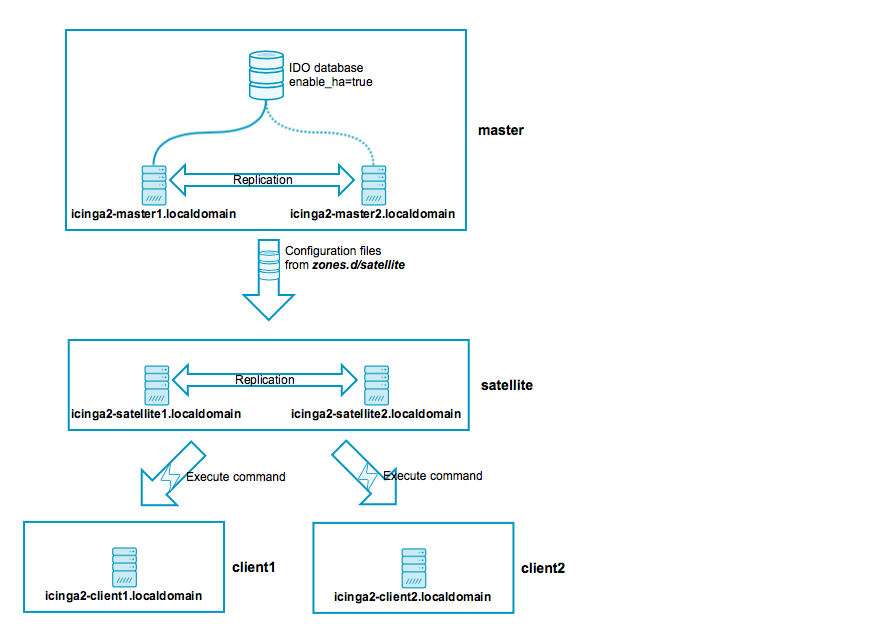
Three Levels with Master, Satellites, and Clients 
This scenario combines everything you’ve learned so far: High-availability masters, satellites receiving their configuration from the master zone, and clients checked via command endpoint from the satellite zones.
Tip:
It can get complicated, so grab a pen and paper and bring your thoughts to life. Play around with a test setup before using it in a production environment!
Best practice is to run the database backend on a dedicated server/cluster and only expose a virtual IP address to Icinga and the IDO feature. By default, only one endpoint will actively write to the backend then. Typical setups for MySQL clusters involve Master-Master-Replication (Master-Slave-Replication in both directions) or Galera, more tips can be found on our community forums.
Overview:
icinga2-master1.localdomainis the configuration master master node.icinga2-master2.localdomainis the secondary master master node without configuration inzones.d.icinga2-satellite1.localdomainandicinga2-satellite2.localdomainare satellite nodes in amasterchild zone. They forward CSR signing requests to the master zone.icinga2-client1.localdomainandicinga2-client2.localdomainare two child nodes as clients.
Setup requirements:
- Set up
icinga2-master1.localdomainas master. - Set up
icinga2-master2.localdomain,icinga2-satellite1.localdomainandicinga2-satellite2.localdomainas clients (we will modify the generated configuration). - Set up
icinga2-client1.localdomainandicinga2-client2.localdomainas clients.
When being asked for the parent endpoint providing CSR auto-signing capabilities,
please add one of the satellite nodes. Note: This requires Icinga 2 v2.8+
and the CA Proxy on all master, satellite and client nodes.
Example for icinga2-client1.localdomain:
Please specify the parent endpoint(s) (master or satellite) where this node should connect to:
Parent endpoint is the first satellite icinga2-satellite1.localdomain:
Master/Satellite Common Name (CN from your master/satellite node): icinga2-satellite1.localdomain
Do you want to establish a connection to the parent node from this node? [Y/n]: y

Please specify the master/satellite connection information:
Master/Satellite endpoint host (IP address or FQDN): 192.168.56.105
Master/Satellite endpoint port [5665]: 5665
Add the second satellite icinga2-satellite2.localdomain as parent:
Add more master/satellite endpoints? [y/N]: y

Master/Satellite Common Name (CN from your master/satellite node): icinga2-satellite2.localdomain
Do you want to establish a connection to the parent node from this node? [Y/n]: y

Please specify the master/satellite connection information:
Master/Satellite endpoint host (IP address or FQDN): 192.168.56.106
Master/Satellite endpoint port [5665]: 5665

Add more master/satellite endpoints? [y/N]: n
The specified parent nodes will forward the CSR signing request to the master instances.
Proceed with adding the optional client ticket for CSR auto-signing:
Please specify the request ticket generated on your Icinga 2 master (optional).
 (Hint: # icinga2 pki ticket --cn 'icinga2-client1.localdomain'):
4f75d2ecd253575fe9180938ebff7cbca262f96e
In case you’ve chosen to use On-Demand CSR Signing you can leave the ticket question blank.
Instead, Icinga 2 tells you to approve the request later on the master node.
No ticket was specified. Please approve the certificate signing request manually
on the master (see 'icinga2 ca list' and 'icinga2 ca sign --help' for details).
You can optionally specify a different bind host and/or port.
Please specify the API bind host/port (optional):
Bind Host []:
Bind Port []:
The next step asks you to accept configuration (required for config sync mode) and commands (required for command endpoint mode).
Accept config from parent node? [y/N]: y
Accept commands from parent node? [y/N]: y
Next you can optionally specify the local and parent zone names. This will be reflected in the generated zone configuration file.
Local zone name [icinga2-client1.localdomain]: icinga2-client1.localdomain
Set the parent zone name to satellite for this client.
Parent zone name [master]: satellite
You can add more global zones in addition to global-templates and director-global if necessary.
Press Enter or choose n, if you don’t want to add any additional.
Reconfiguring Icinga...

Default global zones: global-templates director-global
Do you want to specify additional global zones? [y/N]: N
Last but not least the wizard asks you whether you want to disable the inclusion of the local configuration
directory in conf.d, or not. Defaults to disabled, as clients either are checked via command endpoint, or
they receive configuration synced from the parent zone.
Do you want to disable the inclusion of the conf.d directory [Y/n]: Y
Disabling the inclusion of the conf.d directory...
We’ll discuss the details of the required configuration below. Most of this configuration can be rendered by the setup wizards.
The zone hierarchy can look like this. We’ll define only the directly connected zones here.
The master instances should actively connect to the satellite instances, therefore
the configuration on icinga2-master1.localdomain and icinga2-master2.localdomain
must include the host attribute for the satellite endpoints:
[root@icinga2-master1.localdomain /]# vim /etc/icinga2/zones.conf

object Endpoint "icinga2-master1.localdomain" {
  //that's us
}

object Endpoint "icinga2-master2.localdomain" {
  host = "192.168.56.102"
}

object Endpoint "icinga2-satellite1.localdomain" {
  host = "192.168.56.105"
}

object Endpoint "icinga2-satellite2.localdomain" {
  host = "192.168.56.106"
}

object Zone "master" {
  endpoints = [ "icinga2-master1.localdomain", "icinga2-master2.localdomain" ]
}

object Zone "satellite" {
  endpoints = [ "icinga2-satellite1.localdomain", "icinga2-satellite2.localdomain" ]

  parent = "master"
}

/* sync global commands */
object Zone "global-templates" {
  global = true
}

object Zone "director-global" {
  global = true
}
In contrast to that, the satellite instances icinga2-satellite1.localdomain
and icinga2-satellite2.localdomain should not actively connect to the master
instances.
[root@icinga2-satellite1.localdomain /]# vim /etc/icinga2/zones.conf

object Endpoint "icinga2-master1.localdomain" {
  //this endpoint will connect to us
}

object Endpoint "icinga2-master2.localdomain" {
  //this endpoint will connect to us
}

object Endpoint "icinga2-satellite1.localdomain" {
  //that's us
}

object Endpoint "icinga2-satellite2.localdomain" {
  host = "192.168.56.106"
}

object Zone "master" {
  endpoints = [ "icinga2-master1.localdomain", "icinga2-master2.localdomain" ]
}

object Zone "satellite" {
  endpoints = [ "icinga2-satellite1.localdomain", "icinga2-satellite2.localdomain" ]

  parent = "master"
}

/* sync global commands */
object Zone "global-templates" {
  global = true
}

object Zone "director-global" {
  global = true
}
host attribute, also for other endpoints in the same zone.
Adopt the configuration for icinga2-master2.localdomain and icinga2-satellite2.localdomain.
Since we want to use top down command endpoint checks, we must configure the client endpoint and zone objects. In order to minimize the effort, we’ll sync the client zone and endpoint configuration to the satellites where the connection information is needed as well.
[root@icinga2-master1.localdomain /]# mkdir -p /etc/icinga2/zones.d/{master,satellite,global-templates}
[root@icinga2-master1.localdomain /]# cd /etc/icinga2/zones.d/satellite

[root@icinga2-master1.localdomain /etc/icinga2/zones.d/satellite]# vim icinga2-client1.localdomain.conf

object Endpoint "icinga2-client1.localdomain" {
  host = "192.168.56.111" //the satellite actively tries to connect to the client
}

object Zone "icinga2-client1.localdomain" {
  endpoints = [ "icinga2-client1.localdomain" ]

  parent = "satellite"
}

[root@icinga2-master1.localdomain /etc/icinga2/zones.d/satellite]# vim icinga2-client2.localdomain.conf

object Endpoint "icinga2-client2.localdomain" {
  host = "192.168.56.112" //the satellite actively tries to connect to the client
}

object Zone "icinga2-client2.localdomain" {
  endpoints = [ "icinga2-client2.localdomain" ]

  parent = "satellite"
}
The two client nodes do not necessarily need to know about each other, either. The only important thing is that they know about the parent zone (the satellite) and their endpoint members (and optionally the global zone).
If you specify the host attribute in the icinga2-satellite1.localdomain and icinga2-satellite2.localdomain
endpoint objects, the client node will actively try to connect to the satellite node. Since we’ve specified the client
endpoint’s attribute on the satellite node already, we don’t want the client node to connect to the
satellite nodes. Choose one connection direction.
Example for icinga2-client1.localdomain:
[root@icinga2-client1.localdomain /]# vim /etc/icinga2/zones.conf

object Endpoint "icinga2-satellite1.localdomain" {
  //do not actively connect to the satellite by leaving out the 'host' attribute
}

object Endpoint "icinga2-satellite2.localdomain" {
  //do not actively connect to the satellite by leaving out the 'host' attribute
}

object Endpoint "icinga2-client1.localdomain" {
  //that's us
}

object Zone "satellite" {
  endpoints = [ "icinga2-satellite1.localdomain", "icinga2-satellite2.localdomain" ]
}

object Zone "icinga2-client1.localdomain" {
  endpoints = [ "icinga2-client1.localdomain" ]

  parent = "satellite"
}

/* sync global commands */
object Zone "global-templates" {
  global = true
}

object Zone "director-global" {
  global = true
}
Example for icinga2-client2.localdomain:
[root@icinga2-client2.localdomain /]# vim /etc/icinga2/zones.conf

object Endpoint "icinga2-satellite1.localdomain" {
  //do not actively connect to the satellite by leaving out the 'host' attribute
}

object Endpoint "icinga2-satellite2.localdomain" {
  //do not actively connect to the satellite by leaving out the 'host' attribute
}

object Endpoint "icinga2-client2.localdomain" {
  //that's us
}

object Zone "satellite" {
  endpoints = [ "icinga2-satellite1.localdomain", "icinga2-satellite2.localdomain" ]
}

object Zone "icinga2-client2.localdomain" {
  endpoints = [ "icinga2-client2.localdomain" ]

  parent = "satellite"
}

/* sync global commands */
object Zone "global-templates" {
  global = true
}

object Zone "director-global" {
  global = true
}
Now it is time to define the two client hosts on the master, sync them to the satellites
and apply service checks using the command endpoint execution method to them.
Add the two client nodes as host objects to the satellite zone.
We’ve already created the directories in /etc/icinga2/zones.d including the files for the
zone and endpoint configuration for the clients.
[root@icinga2-master1.localdomain /]# cd /etc/icinga2/zones.d/satellite
Add the host object configuration for the icinga2-client1.localdomain client. You should
have created the configuration file in the previous steps and it should contain the endpoint
and zone object configuration already.
[root@icinga2-master1.localdomain /etc/icinga2/zones.d/satellite]# vim icinga2-client1.localdomain.conf

object Host "icinga2-client1.localdomain" {
  check_command = "hostalive"
  address = "192.168.56.111"
  vars.client_endpoint = name //follows the convention that host name == endpoint name
}
Add the host object configuration for the icinga2-client2.localdomain client configuration file:
[root@icinga2-master1.localdomain /etc/icinga2/zones.d/satellite]# vim icinga2-client2.localdomain.conf

object Host "icinga2-client2.localdomain" {
  check_command = "hostalive"
  address = "192.168.56.112"
  vars.client_endpoint = name //follows the convention that host name == endpoint name
}
Add a service object which is executed on the satellite nodes (e.g. ping4). Pin the apply rule to the satellite zone only.
[root@icinga2-master1.localdomain /etc/icinga2/zones.d/satellite]# vim services.conf

apply Service "ping4" {
  check_command = "ping4"
  //check is executed on the satellite node
  assign where host.zone == "satellite" && host.address
}
Add services using command endpoint checks. Pin the apply rules to the satellite zone only.
[root@icinga2-master1.localdomain /etc/icinga2/zones.d/satellite]# vim services.conf

apply Service "disk" {
  check_command = "disk"

  //specify where the check is executed
  command_endpoint = host.vars.client_endpoint

  assign where host.zone == "satellite" && host.vars.client_endpoint
}
Validate the configuration and restart Icinga 2 on the master node icinga2-master1.localdomain.
[root@icinga2-master1.localdomain /]# icinga2 daemon -C
[root@icinga2-master1.localdomain /]# systemctl restart icinga2
Open Icinga Web 2 and check the two newly created client hosts with two new services
– one executed locally (ping4) and one using command endpoint (disk).
Tip:
It’s a good idea to add health checks to make sure that your cluster notifies you in case of failure.
Best Practice 
We’ve put together a collection of configuration examples from community feedback. If you like to share your tips and tricks with us, please join the community channels!
Global Zone for Config Sync 
Global zones can be used to sync generic configuration objects to all nodes depending on them. Common examples are:
- Templates which are imported into zone specific objects.
- Command objects referenced by Host, Service, Notification objects.
- Apply rules for services, notifications and dependencies.
- User objects referenced in notifications.
- Group objects.
- TimePeriod objects.
Plugin scripts and binaries cannot be synced, this is for Icinga 2 configuration files only. Use your preferred package repository and/or configuration management tool (Puppet, Ansible, Chef, etc.) for that.
Note: Checkable objects (hosts and services) cannot be put into a global zone. The configuration validation will terminate with an error.
The zone object configuration must be deployed on all nodes which should receive the global configuration files:
[root@icinga2-master1.localdomain /]# vim /etc/icinga2/zones.conf

object Zone "global-commands" {
  global = true
}
The default global zones generated by the setup wizards are called global-templates and director-global.
Similar to the zone configuration sync you’ll need to create a new directory in
/etc/icinga2/zones.d:
[root@icinga2-master1.localdomain /]# mkdir -p /etc/icinga2/zones.d/global-commands
Next, add a new check command, for example:
[root@icinga2-master1.localdomain /]# vim /etc/icinga2/zones.d/global-commands/web.conf

object CheckCommand "webinject" {
  //...
}
Restart the client(s) which should receive the global zone before before restarting the parent master/satellite nodes.
Then validate the configuration on the master node and restart Icinga 2.
Tip: You can copy the example configuration files located in /etc/icinga2/conf.d
into the default global zone global-templates.
Example:
[root@icinga2-master1.localdomain /]# cd /etc/icinga2/conf.d
[root@icinga2-master1.localdomain /etc/icinga2/conf.d]# cp {commands,groups,notifications,services,templates,timeperiods,users}.conf /etc/icinga2/zones.d/global-templates
Health Checks 
In case of network failures or other problems, your monitoring might either have late check results or just send out mass alarms for unknown checks.
In order to minimize the problems caused by this, you should configure additional health checks.
The cluster check, for example, will check if all endpoints in the current zone and the directly
connected zones are working properly:
[root@icinga2-master1.localdomain /]# mkdir -p /etc/icinga2/zones.d/master
[root@icinga2-master1.localdomain /]# vim /etc/icinga2/zones.d/master/icinga2-master1.localdomain.conf

object Host "icinga2-master1.localdomain" {
  check_command = "hostalive"
  address = "192.168.56.101"
}

[root@icinga2-master1.localdomain /]# vim /etc/icinga2/zones.d/master/cluster.conf

object Service "cluster" {
  check_command = "cluster"
  check_interval = 5s
  retry_interval = 1s

  host_name = "icinga2-master1.localdomain"
}
The cluster-zone check will test whether the configured target zone is currently
connected or not. This example adds a health check for the ha master with clients scenario.
[root@icinga2-master1.localdomain /]# vim /etc/icinga2/zones.d/master/services.conf

apply Service "cluster-health" {
  check_command = "cluster-zone"

  display_name = "cluster-health-" + host.name

  /* This follows the convention that the client zone name is the FQDN which is the same as the host object name. */
  vars.cluster_zone = host.name

  assign where host.vars.client_endpoint
}
In case you cannot assign the cluster_zone attribute, add specific
checks to your cluster:
[root@icinga2-master1.localdomain /]# vim /etc/icinga2/zones.d/master/cluster.conf

object Service "cluster-zone-satellite" {
  check_command = "cluster-zone"
  check_interval = 5s
  retry_interval = 1s
  vars.cluster_zone = "satellite"

  host_name = "icinga2-master1.localdomain"
}
If you are using top down checks with command endpoint configuration, you can add a dependency which prevents notifications for all other failing services:
[root@icinga2-master1.localdomain /]# vim /etc/icinga2/zones.d/master/dependencies.conf

apply Dependency "health-check" to Service {
  parent_service_name = "child-health"

  states = [ OK ]
  disable_notifications = true

  assign where host.vars.client_endpoint
  ignore where service.name == "child-health"
}
Pin Checks in a Zone 
In case you want to pin specific checks to their endpoints in a given zone you’ll need to use
the command_endpoint attribute. This is reasonable if you want to
execute a local disk check in the master Zone on a specific endpoint then.
[root@icinga2-master1.localdomain /]# mkdir -p /etc/icinga2/zones.d/master
[root@icinga2-master1.localdomain /]# vim /etc/icinga2/zones.d/master/icinga2-master1.localdomain.conf

object Host "icinga2-master1.localdomain" {
  check_command = "hostalive"
  address = "192.168.56.101"
}

[root@icinga2-master1.localdomain /]# vim /etc/icinga2/zones.d/master/services.conf

apply Service "disk" {
  check_command = "disk"

  command_endpoint = host.name //requires a host object matching the endpoint object name e.g. icinga2-master1.localdomain

  assign where host.zone == "master" && match("icinga2-master*", host.name)
}
The host.zone attribute check inside the expression ensures that
the service object is only created for host objects inside the master
zone. In addition to that the match
function ensures to only create services for the master nodes.
Windows Firewall 
ICMP Requests 
By default ICMP requests are disabled in the Windows firewall. You can change that by adding a new rule.
C:\WINDOWS\system32>netsh advfirewall firewall add rule name="ICMP Allow incoming V4 echo request" protocol=icmpv4:8,any dir=in action=allow
Icinga 2 
If your master/satellite nodes should actively connect to the Windows client
you’ll also need to ensure that port 5665 is enabled.
C:\WINDOWS\system32>netsh advfirewall firewall add rule name="Open port 5665 (Icinga 2)" dir=in action=allow protocol=TCP localport=5665
NSClient++ API 
If the check_nscp_api plugin is used to query NSClient++, you need to ensure that its port is enabled.
C:\WINDOWS\system32>netsh advfirewall firewall add rule name="Open port 8443 (NSClient++ API)" dir=in action=allow protocol=TCP localport=8443
For security reasons, it is advised to enable the NSClient++ HTTP API for local connection from the Icinga 2 client only. Remote connections to the HTTP API are not recommended with using the legacy HTTP API.
Windows Client and Plugins 
The Icinga 2 package on Windows already provides several plugins. Detailed documentation is available for all check command definitions.
Add the following include statement on all your nodes (master, satellite, client):
vim /etc/icinga2/icinga2.conf

include <windows-plugins>
Based on the master with clients scenario we’ll now add a local disk check.
First, add the client node as host object:
[root@icinga2-master1.localdomain /]# cd /etc/icinga2/zones.d/master
[root@icinga2-master1.localdomain /etc/icinga2/zones.d/master]# vim hosts.conf

object Host "icinga2-client2.localdomain" {
  check_command = "hostalive"
  address = "192.168.56.112"
  vars.client_endpoint = name //follows the convention that host name == endpoint name
  vars.os_type = "windows"
}
Next, add the disk check using command endpoint checks (details in the disk-windows documentation):
[root@icinga2-master1.localdomain /etc/icinga2/zones.d/master]# vim services.conf

apply Service "disk C:" {
  check_command = "disk-windows"

  vars.disk_win_path = "C:"

  //specify where the check is executed
  command_endpoint = host.vars.client_endpoint

  assign where host.vars.os_type == "windows" && host.vars.client_endpoint
}
Validate the configuration and restart Icinga 2.
[root@icinga2-master1.localdomain /]# icinga2 daemon -C
[root@icinga2-master1.localdomain /]# systemctl restart icinga2
Open Icinga Web 2 and check your newly added Windows disk check :)
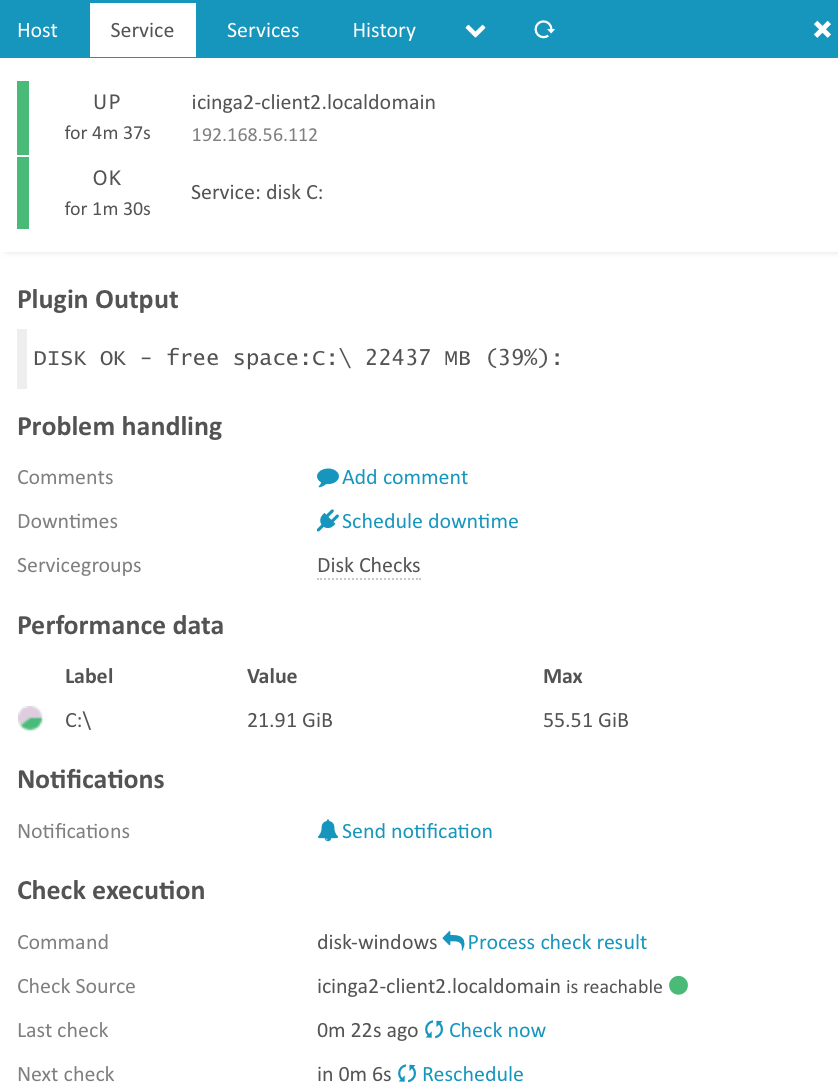
If you want to add your own plugins please check this chapter for the requirements.
Windows Client and NSClient++ 
There are two methods available for querying NSClient++:
- Query the HTTP API locally from an Icinga 2 client (requires a running NSClient++ service)
- Run a local CLI check (does not require NSClient++ as a service)
Both methods have their advantages and disadvantages. One thing to note: If you rely on performance counter delta calculations such as CPU utilization, please use the HTTP API instead of the CLI sample call.
NSCLient++ with check_nscp_api 
The Windows setup already allows you to install the NSClient++ package. In addition to the Windows plugins you can use the nscp_api command provided by the Icinga Template Library (ITL).
The initial setup for the NSClient++ API and the required arguments is the described in the ITL chapter for the nscp_api CheckCommand.
Based on the master with clients scenario we’ll now add a local nscp check which queries the NSClient++ API to check the free disk space.
Define a host object called icinga2-client2.localdomain on the master. Add the nscp_api_password
custom attribute and specify the drives to check.
[root@icinga2-master1.localdomain /]# cd /etc/icinga2/zones.d/master
[root@icinga2-master1.localdomain /etc/icinga2/zones.d/master]# vim hosts.conf

object Host "icinga2-client1.localdomain" {
check_command = "hostalive"
address = "192.168.56.111"
vars.client_endpoint = name //follows the convention that host name == endpoint name
vars.os_type = "Windows"
vars.nscp_api_password = "icinga"
vars.drives = [ "C:", "D:" ]
}
The service checks are generated using an apply for
rule based on host.vars.drives:
[root@icinga2-master1.localdomain /etc/icinga2/zones.d/master]# vim services.conf

apply Service "nscp-api-" for (drive in host.vars.drives) {
  import "generic-service"

  check_command = "nscp_api"
  command_endpoint = host.vars.client_endpoint

  //display_name = "nscp-drive-" + drive

  vars.nscp_api_host = "localhost"
  vars.nscp_api_query = "check_drivesize"
  vars.nscp_api_password = host.vars.nscp_api_password
  vars.nscp_api_arguments = [ "drive=" +  drive ]

  ignore where host.vars.os_type != "Windows"
}
Validate the configuration and restart Icinga 2.
[root@icinga2-master1.localdomain /]# icinga2 daemon -C
[root@icinga2-master1.localdomain /]# systemctl restart icinga2
Two new services (“nscp-drive-D:” and “nscp-drive-C:”) will be visible in Icinga Web 2.
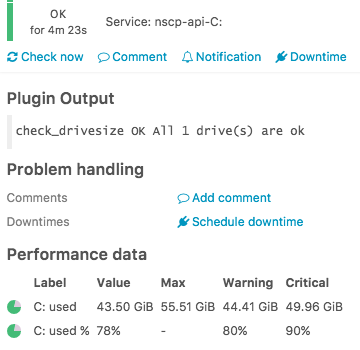
Note: You can also omit the command_endpoint configuration to execute
the command on the master. This also requires a different value for nscp_api_host
which defaults to host.address.
  //command_endpoint = host.vars.client_endpoint

  //vars.nscp_api_host = "localhost"
You can verify the check execution by looking at the Check Source attribute
in Icinga Web 2 or the REST API.
If you want to monitor specific Windows services, you could use the following example:
[root@icinga2-master1.localdomain /]# cd /etc/icinga2/zones.d/master
[root@icinga2-master1.localdomain /etc/icinga2/zones.d/master]# vim hosts.conf

object Host "icinga2-client1.localdomain" {
check_command = "hostalive"
address = "192.168.56.111"
vars.client_endpoint = name //follows the convention that host name == endpoint name
vars.os_type = "Windows"
vars.nscp_api_password = "icinga"
vars.services = [ "Windows Update", "wscsvc" ]
}

[root@icinga2-master1.localdomain /etc/icinga2/zones.d/master]# vim services.conf

apply Service "nscp-api-" for (svc in host.vars.services) {
  import "generic-service"

  check_command = "nscp_api"
  command_endpoint = host.vars.client_endpoint

  //display_name = "nscp-service-" + svc

  vars.nscp_api_host = "localhost"
  vars.nscp_api_query = "check_service"
  vars.nscp_api_password = host.vars.nscp_api_password
  vars.nscp_api_arguments = [ "service=" + svc ]

  ignore where host.vars.os_type != "Windows"
}
NSCLient++ with nscp-local 
The Windows setup already allows you to install the NSClient++ package. In addition to the Windows plugins you can use the nscp-local commands provided by the Icinga Template Library (ITL).
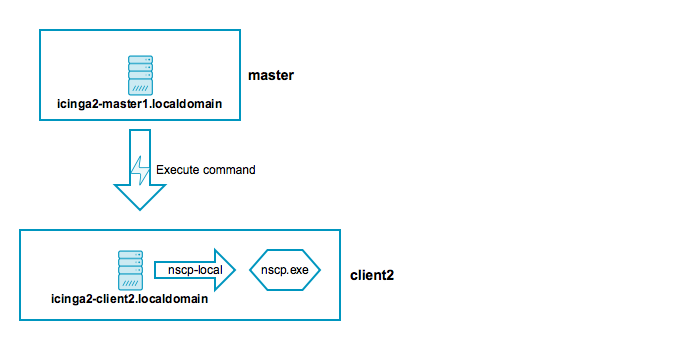
Add the following include statement on all your nodes (master, satellite, client):
vim /etc/icinga2/icinga2.conf

include <nscp>
The CheckCommand definitions will automatically determine the installed path
to the nscp.exe binary.
Based on the master with clients scenario we’ll now add a local nscp check querying a given performance counter.
First, add the client node as host object:
[root@icinga2-master1.localdomain /]# cd /etc/icinga2/zones.d/master
[root@icinga2-master1.localdomain /etc/icinga2/zones.d/master]# vim hosts.conf

object Host "icinga2-client1.localdomain" {
  check_command = "hostalive"
  address = "192.168.56.111"
  vars.client_endpoint = name //follows the convention that host name == endpoint name
  vars.os_type = "windows"
}
Next, add a performance counter check using command endpoint checks (details in the nscp-local-counter documentation):
[root@icinga2-master1.localdomain /etc/icinga2/zones.d/master]# vim services.conf

apply Service "nscp-local-counter-cpu" {
  check_command = "nscp-local-counter"
  command_endpoint = host.vars.client_endpoint

  vars.nscp_counter_name = "\\Processor(_total)\\% Processor Time"
  vars.nscp_counter_perfsyntax = "Total Processor Time"
  vars.nscp_counter_warning = 1
  vars.nscp_counter_critical = 5

  vars.nscp_counter_showall = true

  assign where host.vars.os_type == "windows" && host.vars.client_endpoint
}
Validate the configuration and restart Icinga 2.
[root@icinga2-master1.localdomain /]# icinga2 daemon -C
[root@icinga2-master1.localdomain /]# systemctl restart icinga2
Open Icinga Web 2 and check your newly added Windows NSClient++ check :)
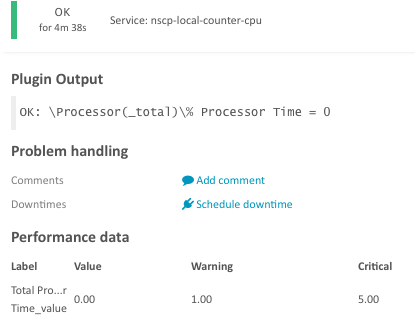
Tip
In order to measure CPU load, you’ll need a running NSClient++ service. Therefore it is advised to use a local nscp-api check against its REST API.
Advanced Hints 
You can find additional hints in this section if you prefer to go your own route with automating setups (setup, certificates, configuration).
Certificate Auto-Renewal 
Icinga 2 v2.8+ adds the possibility that nodes request certificate updates on their own. If their expiration date is soon enough, they automatically renew their already signed certificate by sending a signing request to the parent node. You’ll also see a message in the logs if certificate renewal isn’t necessary.
High-Availability for Icinga 2 Features 
All nodes in the same zone require that you enable the same features for high-availability (HA).
By default, the following features provide advanced HA functionality:
- Checks (load balanced, automated failover).
- Notifications (load balanced, automated failover).
- DB IDO (Run-Once, automated failover).
High-Availability with Checks 
All instances within the same zone (e.g. the master zone as HA cluster) must
have the checker feature enabled.
Example:
# icinga2 feature enable checker
All nodes in the same zone load-balance the check execution. If one instance shuts down, the other nodes will automatically take over the remaining checks.
High-Availability with Notifications 
All instances within the same zone (e.g. the master zone as HA cluster) must
have the notification feature enabled.
Example:
# icinga2 feature enable notification
Notifications are load-balanced amongst all nodes in a zone. By default this functionality
is enabled.
If your nodes should send out notifications independently from any other nodes (this will cause
duplicated notifications if not properly handled!), you can set enable_ha = false
in the NotificationComponent feature.
High-Availability with DB IDO 
All instances within the same zone (e.g. the master zone as HA cluster) must
have the DB IDO feature enabled.
Example DB IDO MySQL:
# icinga2 feature enable ido-mysql
By default the DB IDO feature only runs on one node. All other nodes in the same zone disable the active IDO database connection at runtime. The node with the active DB IDO connection is not necessarily the zone master.
Note: The DB IDO HA feature can be disabled by setting the enable_ha attribute to false
for the IdoMysqlConnection or
IdoPgsqlConnection object on all nodes in the
same zone.
All endpoints will enable the DB IDO feature and connect to the configured database and dump configuration, status and historical data on their own.
If the instance with the active DB IDO connection dies, the HA functionality will automatically elect a new DB IDO master.
The DB IDO feature will try to determine which cluster endpoint is currently writing to the database and bail out if another endpoint is active. You can manually verify that by running the following query command:
icinga=> SELECT status_update_time, endpoint_name FROM icinga_programstatus;
   status_update_time   | endpoint_name
------------------------+---------------
 2016-08-15 15:52:26+02 | icinga2-master1.localdomain
(1 Zeile)
This is useful when the cluster connection between endpoints breaks, and prevents
data duplication in split-brain-scenarios. The failover timeout can be set for the
failover_timeout attribute, but not lower than 60 seconds.
Endpoint Connection Direction 
Nodes will attempt to connect to another node when its local Endpoint object
configuration specifies a valid host attribute (FQDN or IP address).
Example for the master node icinga2-master1.localdomain actively connecting
to the client node icinga2-client1.localdomain:
[root@icinga2-master1.localdomain /]# vim /etc/icinga2/zones.conf

//...

object Endpoint "icinga2-client1.localdomain" {
  host = "192.168.56.111" //the master actively tries to connect to the client
  log_duration = 0
}
Example for the client node icinga2-client1.localdomain not actively
connecting to the master node icinga2-master1.localdomain:
[root@icinga2-client1.localdomain /]# vim /etc/icinga2/zones.conf

//...

object Endpoint "icinga2-master1.localdomain" {
  //do not actively connect to the master by leaving out the 'host' attribute
  log_duration = 0
}
It is not necessary that both the master and the client node establish two connections to each other. Icinga 2 will only use one connection and close the second connection if established.
Tip: Choose either to let master/satellite nodes connect to client nodes or vice versa.
Disable Log Duration for Command Endpoints 
The replay log is a built-in mechanism to ensure that nodes in a distributed setup keep the same history (check results, notifications, etc.) when nodes are temporarily disconnected and then reconnect.
This functionality is not needed when a master/satellite node is sending check execution events to a client which is purely configured for command endpoint checks only.
The Endpoint object attribute log_duration can
be lower or set to 0 to fully disable any log replay updates when the
client is not connected.
Configuration on the master node icinga2-master1.localdomain:
[root@icinga2-master1.localdomain /]# vim /etc/icinga2/zones.conf

//...

object Endpoint "icinga2-client1.localdomain" {
  host = "192.168.56.111" //the master actively tries to connect to the client
  log_duration = 0
}

object Endpoint "icinga2-client2.localdomain" {
  host = "192.168.56.112" //the master actively tries to connect to the client
  log_duration = 0
}
Configuration on the client icinga2-client1.localdomain:
[root@icinga2-client1.localdomain /]# vim /etc/icinga2/zones.conf

//...

object Endpoint "icinga2-master1.localdomain" {
  //do not actively connect to the master by leaving out the 'host' attribute
  log_duration = 0
}

object Endpoint "icinga2-master2.localdomain" {
  //do not actively connect to the master by leaving out the 'host' attribute
  log_duration = 0
}
Initial Sync for new Endpoints in a Zone 
In order to make sure that all of your zone endpoints have the same state you need to pick the authoritative running one and copy the following content:
- State file from
/var/lib/icinga2/icinga2.state - Internal config package for runtime created objects (downtimes, comments, hosts, etc.) at
/var/lib/icinga2/api/packages/_api
If you need already deployed config packages from the Director, or synced cluster zones,
you can also sync the entire /var/lib/icinga2 directory. This directory should also be
included in your backup strategy.
Note
Ensure that all endpoints are shut down during this procedure. Once you have synced the cached files, proceed with configuring the remaining endpoints to let them know about the new master/satellite node (zones.conf).
Manual Certificate Creation 
Create CA on the Master 
Choose the host which should store the certificate authority (one of the master nodes).
The first step is the creation of the certificate authority (CA) by running the following command as root user:
[root@icinga2-master1.localdomain /root]# icinga2 pki new-ca
Create CSR and Certificate 
Create a certificate signing request (CSR) for the local instance:
[root@icinga2-master1.localdomain /root]# icinga2 pki new-cert --cn icinga2-master1.localdomain \
  --key icinga2-master1.localdomain.key \
  --csr icinga2-master1.localdomain.csr
Sign the CSR with the previously created CA:
[root@icinga2-master1.localdomain /root]# icinga2 pki sign-csr --csr icinga2-master1.localdomain.csr --cert icinga2-master1.localdomain
Repeat the steps for all instances in your setup.
Copy Certificates 
Copy the host’s certificate files and the public CA certificate to /var/lib/icinga2/certs:
[root@icinga2-master1.localdomain /root]# mkdir -p /var/lib/icinga2/certs
[root@icinga2-master1.localdomain /root]# cp icinga2-master1.localdomain.{crt,key} /var/lib/icinga2/certs
[root@icinga2-master1.localdomain /root]# cp /var/lib/icinga2/ca/ca.crt /var/lib/icinga2/certs
Ensure that proper permissions are set (replace icinga with the Icinga 2 daemon user):
[root@icinga2-master1.localdomain /root]# chown -R icinga:icinga /var/lib/icinga2/certs
[root@icinga2-master1.localdomain /root]# chmod 600 /var/lib/icinga2/certs/*.key
[root@icinga2-master1.localdomain /root]# chmod 644 /var/lib/icinga2/certs/*.crt
The CA public and private key are stored in the /var/lib/icinga2/ca directory. Keep this path secure and include
it in your backups.
Create Multiple Certificates 
Use your preferred method to automate the certificate generation process.
[root@icinga2-master1.localdomain /var/lib/icinga2/certs]# for node in icinga2-master1.localdomain icinga2-master2.localdomain icinga2-satellite1.localdomain; do icinga2 pki new-cert --cn $node --csr $node.csr --key $node.key; done
information/base: Writing private key to 'icinga2-master1.localdomain.key'.
information/base: Writing certificate signing request to 'icinga2-master1.localdomain.csr'.
information/base: Writing private key to 'icinga2-master2.localdomain.key'.
information/base: Writing certificate signing request to 'icinga2-master2.localdomain.csr'.
information/base: Writing private key to 'icinga2-satellite1.localdomain.key'.
information/base: Writing certificate signing request to 'icinga2-satellite1.localdomain.csr'.

[root@icinga2-master1.localdomain /var/lib/icinga2/certs]# for node in icinga2-master1.localdomain icinga2-master2.localdomain icinga2-satellite1.localdomain; do sudo icinga2 pki sign-csr --csr $node.csr --cert $node.crt; done
information/pki: Writing certificate to file 'icinga2-master1.localdomain.crt'.
information/pki: Writing certificate to file 'icinga2-master2.localdomain.crt'.
information/pki: Writing certificate to file 'icinga2-satellite1.localdomain.crt'.
Copy and move these certificates to the respective instances e.g. with SSH/SCP.
Automation 
These hints should get you started with your own automation tools (Puppet, Ansible, Chef, Salt, etc.) or custom scripts for automated setup.
These are collected best practices from various community channels.
- Silent Windows setup
- Node Setup CLI command with parameters
If you prefer an alternate method, we still recommend leaving all the Icinga 2 features intact (e.g. icinga2 feature enable api).
You should also use well known and documented default configuration file locations (e.g. zones.conf).
This will tremendously help when someone is trying to help in the community channels.
Silent Windows Setup 
If you want to install the client silently/unattended, use the /qn modifier. The
installation should not trigger a restart, but if you want to be completely sure, you can use the /norestart modifier.
C:> msiexec /i C:\Icinga2-v2.5.0-x86.msi /qn /norestart
Once the setup is completed you can use the node setup cli command too.
Node Setup using CLI Parameters 
Instead of using the node wizard CLI command, there is an alternative node setup
command available which has some prerequisites.
Note: The CLI command can be used on Linux/Unix and Windows operating systems. The graphical Windows setup wizard actively uses these CLI commands.
Node Setup on the Master Node 
In case you want to setup a master node you must add the --master parameter
to the node setup CLI command. In addition to that the --cn can optionally
be passed (defaults to the FQDN).
| Parameter | Description |
|---|---|
| Common name (CN) | Optional. Specified with the --cn parameter. By convention this should be the host’s FQDN. Defaults to the FQDN. |
| Zone name | Optional. Specified with the --zone parameter. Defaults to master. |
| Listen on | Optional. Specified with the --listen parameter. Syntax is host,port. |
| Disable conf.d | Optional. Specified with the disable-confd parameter. If provided, this disables the include_recursive "conf.d" directive and adds the api-users.conf file inclusion to icinga2.conf. Available since v2.9+. Not set by default for compatibility reasons with Puppet, Ansible, Chef, etc. |
Example:
[root@icinga2-master1.localdomain /]# icinga2 node setup --master
In case you want to bind the ApiListener object to a specific
host/port you can specify it like this:
--listen 192.68.56.101,5665
In case you don’t need anything in conf.d, use the following command line:
[root@icinga2-master1.localdomain /]# icinga2 node setup --master --disable-confd
Node Setup with Satellites/Clients 
Make sure that the /var/lib/icinga2/certs directory exists and is owned by the icinga
user (or the user Icinga 2 is running as).
[root@icinga2-client1.localdomain /]# mkdir -p /var/lib/icinga2/certs
[root@icinga2-client1.localdomain /]# chown -R icinga:icinga /var/lib/icinga2/certs
First you’ll need to generate a new local self-signed certificate.
Pass the following details to the pki new-cert CLI command:
| Parameter | Description |
|---|---|
| Common name (CN) | Required. By convention this should be the host’s FQDN. |
| Client certificate files | Required. These generated files will be put into the specified location (–key and –file). By convention this should be using /var/lib/icinga2/certs as directory. |
Example:
[root@icinga2-client1.localdomain /]# icinga2 pki new-cert --cn icinga2-client1.localdomain \
--key /var/lib/icinga2/certs/icinga2-client1.localdomain.key \
--cert /var/lib/icinga2/certs/icinga2-client1.localdomain.crt
Request the master certificate from the master host (icinga2-master1.localdomain)
and store it as trusted-master.crt. Review it and continue.
Pass the following details to the pki save-cert CLI command:
| Parameter | Description |
|---|---|
| Client certificate files | Required. Pass the previously generated files using the --key and --cert parameters. |
| Trusted parent certificate | Required. Store the parent’s certificate file. Manually verify that you’re trusting it. |
| Parent host | Required. FQDN or IP address of the parent host. |
Example:
[root@icinga2-client1.localdomain /]# icinga2 pki save-cert --key /var/lib/icinga2/certs/icinga2-client1.localdomain.key \
--cert /var/lib/icinga2/certs/icinga2-client1.localdomain.crt \
--trustedcert /var/lib/icinga2/certs/trusted-parent.crt \
--host icinga2-master1.localdomain
Continue with the additional node setup step. Specify a local endpoint and zone name (icinga2-client1.localdomain)
and set the master host (icinga2-master1.localdomain) as parent zone configuration. Specify the path to
the previously stored trusted master certificate.
Pass the following details to the node setup CLI command:
| Parameter | Description |
|---|---|
| Common name (CN) | Optional. Specified with the --cn parameter. By convention this should be the host’s FQDN. |
| Request ticket | Required. Add the previously generated ticket number. |
| Trusted master certificate | Required. Add the previously fetched trusted master certificate (this step means that you’ve verified its origin). |
| Parent host | Optional. FQDN or IP address of the parent host. This is where the command connects for CSR signing. If not specified, you need to manually copy the parent’s public CA certificate file into /var/lib/icinga2/certs/ca.crt in order to start Icinga 2. |
| Parent endpoint | Required. Specify the parent’s endpoint name. |
| Client zone name | Required. Specify the client’s zone name. |
| Parent zone name | Optional. Specify the parent’s zone name. |
| Accept config | Optional. Whether this node accepts configuration sync from the master node (required for config sync mode). |
| Accept commands | Optional. Whether this node accepts command execution messages from the master node (required for command endpoint mode). |
| Global zones | Optional. Allows to specify more global zones in addition to global-templates and director-global. |
| Disable conf.d | Optional. Specified with the disable-confd parameter. If provided, this disables the include_recursive "conf.d" directive in icinga2.conf. Available since v2.9+. Not set by default for compatibility reasons with Puppet, Ansible, Chef, etc. |
Note
The
master_hostparameter is deprecated and will be removed in 2.10.0. Please use--parent_hostinstead.
Example for Icinga 2 v2.9:
[root@icinga2-client1.localdomain /]# icinga2 node setup --ticket ead2d570e18c78abf285d6b85524970a0f69c22d \
--cn icinga2-client1.localdomain \
--endpoint icinga2-master1.localdomain \
--zone icinga2-client1.localdomain \
--parent_zone master \
--parent_host icinga2-master1.localdomain \
--trustedcert /var/lib/icinga2/certs/trusted-parent.crt \
--accept-commands --accept-config \
--disable-confd
In case the client should connect to the master node, you’ll
need to modify the --endpoint parameter using the format cn,host,port:
--endpoint icinga2-master1.localdomain,192.168.56.101,5665
Specify the parent zone using the --parent_zone parameter. This is useful
if the client connects to a satellite, not the master instance.
--parent_zone satellite
In case the client should know the additional global zone linux-templates, you’ll
need to set the --global-zones parameter.
--global_zones linux-templates
The --parent-host parameter is optional since v2.9 and allows you to perform a connection-less setup.
You cannot restart Icinga 2 yet, the CLI command asked to to manually copy the parent’s public CA
certificate file in /var/lib/icinga2/certs/ca.crt. Once Icinga 2 is started, it sends
a ticket signing request to the parent node. If you have provided a ticket, the master node
signs the request and sends it back to the client which performs a certificate update in-memory.
In case you did not provide a ticket, you need to manually sign the CSR on the master node which holds the CA’s key pair.
You can find additional best practices below.
If this client node is configured as remote command endpoint execution
you can safely disable the checker feature. The node setup CLI command already disabled the notification feature.
[root@icinga2-client1.localdomain /]# icinga2 feature disable checker
Disable “conf.d” inclusion if this is a top down configured client.
[root@icinga2-client1.localdomain /]# sed -i 's/include_recursive "conf.d"/\/\/include_recursive "conf.d"/g' /etc/icinga2/icinga2.conf
Note: This is the default since v2.9.
Optional: Add an ApiUser object configuration for remote troubleshooting.
[root@icinga2-client1.localdomain /]# cat <<EOF >/etc/icinga2/conf.d/api-users.conf
object ApiUser "root" {
  password = "clientsupersecretpassword"
  permissions = ["*"]
}
EOF
In case you’ve previously disabled the “conf.d” directory only
add the file file conf.d/api-users.conf:
[root@icinga2-client1.localdomain /]# echo 'include "conf.d/api-users.conf"' >> /etc/icinga2/icinga2.conf
Finally restart Icinga 2.
[root@icinga2-client1.localdomain /]# systemctl restart icinga2
Your automation tool must then configure master node in the meantime.
# cat <<EOF >>/etc/icinga2/zones.conf
object Endpoint "icinga2-client1.localdomain" {
  //client connects itself
}

object Zone "icinga2-client1.localdomain" {
  endpoints = [ "icinga2-client1.localdomain" ]
  parent = "master"
}

EOF
Using Multiple Environments 
In some cases it can be desired to run multiple Icinga instances on the same host. Two potential scenarios include:
- Different versions of the same monitoring configuration (e.g. production and testing)
- Disparate sets of checks for entirely unrelated monitoring environments (e.g. infrastructure and applications)
The configuration is done with the global constants ApiBindHost and ApiBindPort
or the bind_host and bind_port attributes of the
ApiListener object.
The environment must be set with the global constant Environment or as object attribute
of the IcingaApplication object.
In any case the constant is default value for the attribute and the direct configuration in the objects have more precedence. The constants have been added to allow the values being set from the CLI on startup.
When Icinga establishes a TLS connection to another cluster instance it automatically uses the SNI extension to signal which endpoint it is attempting to connect to. On its own this can already be used to position multiple Icinga instances behind a load balancer.
SNI example: icinga2-client1.localdomain
However, if the environment is configured to production, Icinga appends the environment name to the SNI hostname like this:
SNI example with environment: icinga2-client1.localdomain:production
Middleware like loadbalancers or TLS proxies can read the SNI header and route the connection to the appropriate target. I.e., it uses a single externally-visible TCP port (usually 5665) and forwards connections to one or more Icinga instances which are bound to a local TCP port. It does so by inspecting the environment name that is sent as part of the SNI extension.